Overview
The Gallery List page in Gallery Settings provides a centralized view of all uploaded customer transformation images.
From this page, you can search for a specific customer's gallery record, filter results by customer number, appointment number, invoice number, or date range, and open the Customer Transformation Images dialog to update the images.
This is a convenient way to manage gallery entries without navigating to individual appointments or invoices.
Navigation Path
Settings → Gallery Settings → Gallery List → Select Customer Record
Steps to Update the Added Gallery via the Insights
Step 1: Navigate to the Gallery List
From the left sidebar, click on Settings.
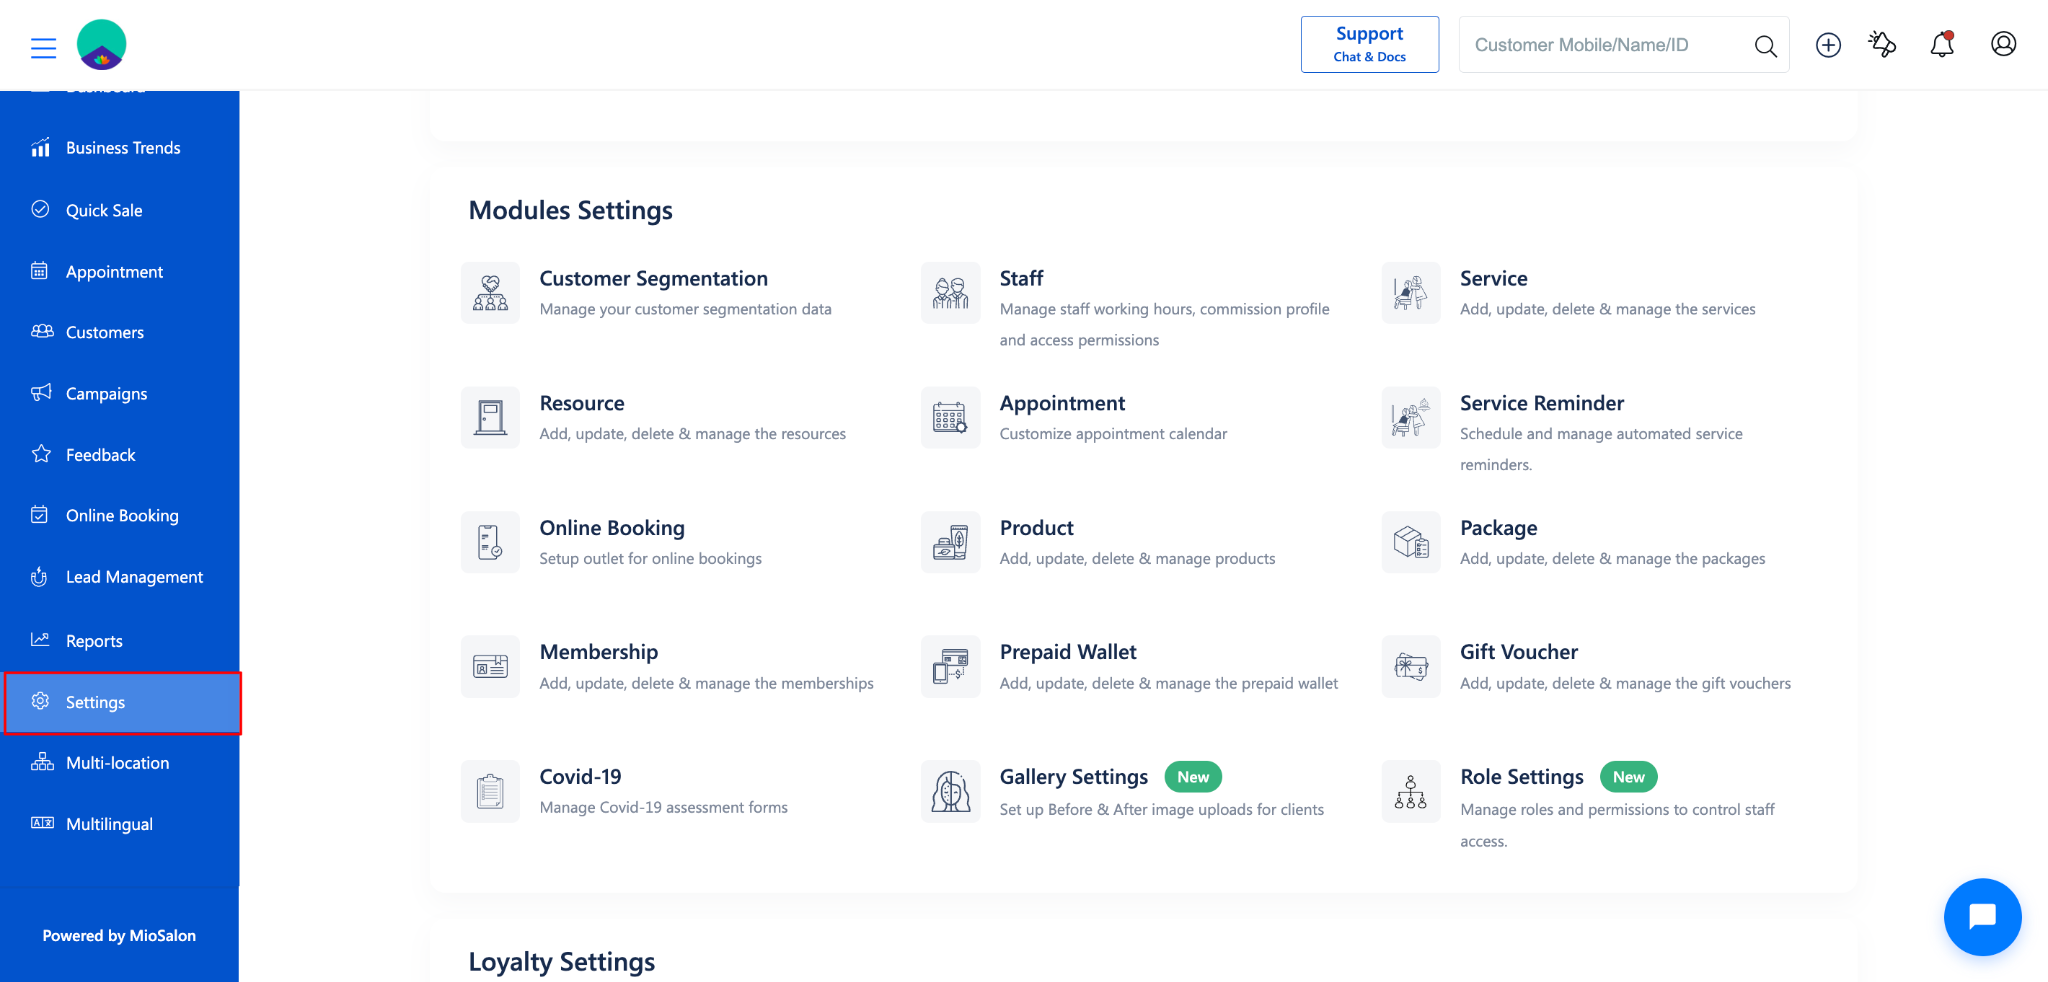
Under Settings, select Gallery Settings.
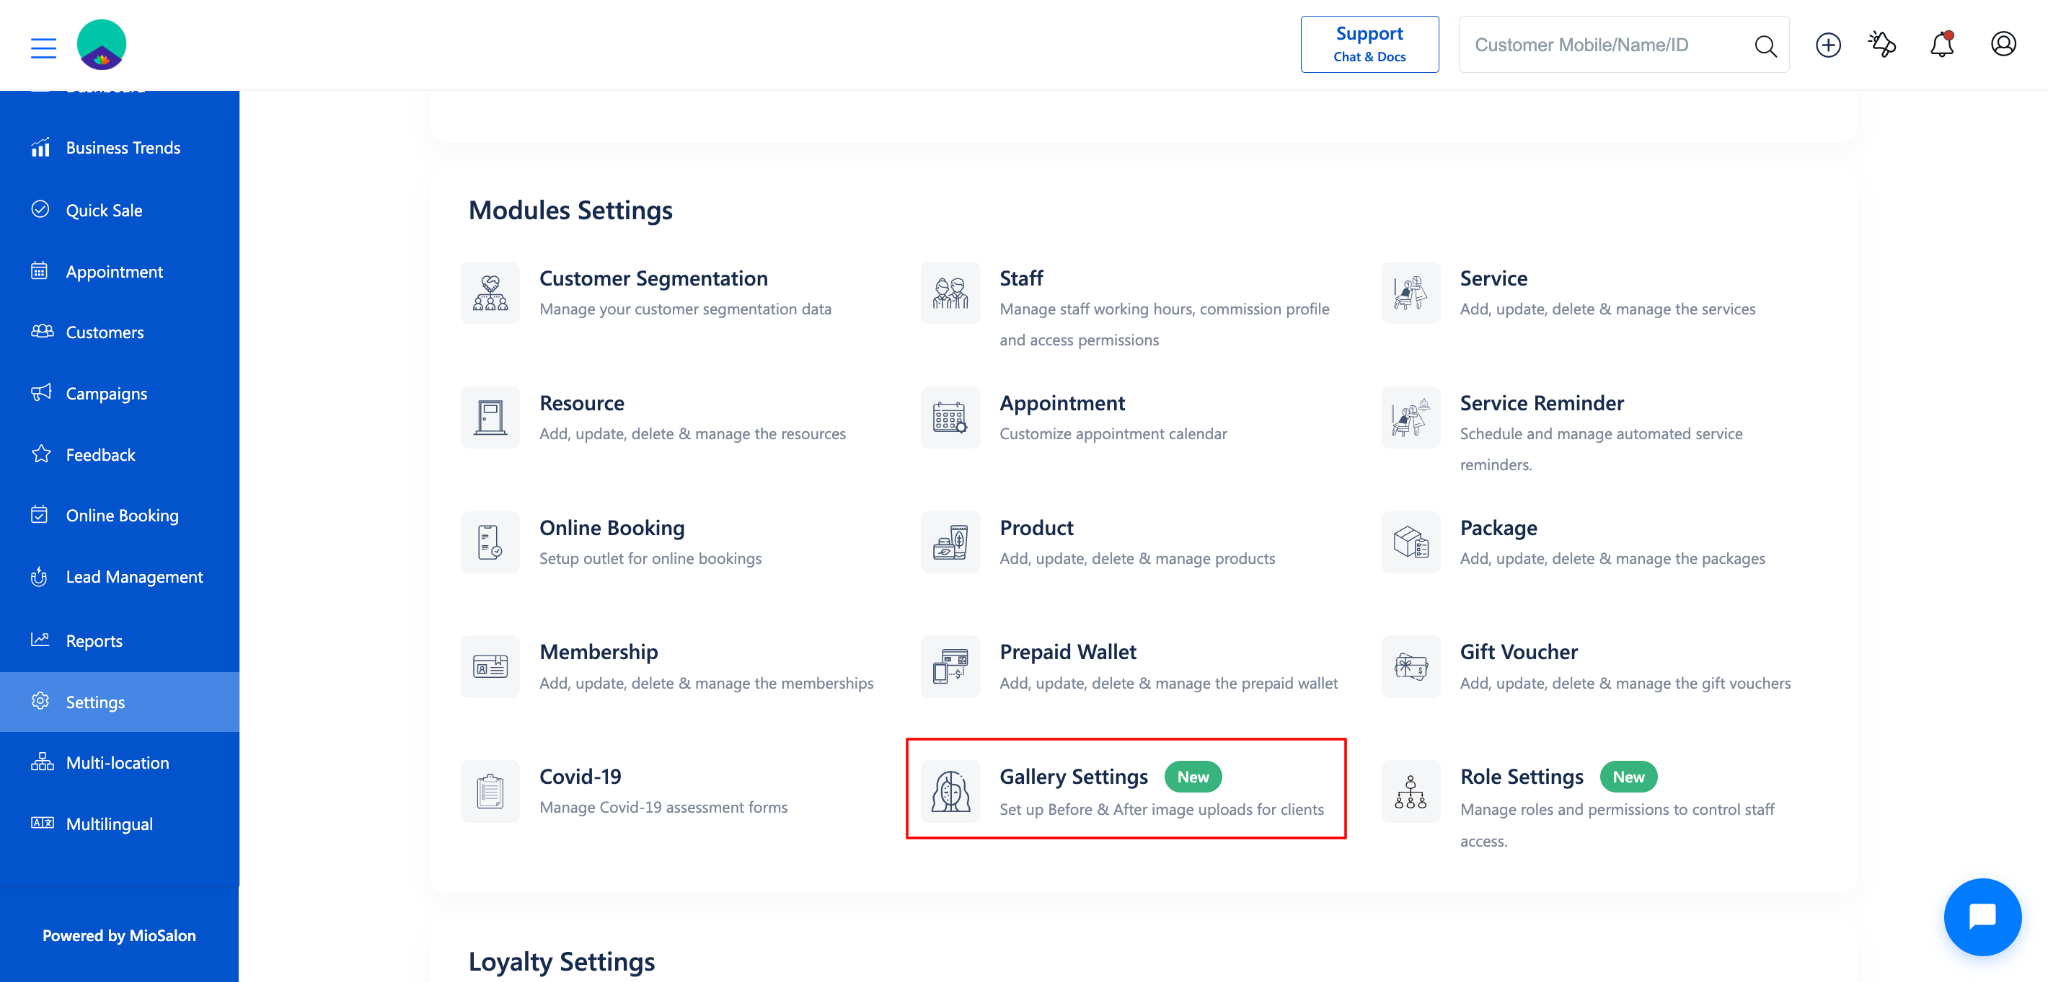
Click on Gallery List from the left-side menu.
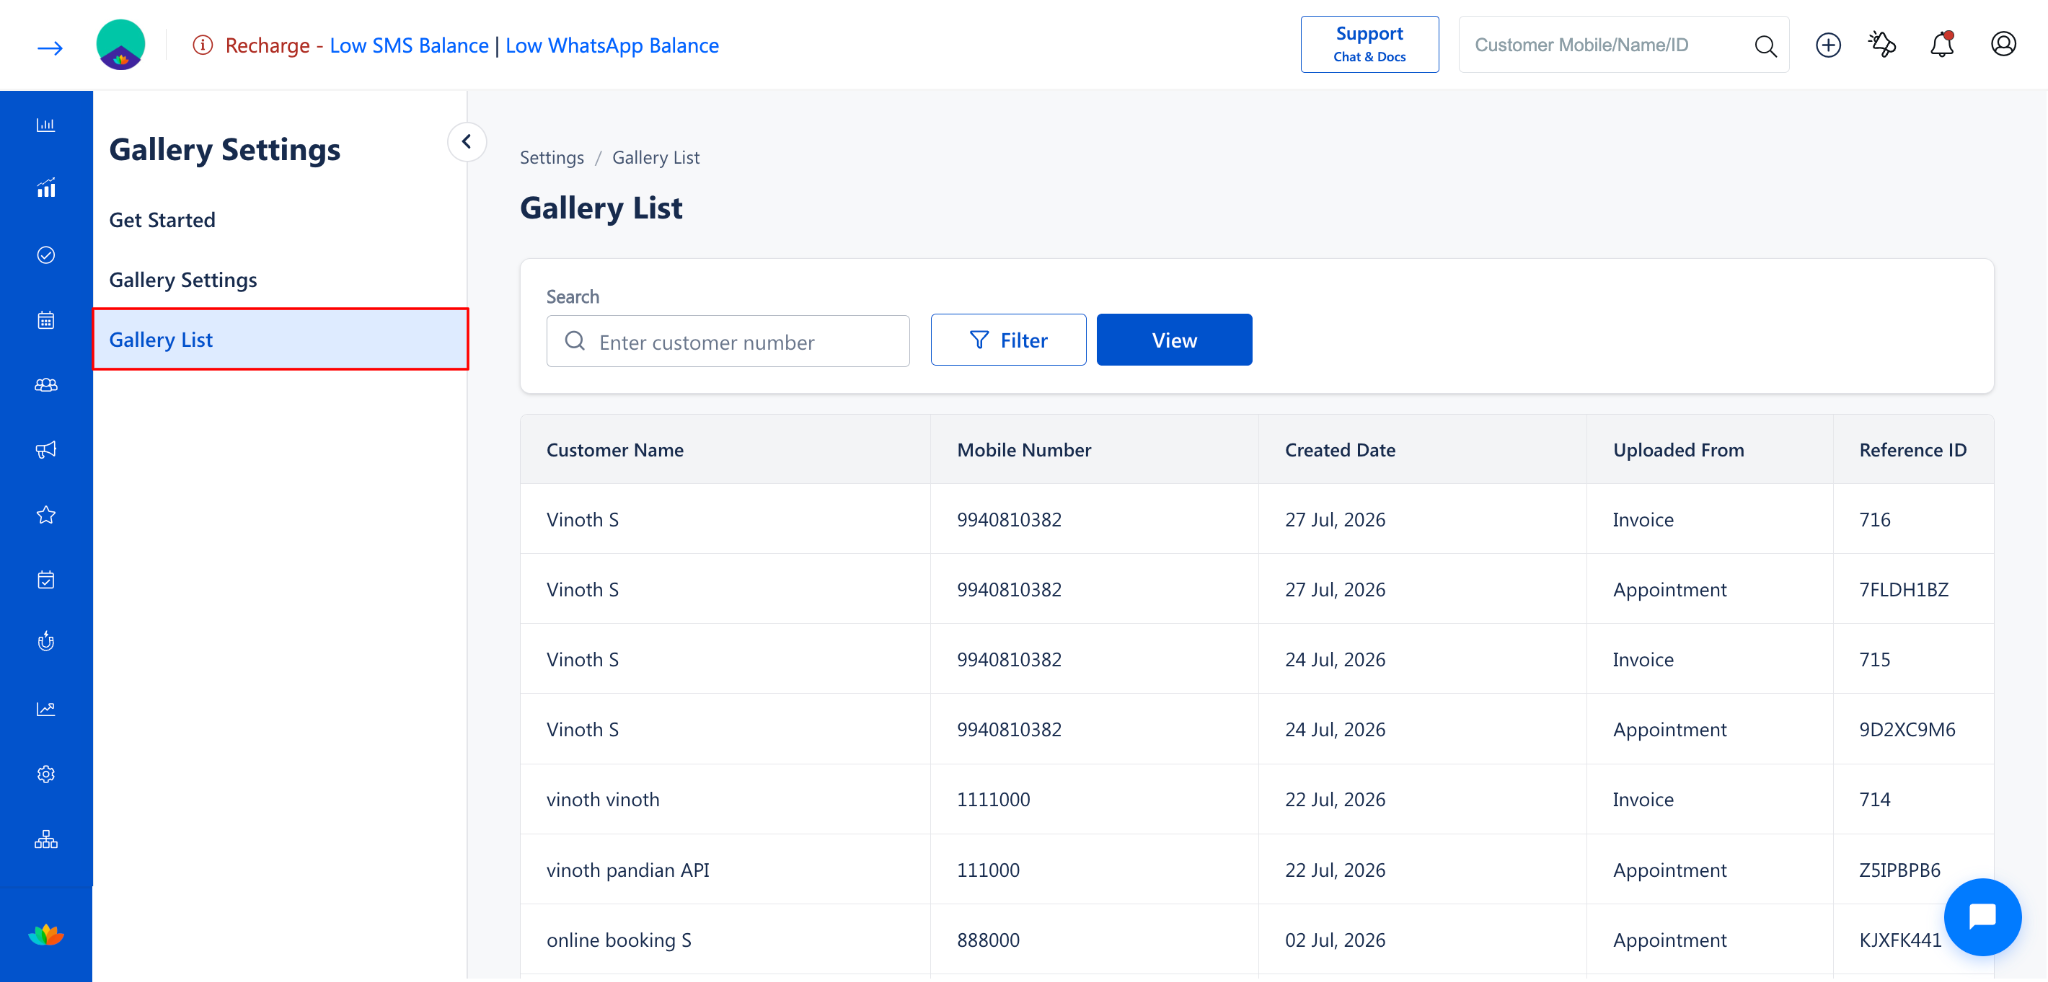
The Gallery List page will display all customer gallery records.
The Gallery List shows the following columns:
Step 2: Search or Filter the Gallery List
Search by Customer Number:
Use the Search field at the top to enter the customer's mobile number.
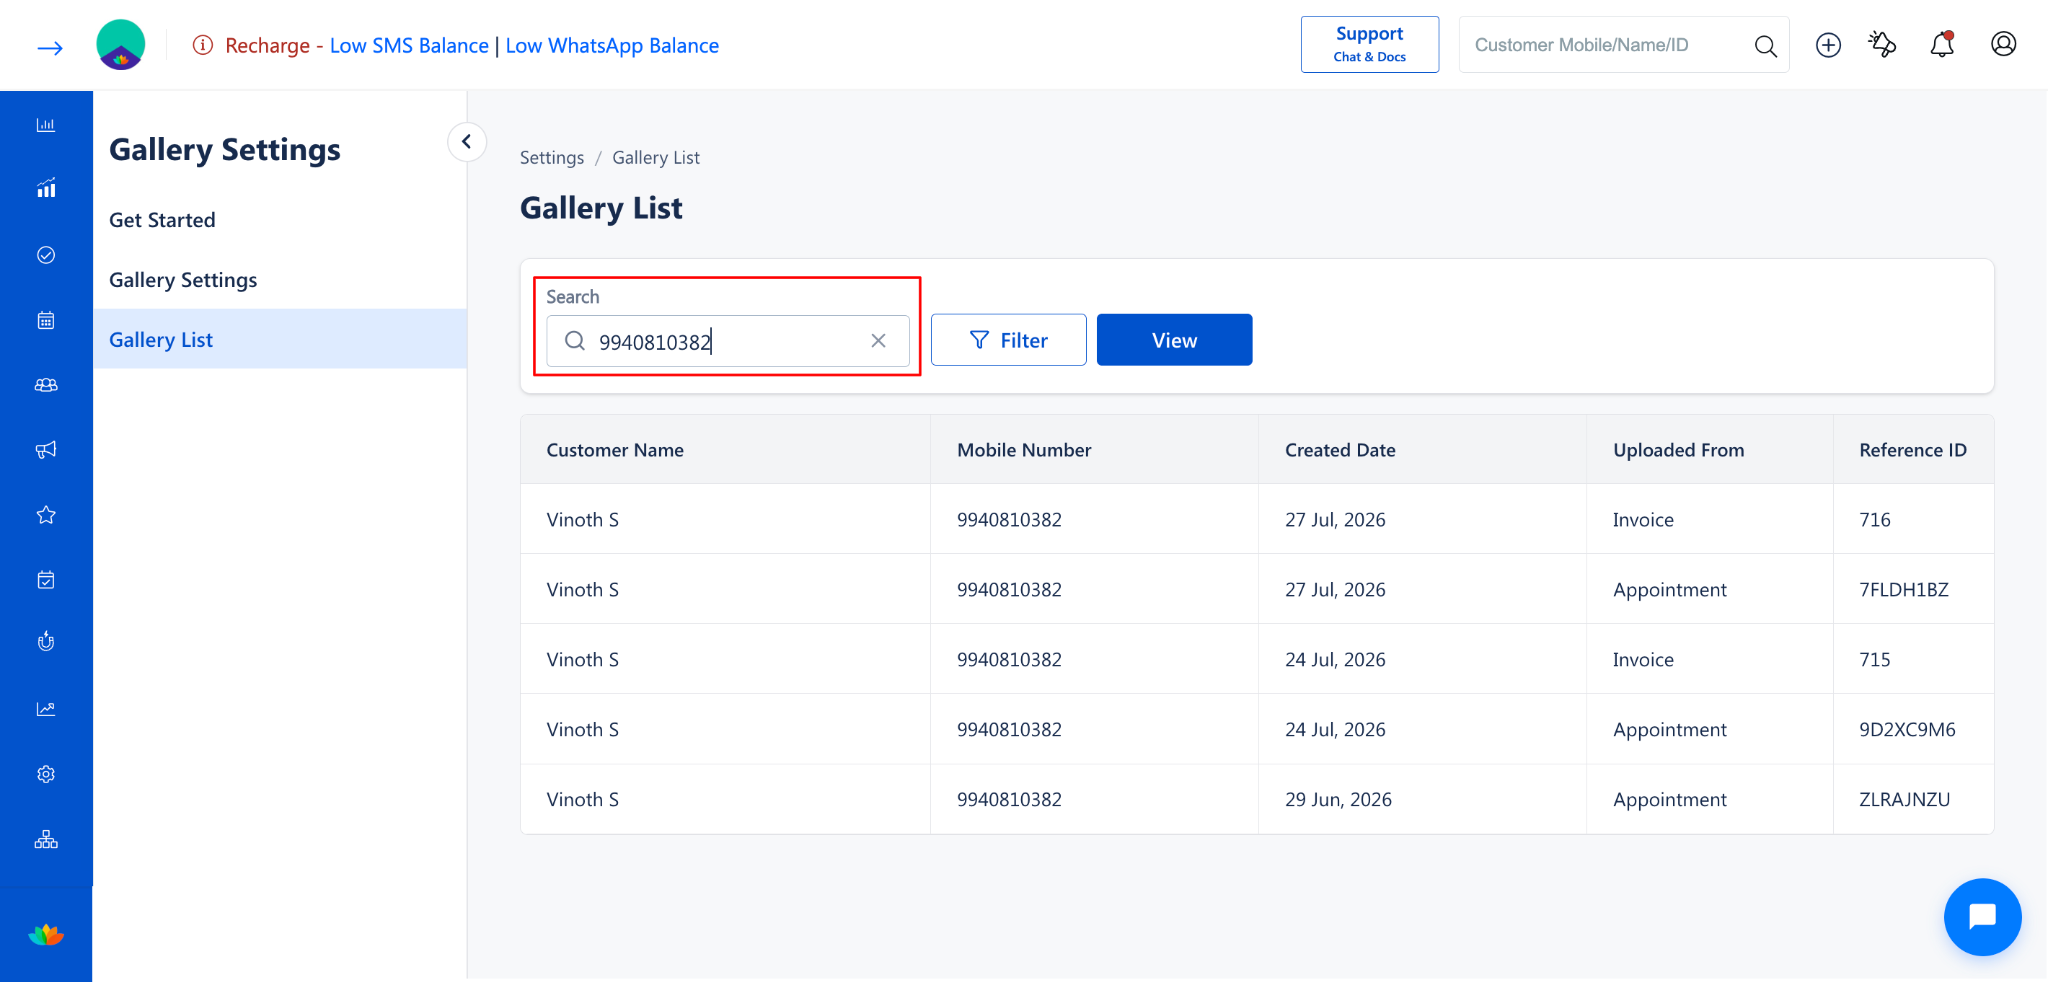
Click the View button to display the results.
Filter by Criteria:
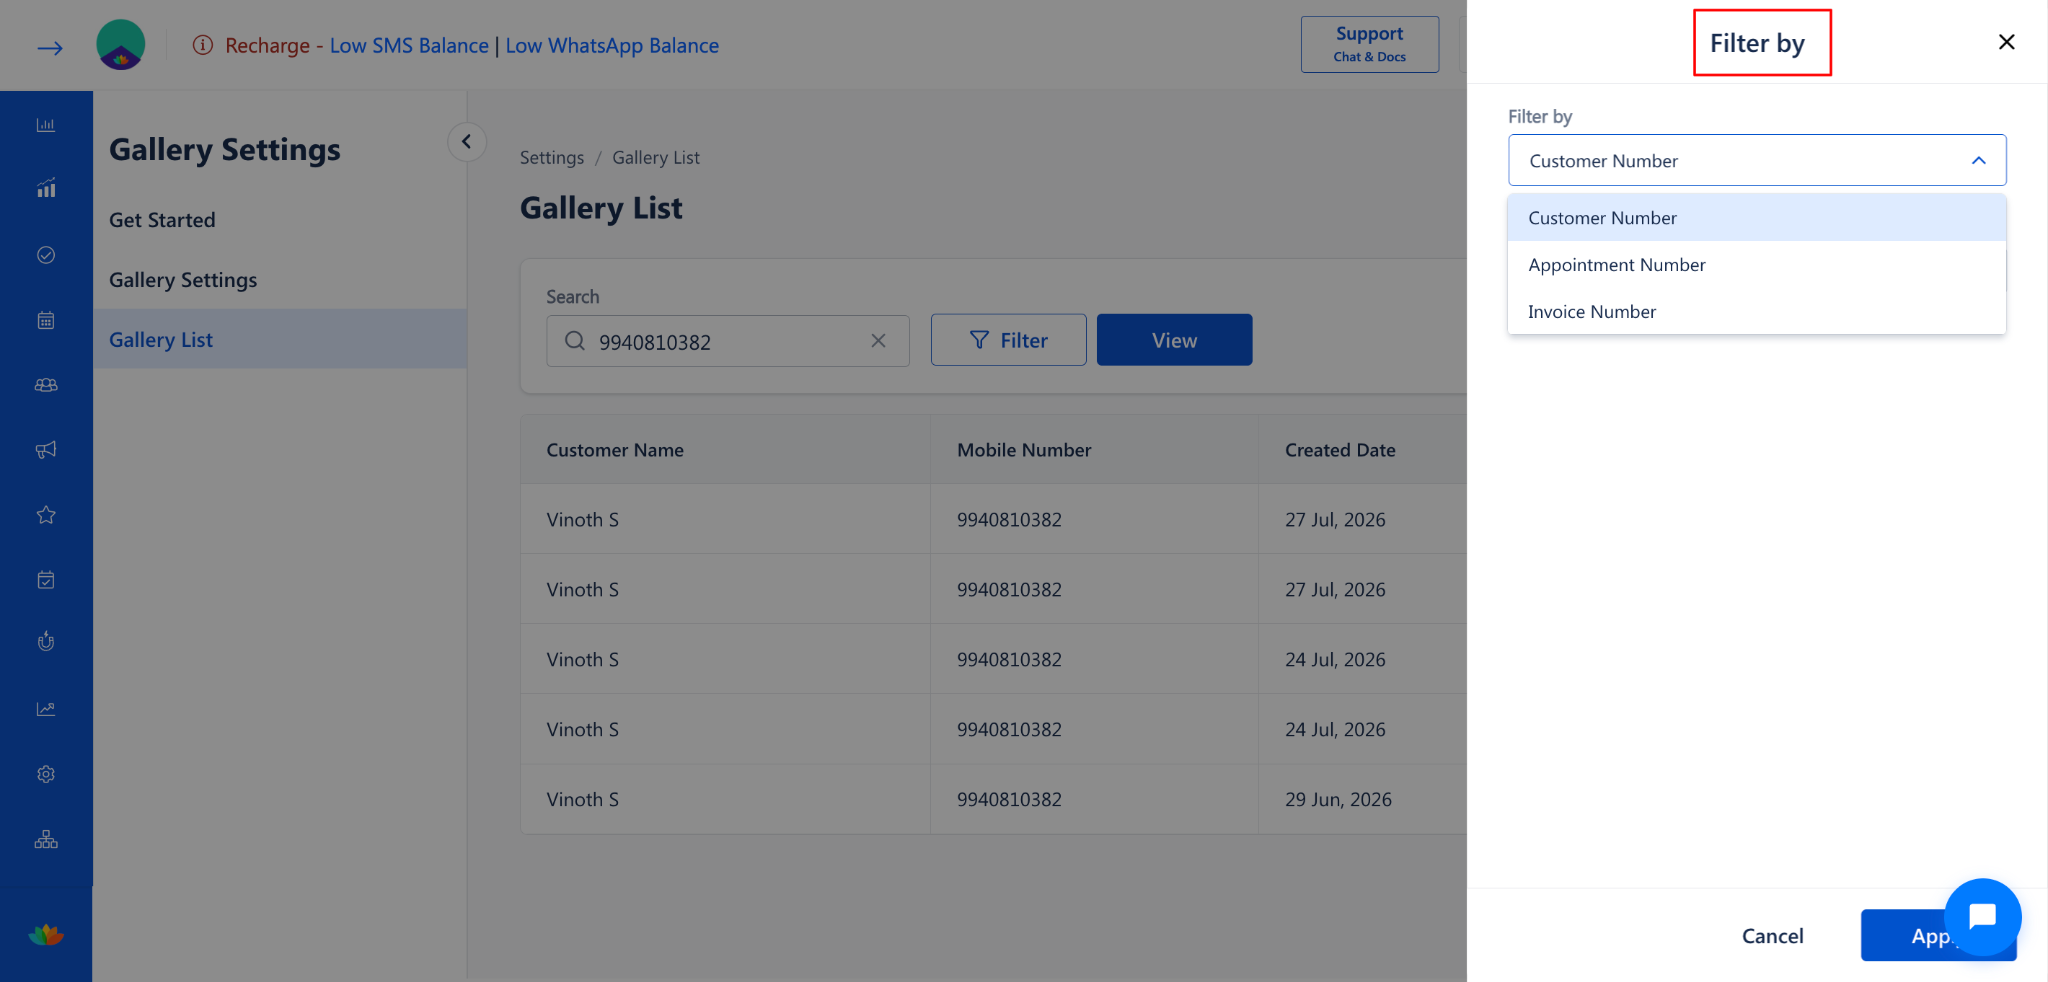
Click the Filter button to open the Filter panel.
Select a Filter by option from the dropdown:
Customer Number
Appointment Number
Invoice Number
Filter by Date Range:
In the Filter panel, click on the Date field.
Use the Quick Filters (Today, Yesterday, Last 7 days, Last 30 days, Current month) or select a custom date range from the calendar.
Click Apply to apply the filter, or Cancel to discard.
Step 3: View Filtered Results
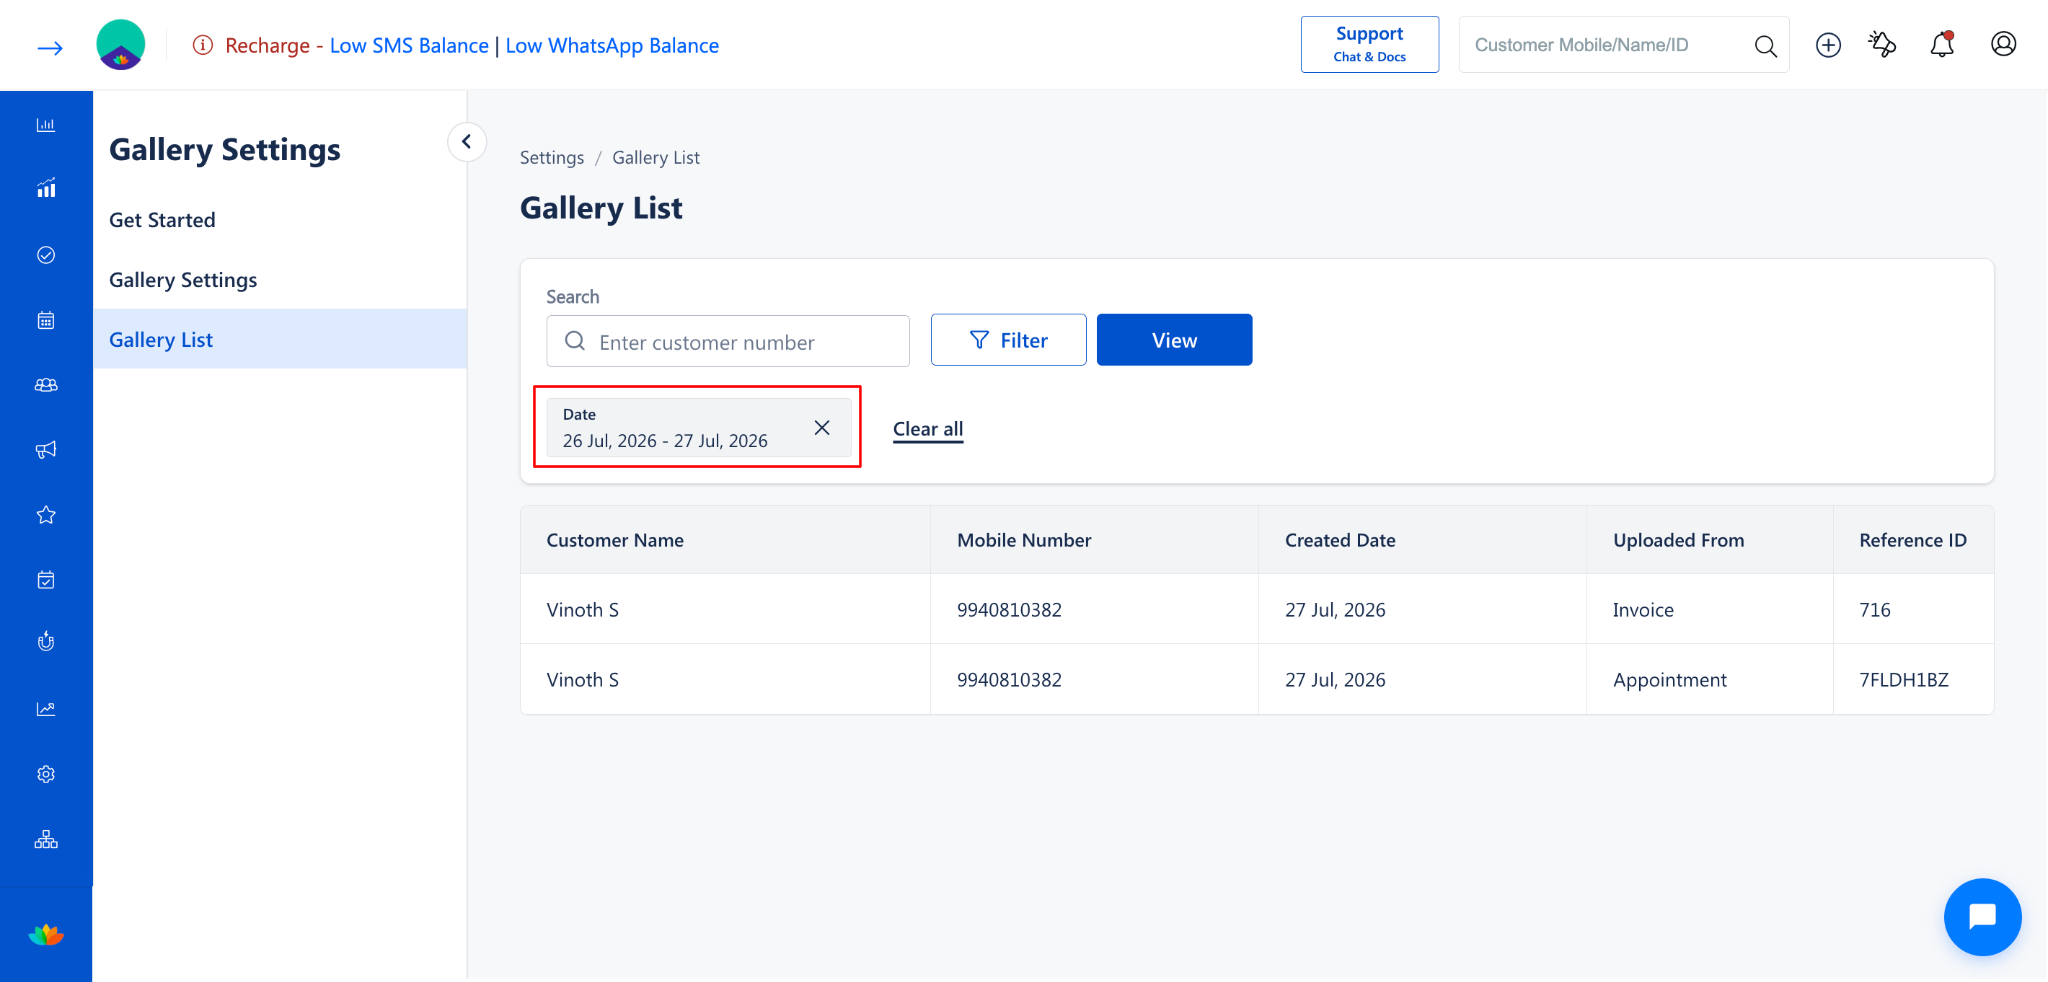
After applying the filter, the Gallery List will display the matching records.
Review the results showing Customer Name, Mobile Number, Created Date, Uploaded From, and Reference ID.
Step 4: Open the Customer's Gallery
Click on the customer record from the filtered list.
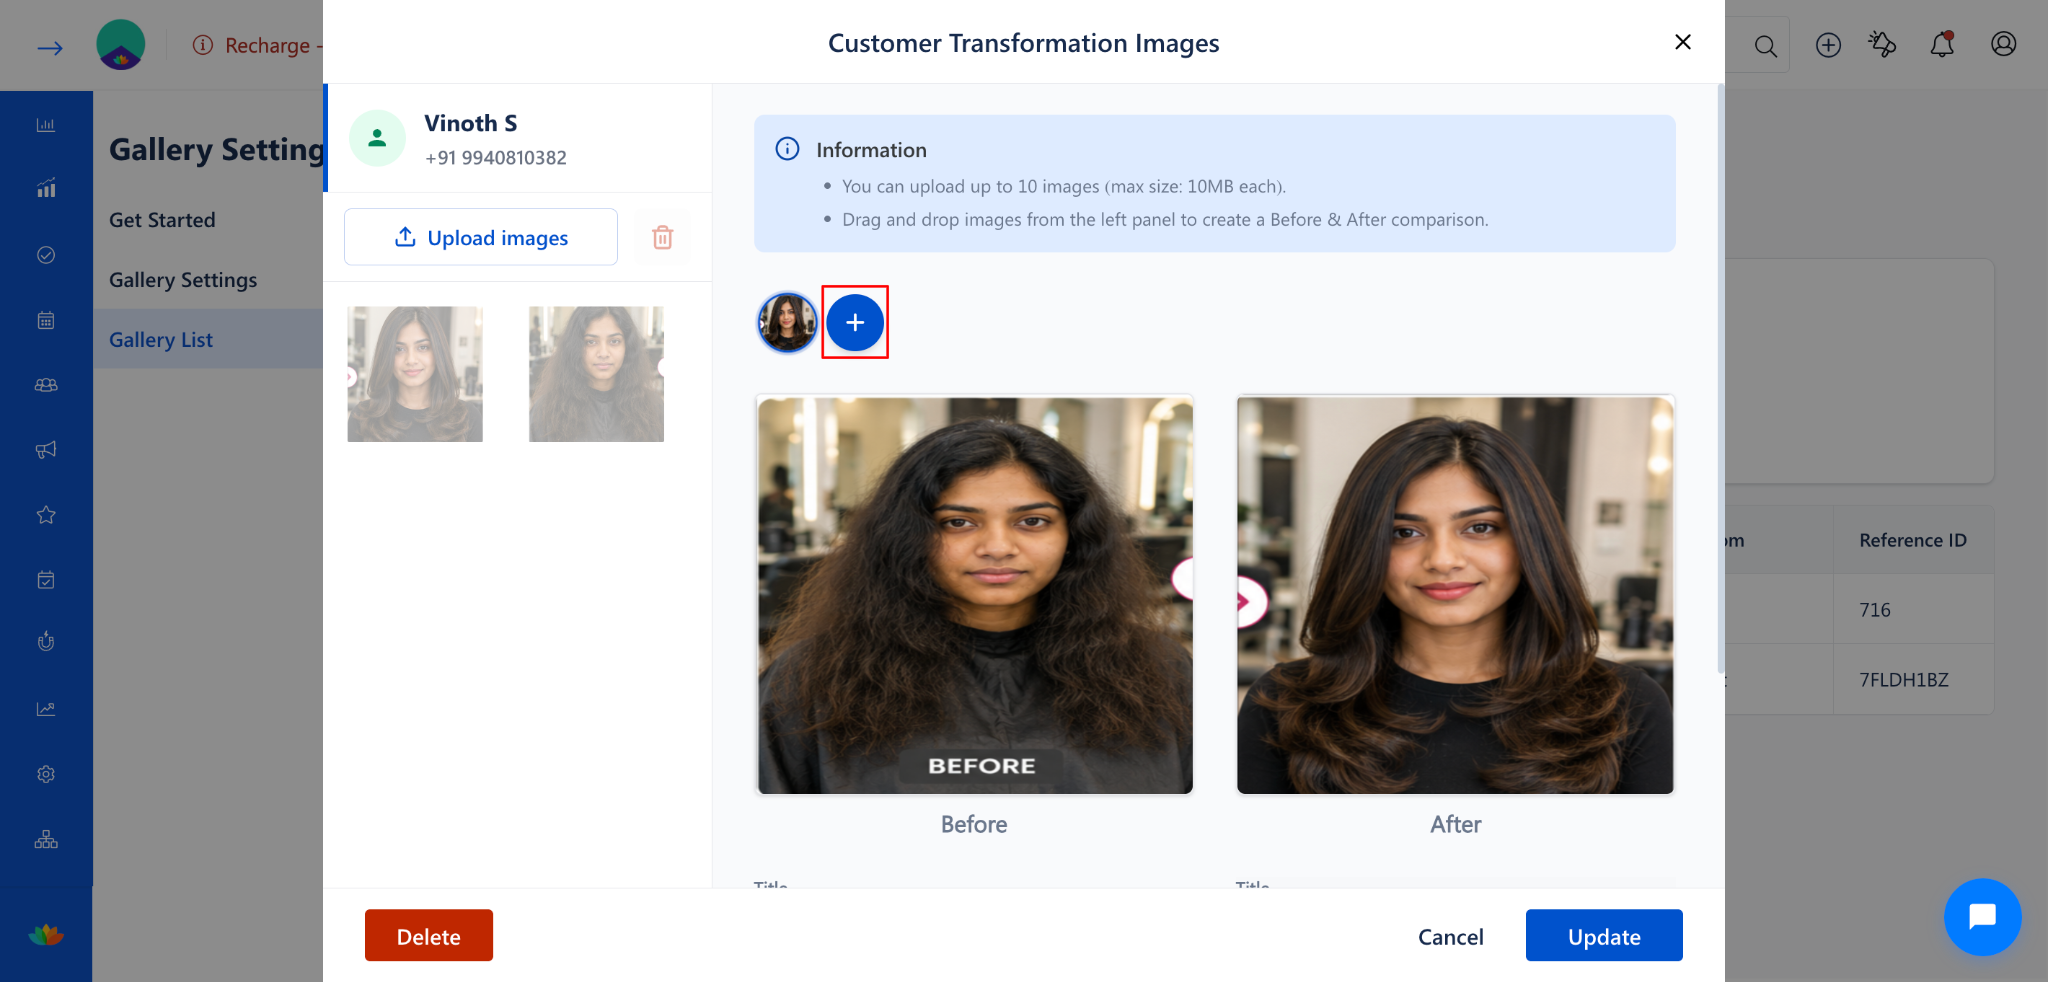
The Customer Transformation Images dialog will open.
The dialog shows all previously uploaded images and Before & After comparison sets.
Step 5: Update the Gallery
To add new images: Click the Upload images button and select new files.
To rearrange images: Drag and drop images between the Before and After slots.
To add a new comparison set: Click the + (plus) button.
To replace an image: Remove the existing image and drag a new one into its place.
Step 6: Save the Changes
Click the Save button to save the updates.
To discard changes, click Cancel to close the dialog without saving.
Use Cases
Update gallery images in bulk by searching across all customer records from a single page.
Modify images for a specific customer without needing to find their individual appointment or invoice.
Review and update galleries filtered by date to manage recent uploads.
Use the Insights page for quality checks across all uploaded transformation images.
Benefits
Provides a centralized location to manage all gallery entries across customers.
Multiple filter options make it easy to find specific records quickly.
Reduces navigation effort by consolidating gallery management in one page.
Supports date-based filtering for periodic review and updates.
Was this article helpful?
That’s Great!
Thank you for your feedback
Sorry! We couldn't be helpful
Thank you for your feedback
Feedback sent
We appreciate your effort and will try to fix the article