Overview
Customer transformation images can also be uploaded after the billing (checkout) process is completed.
When the Gallery Settings is configured to show the upload option on the Invoice Page, the image upload option becomes available through the Actions menu on the bill page.
This approach is ideal for businesses that prefer to capture images after the service is fully delivered and payment is processed.
The uploaded images are stored under the customer's profile and can be accessed from the Gallery List.
Navigation Path
Billing/Invoice → Bill Page → Actions → Customer Transformation Images
Steps to Add Images During and Post Billing
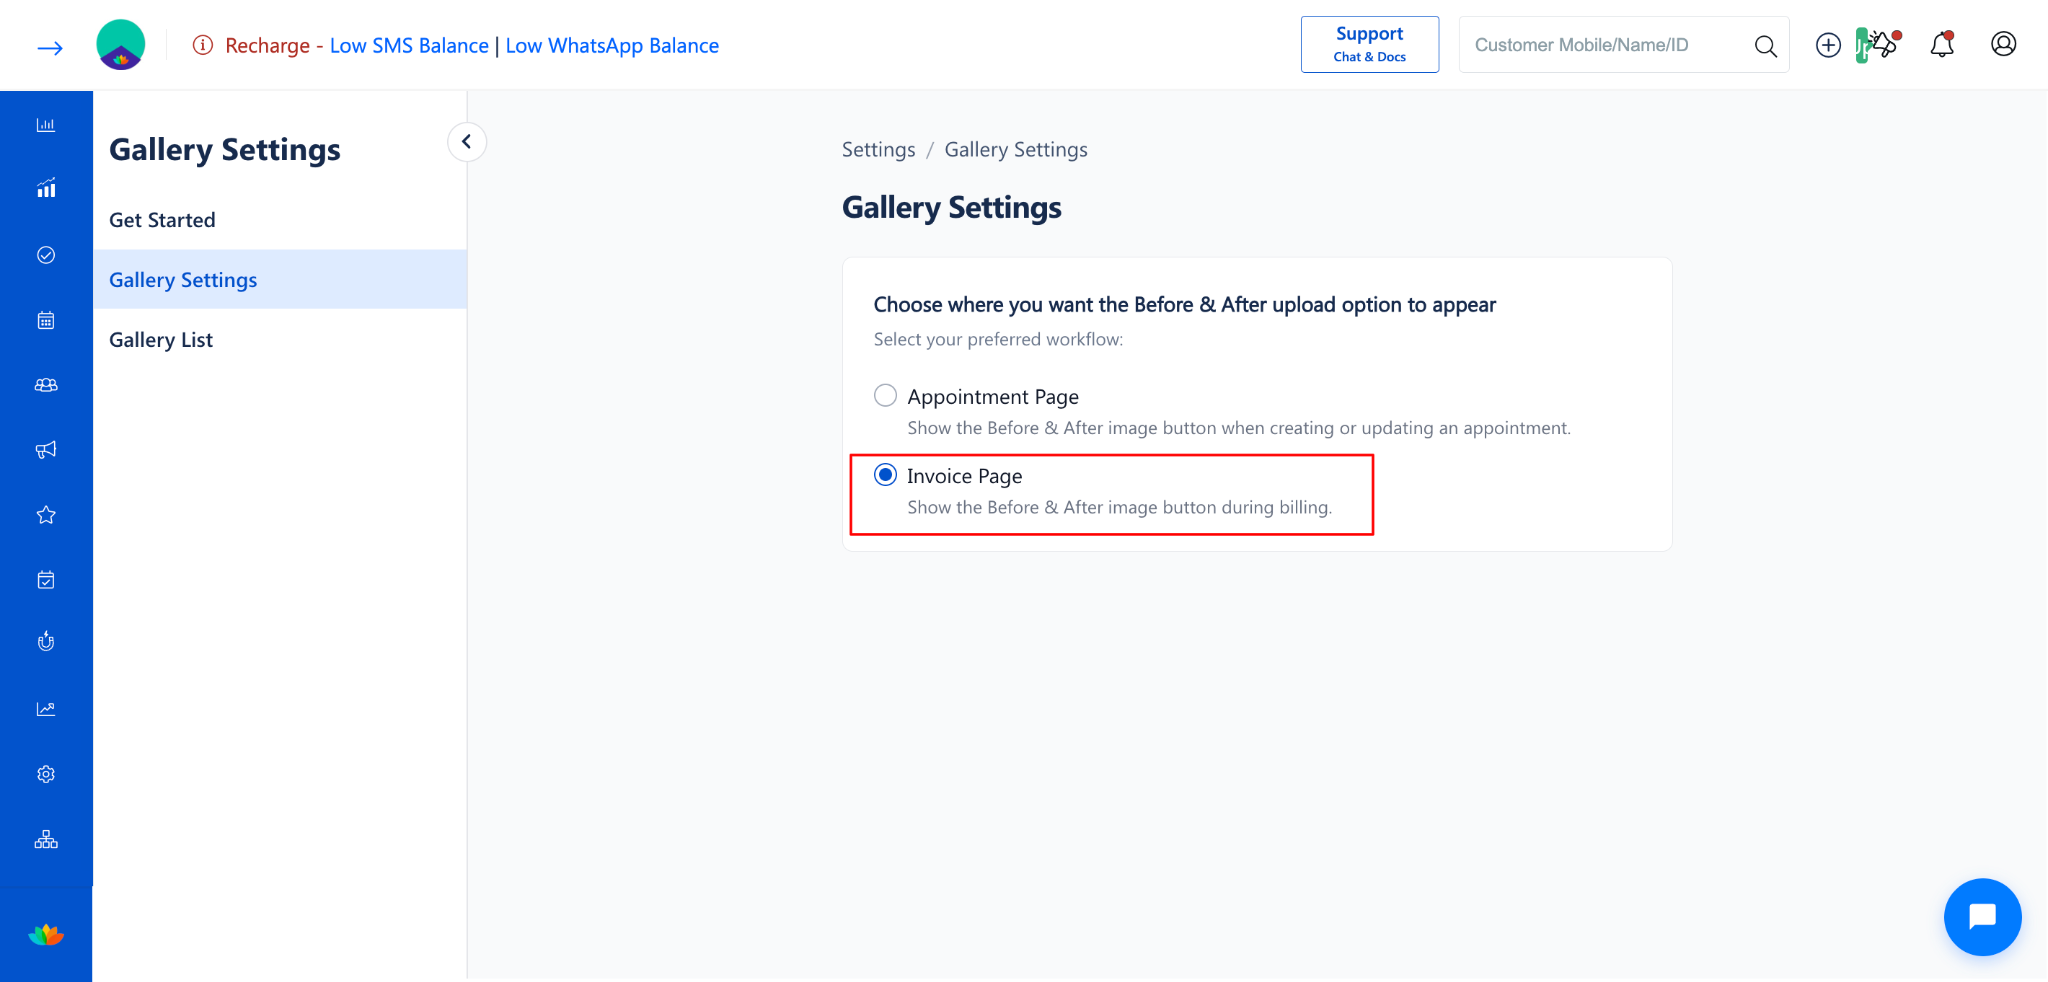
Step 1: Complete the Billing Process
Complete the appointment and proceed to Checkout.
After checkout, the Bill Page will open displaying the invoice details.
Step 2: Open Customer Transformation Images
On the Bill Page, locate the Actions dropdown button at the top of the page.
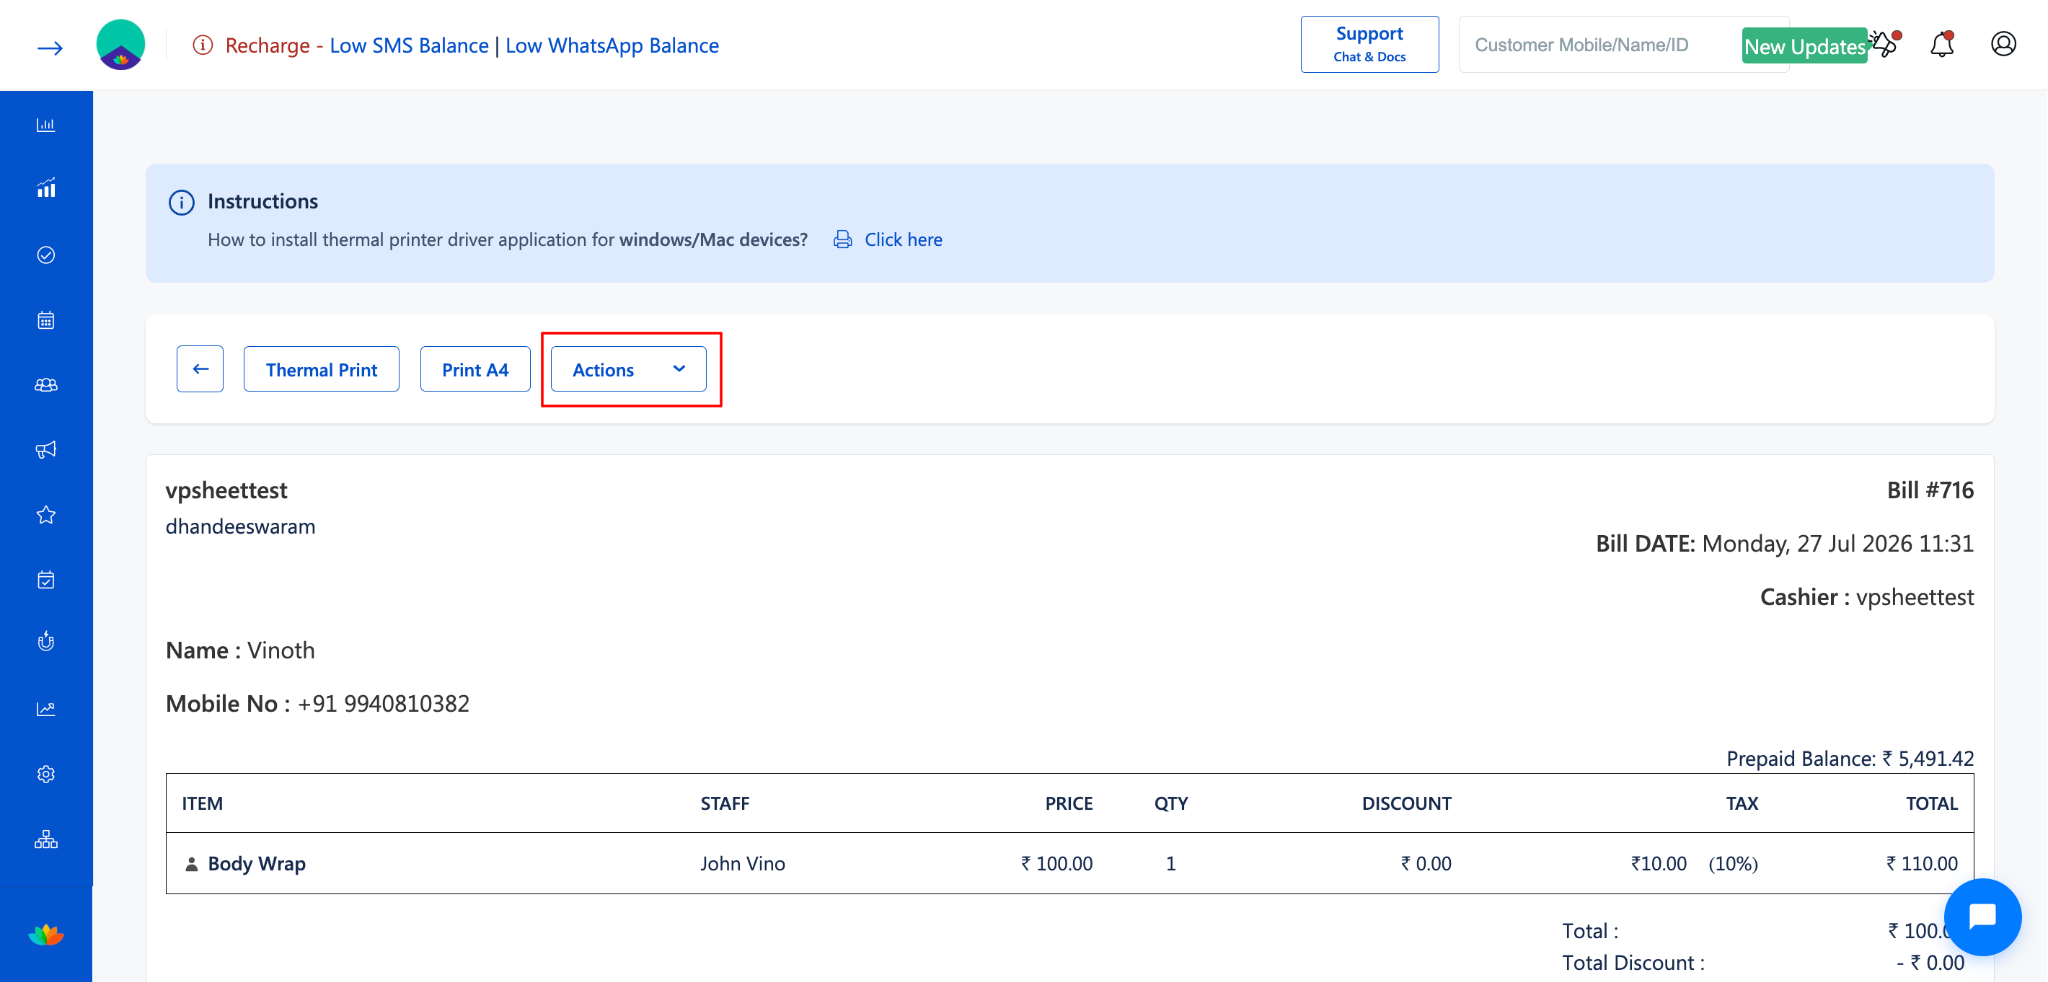
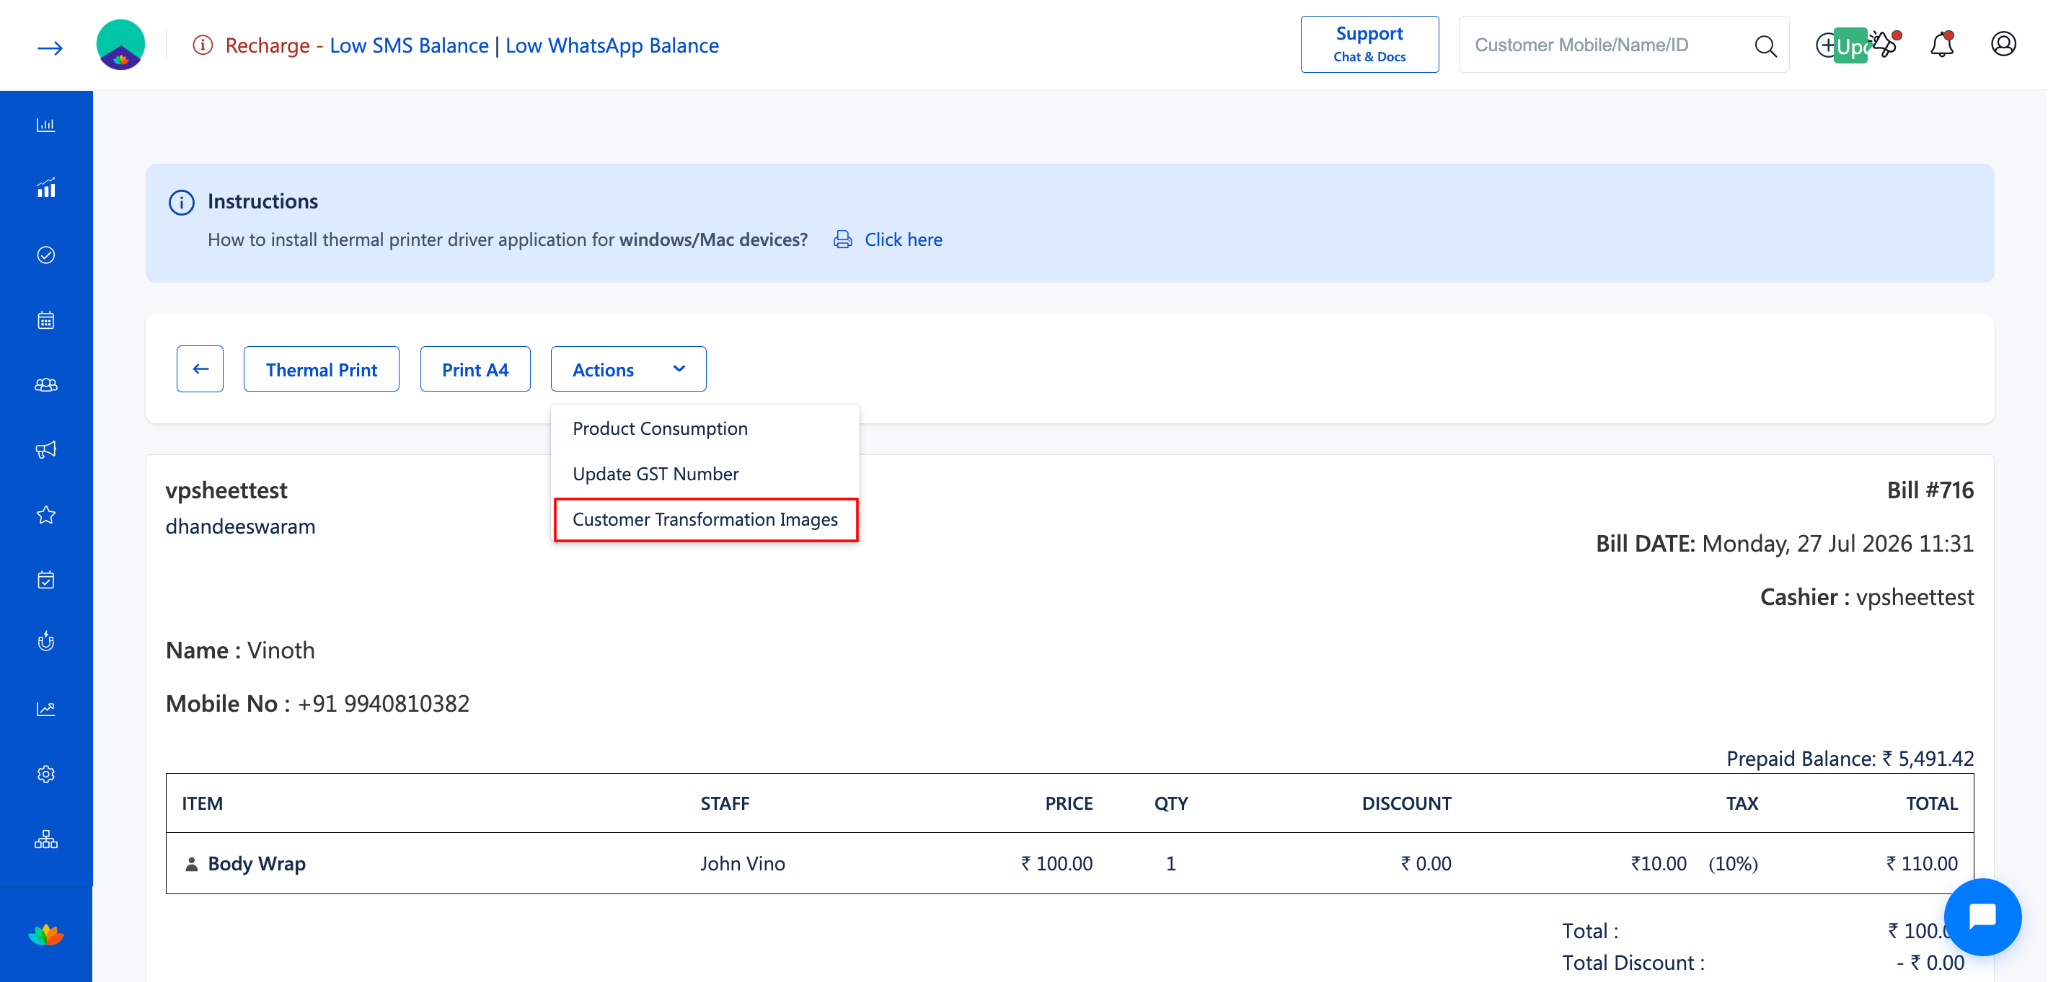
Click on the Actions dropdown.
From the dropdown menu, select Customer Transformation Images.
Step 3: Upload Images
The Customer Transformation Images dialog will open.
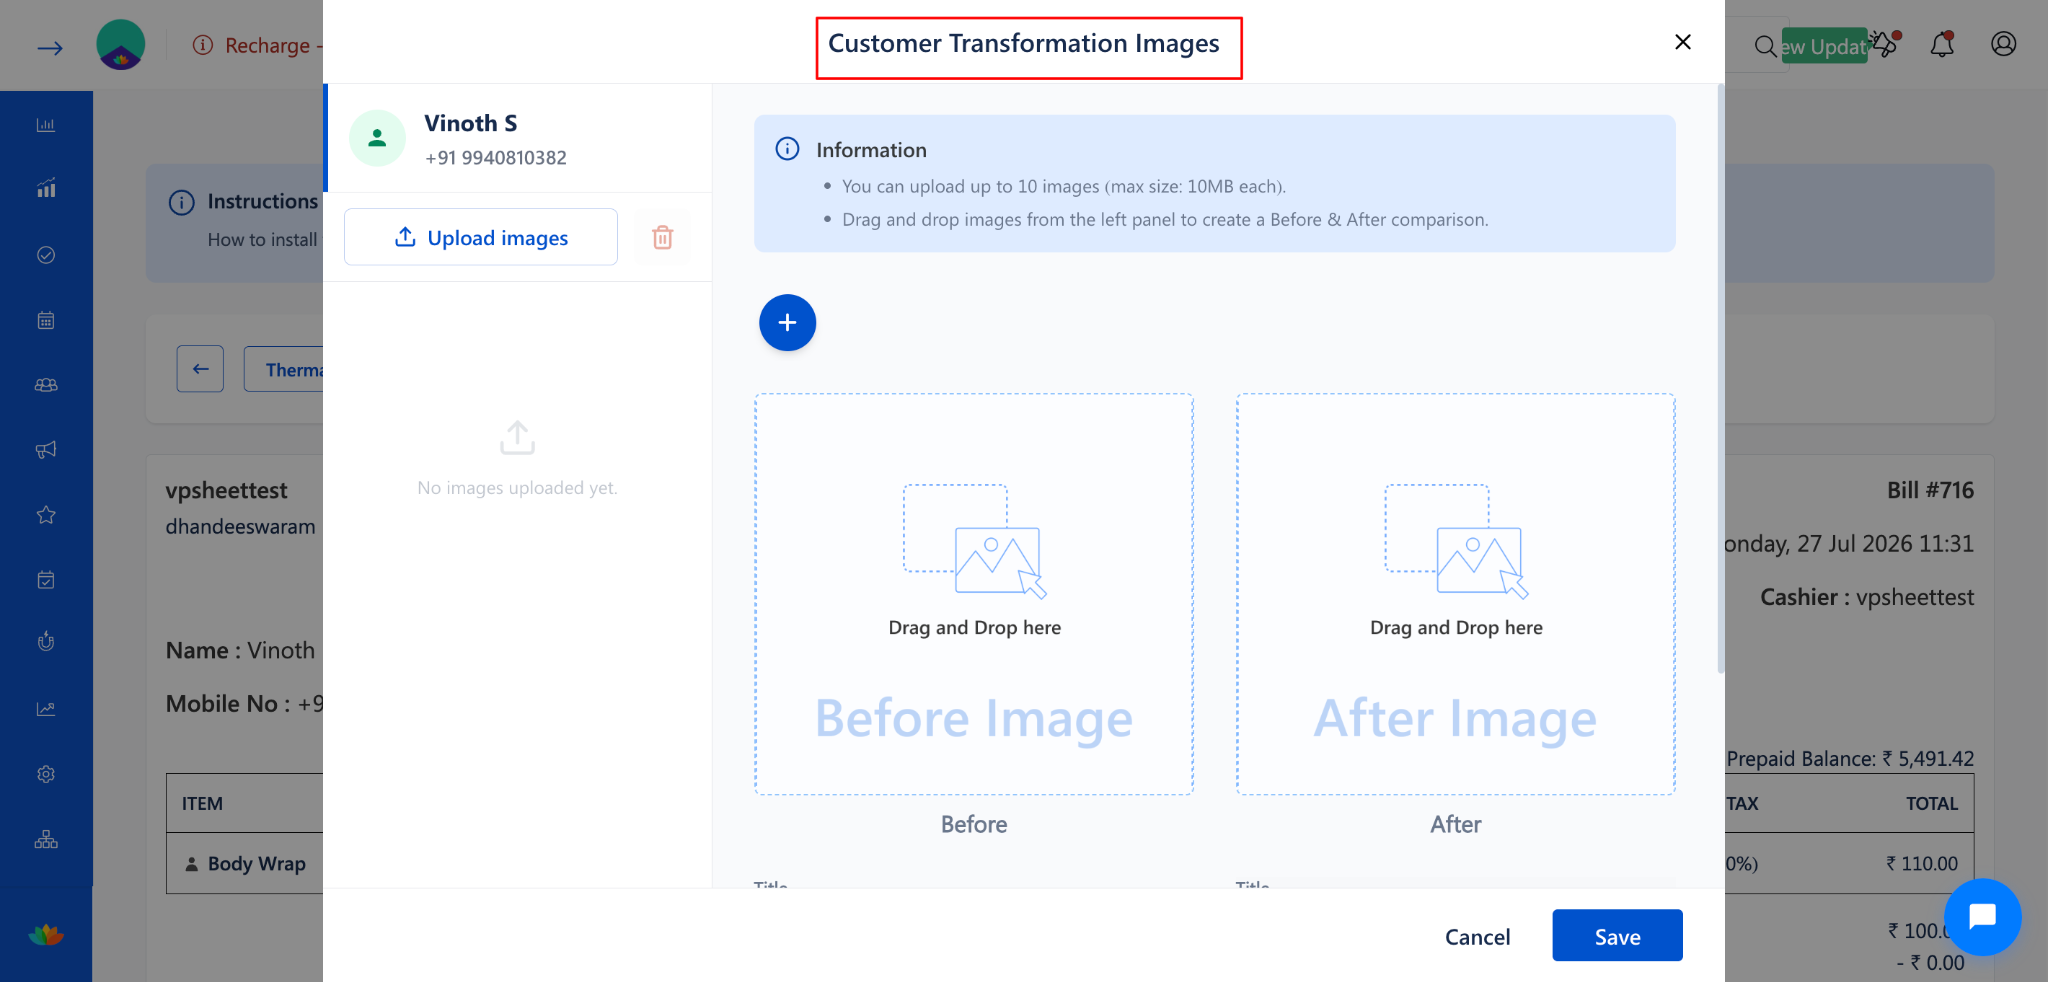
The dialog displays:
Customer name and mobile number at the top.
Upload images button on the left panel.
Before Image and After Image slots on the right panel.
Click the Upload images button on the left panel.
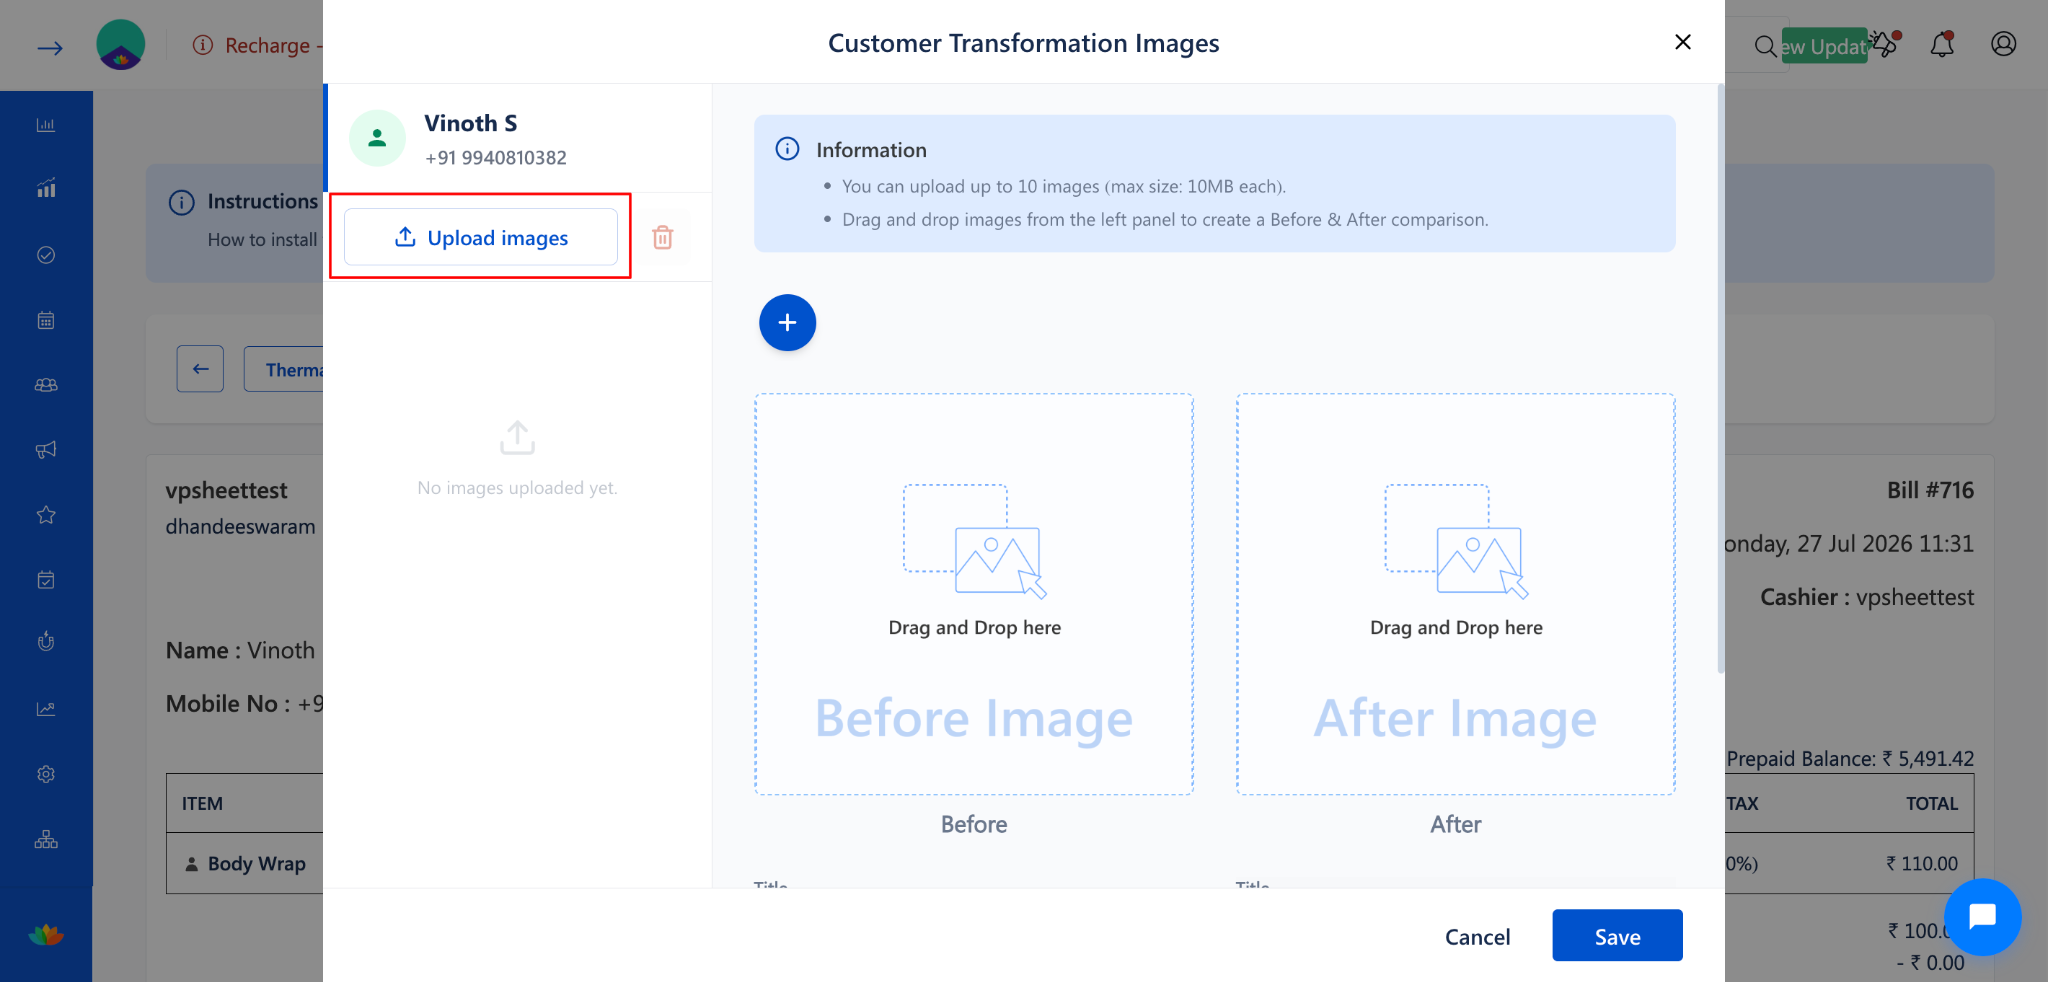
Select images from your computer to upload.
NOTE
You can upload up to 10 images (max size: 10MB each).
Drag and drop images from the left panel to create a Before & After comparison.
Step 4: Arrange Before & After Images
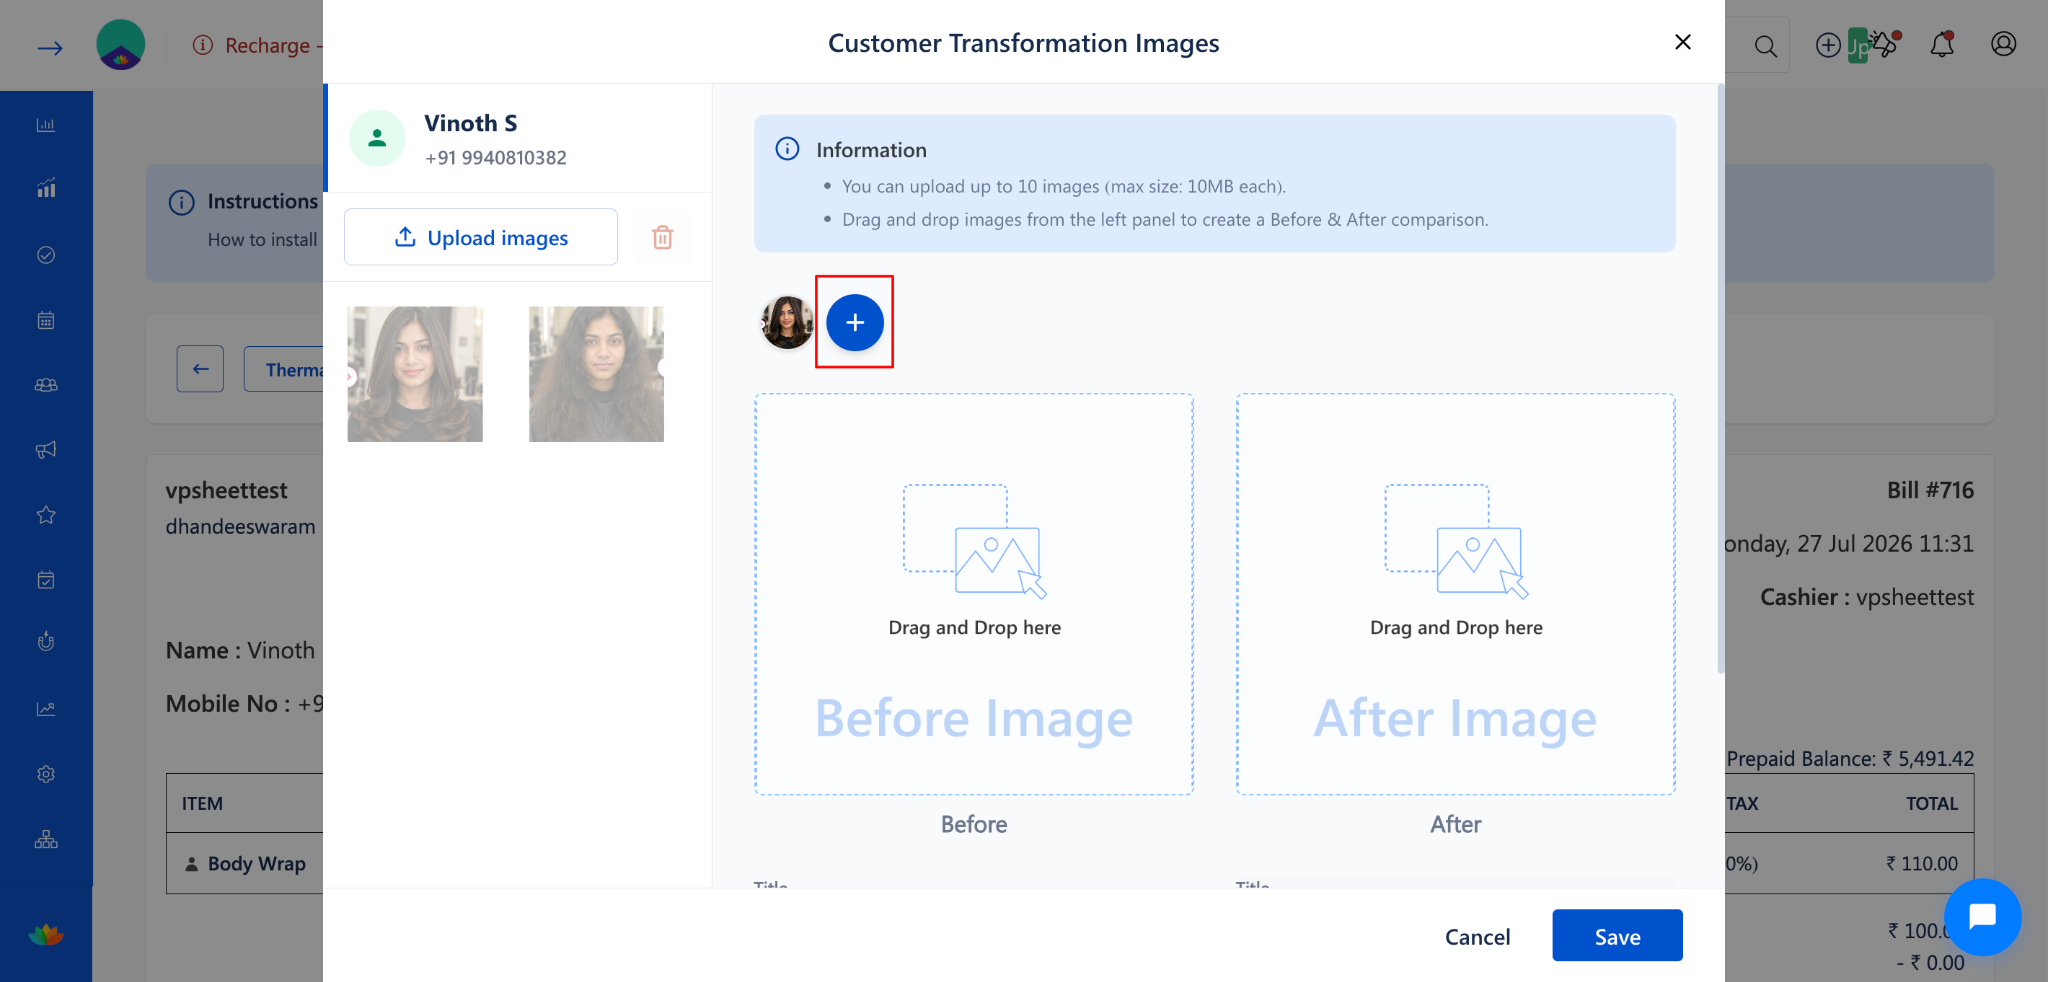
After uploading, the images appear as thumbnails in the left panel.
Drag and drop an image to the Before Image slot (labeled "Drag and Drop here").
Drag and drop another image to the After Image slot.
Use the + (plus) button to add more Before & After comparison sets.
Step 5: Save the Images
Click the Save button at the bottom-right corner to save the transformation images.
To discard changes, click Cancel to close the dialog without saving.
After saving, the uploaded image thumbnails will appear on the Bill Page next to the Actions button.
Use Cases
Upload transformation images after completing a spa or wellness treatment and billing the customer.
Capture service results at the billing stage when the final outcome is visible.
Add images retroactively to past invoices for documentation purposes.
Build a visual portfolio of completed services linked to customer billing records.
Benefits
Allows image capture at the final stage of the customer journey for the most accurate results.
Links transformation images directly to the invoice for easy reference.
Provides a non-intrusive upload process that does not interrupt the appointment workflow.
Supports drag-and-drop functionality for quick and easy Before & After arrangement.
Was this article helpful?
That’s Great!
Thank you for your feedback
Sorry! We couldn't be helpful
Thank you for your feedback
Feedback sent
We appreciate your effort and will try to fix the article