Overview
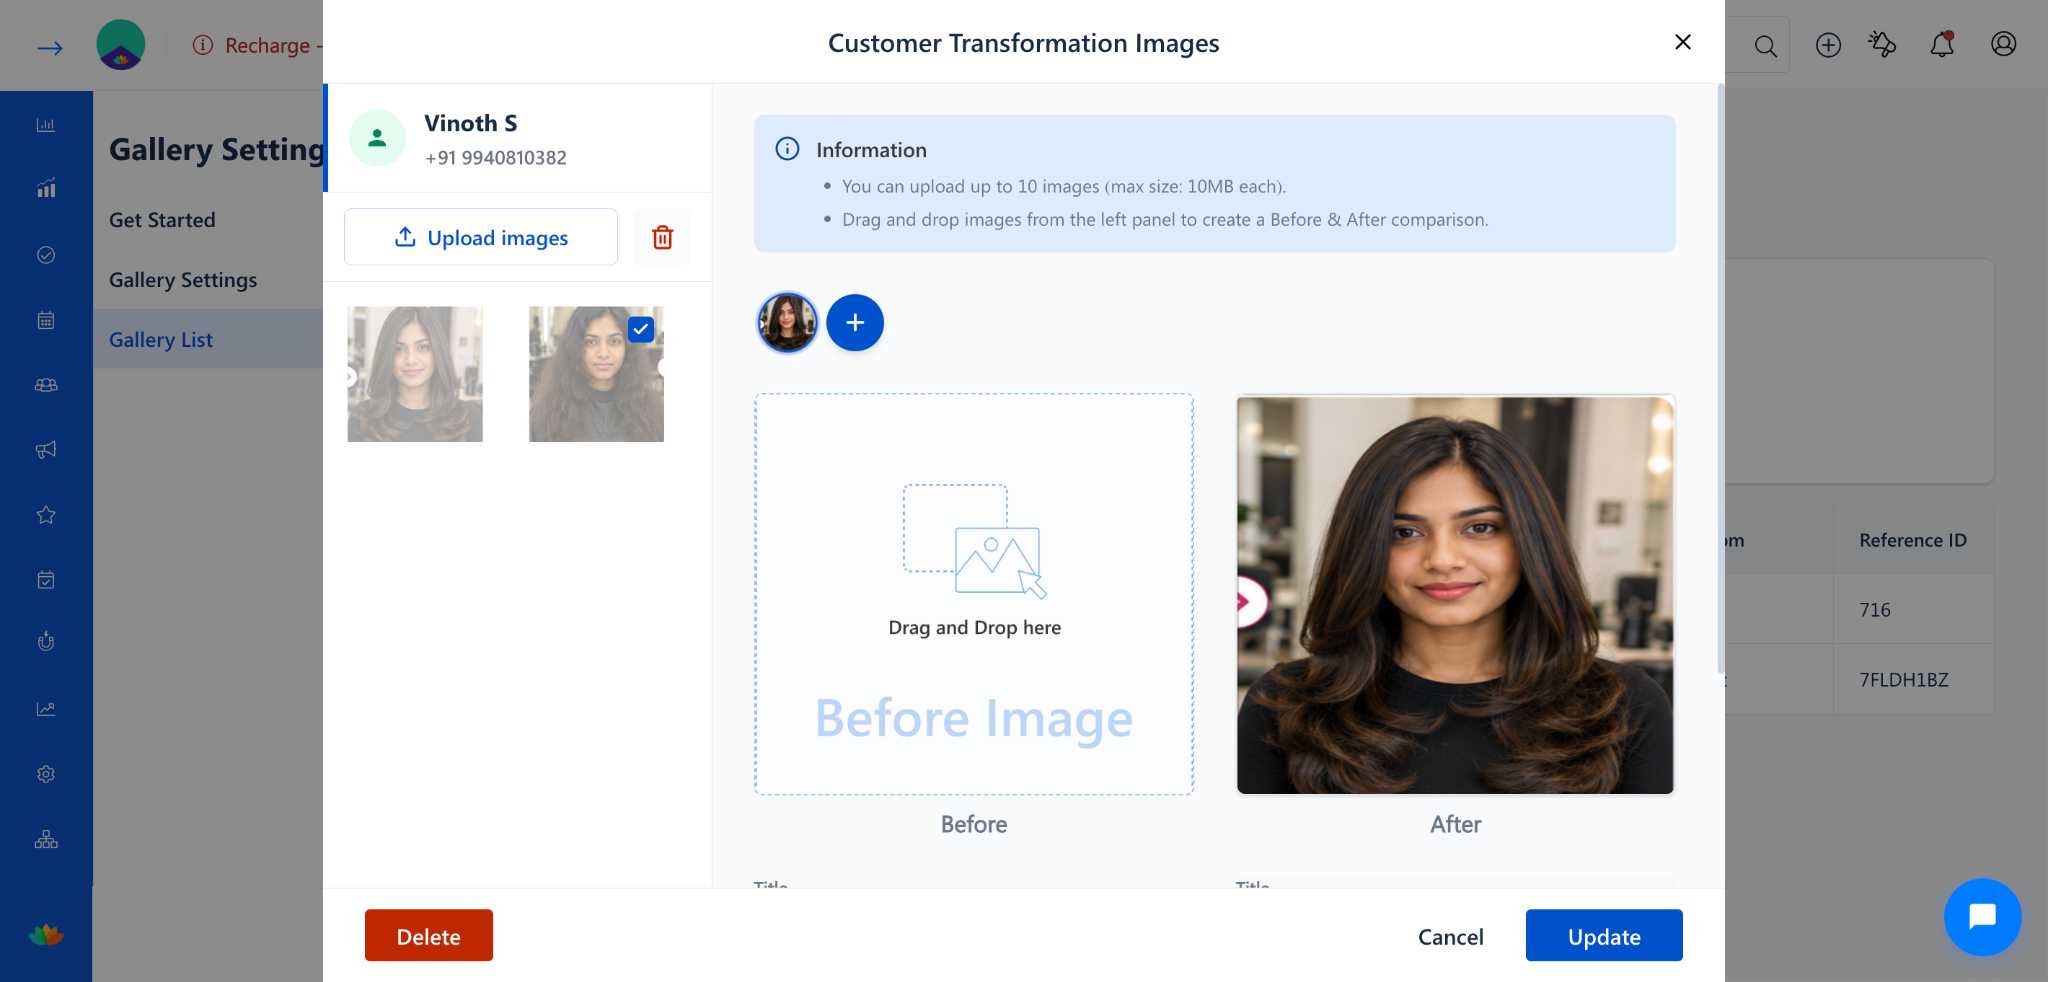
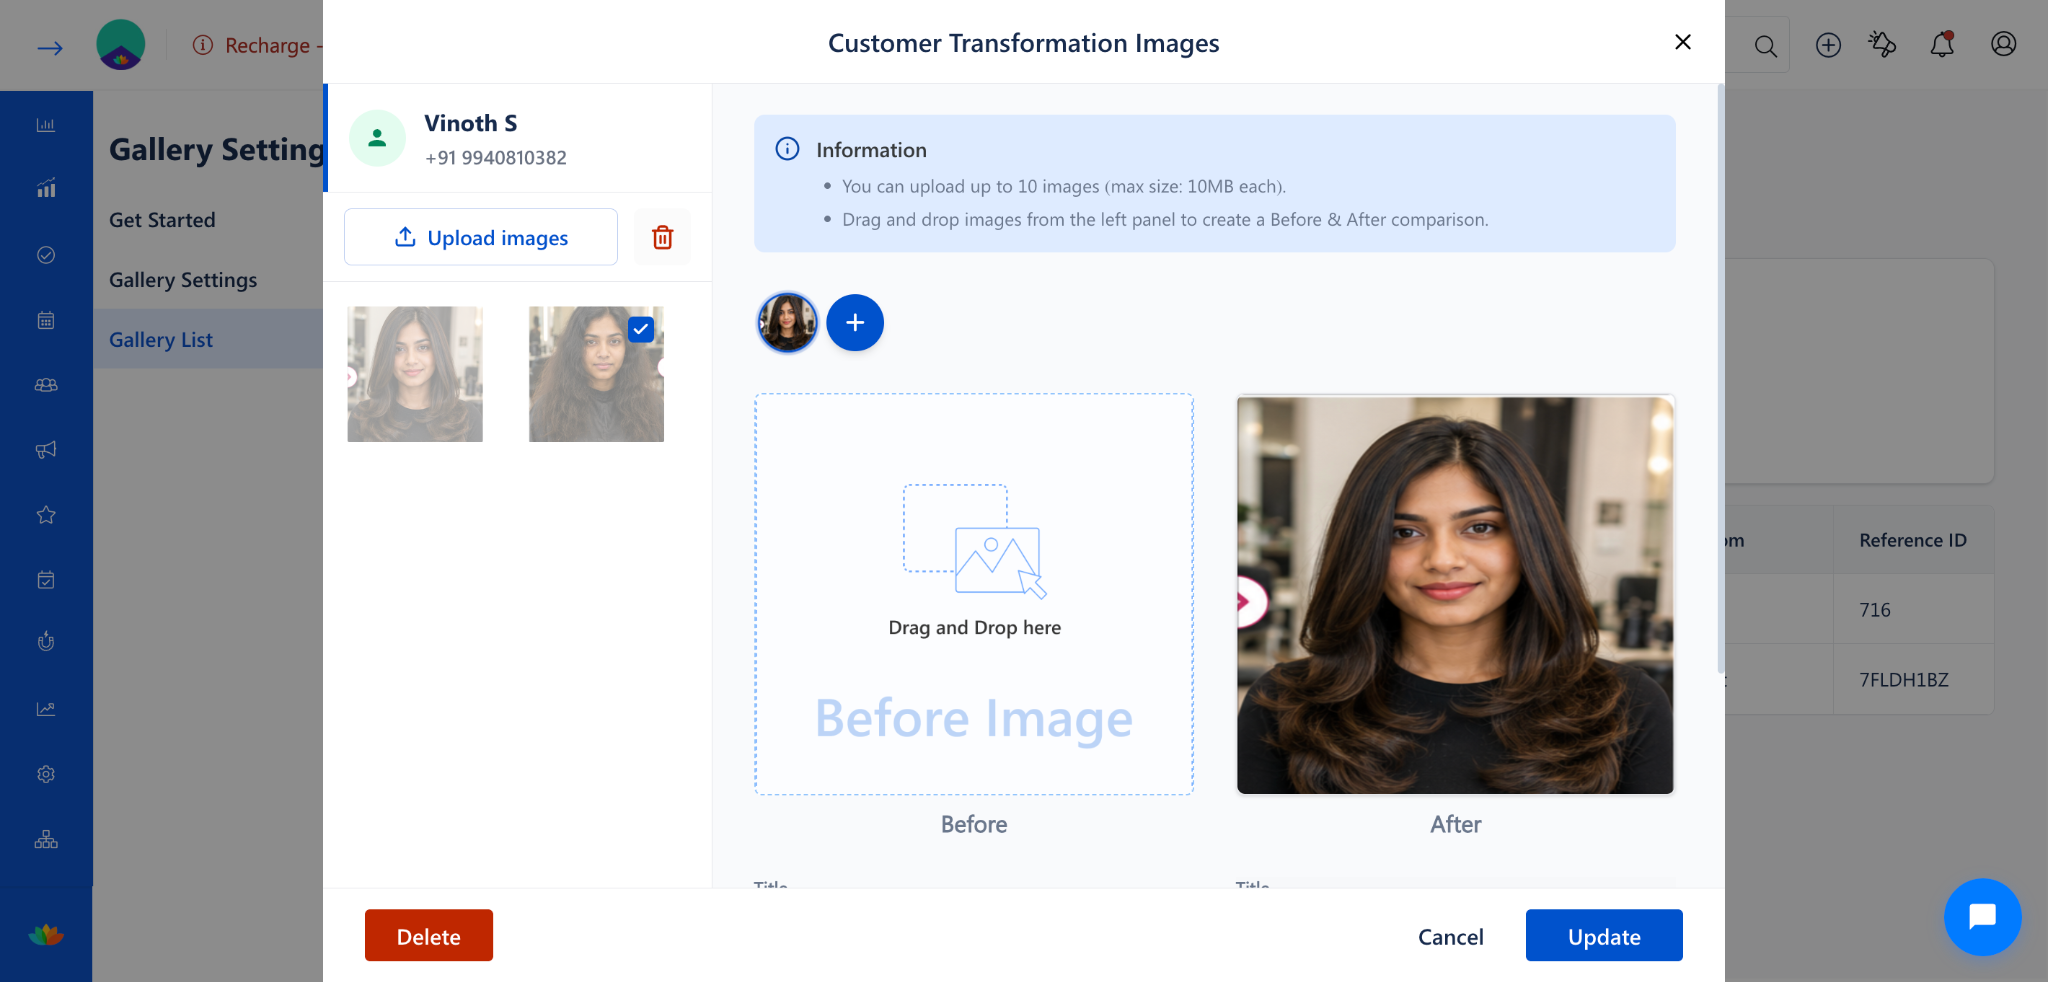
Within the Customer Transformation Images dialog, the left panel displays all images that have been uploaded for a customer. Individual images can be permanently deleted from this section using the delete (trash) icon. This is different from removing an image from the Before & After comparison slots, which only unassigns the image from a comparison set without deleting it. Deleting an image from the Uploaded Image Section permanently removes it from the customer's gallery record.
Navigation Path:
Customer Transformation Images Dialog --> Uploaded Image Section (Left Panel)
Steps to Remove or Delete Image from the Uploaded Image Section
Step 1: Open the Customer Transformation Images Dialog
You can access the Customer Transformation Images dialog from any of the following:
From Appointment:
Open the appointment from the calendar.
Click the Upload Client Images tab on the Appointment Summary page.
Click on the uploaded image thumbnails.
From Billing:
Open the bill page.
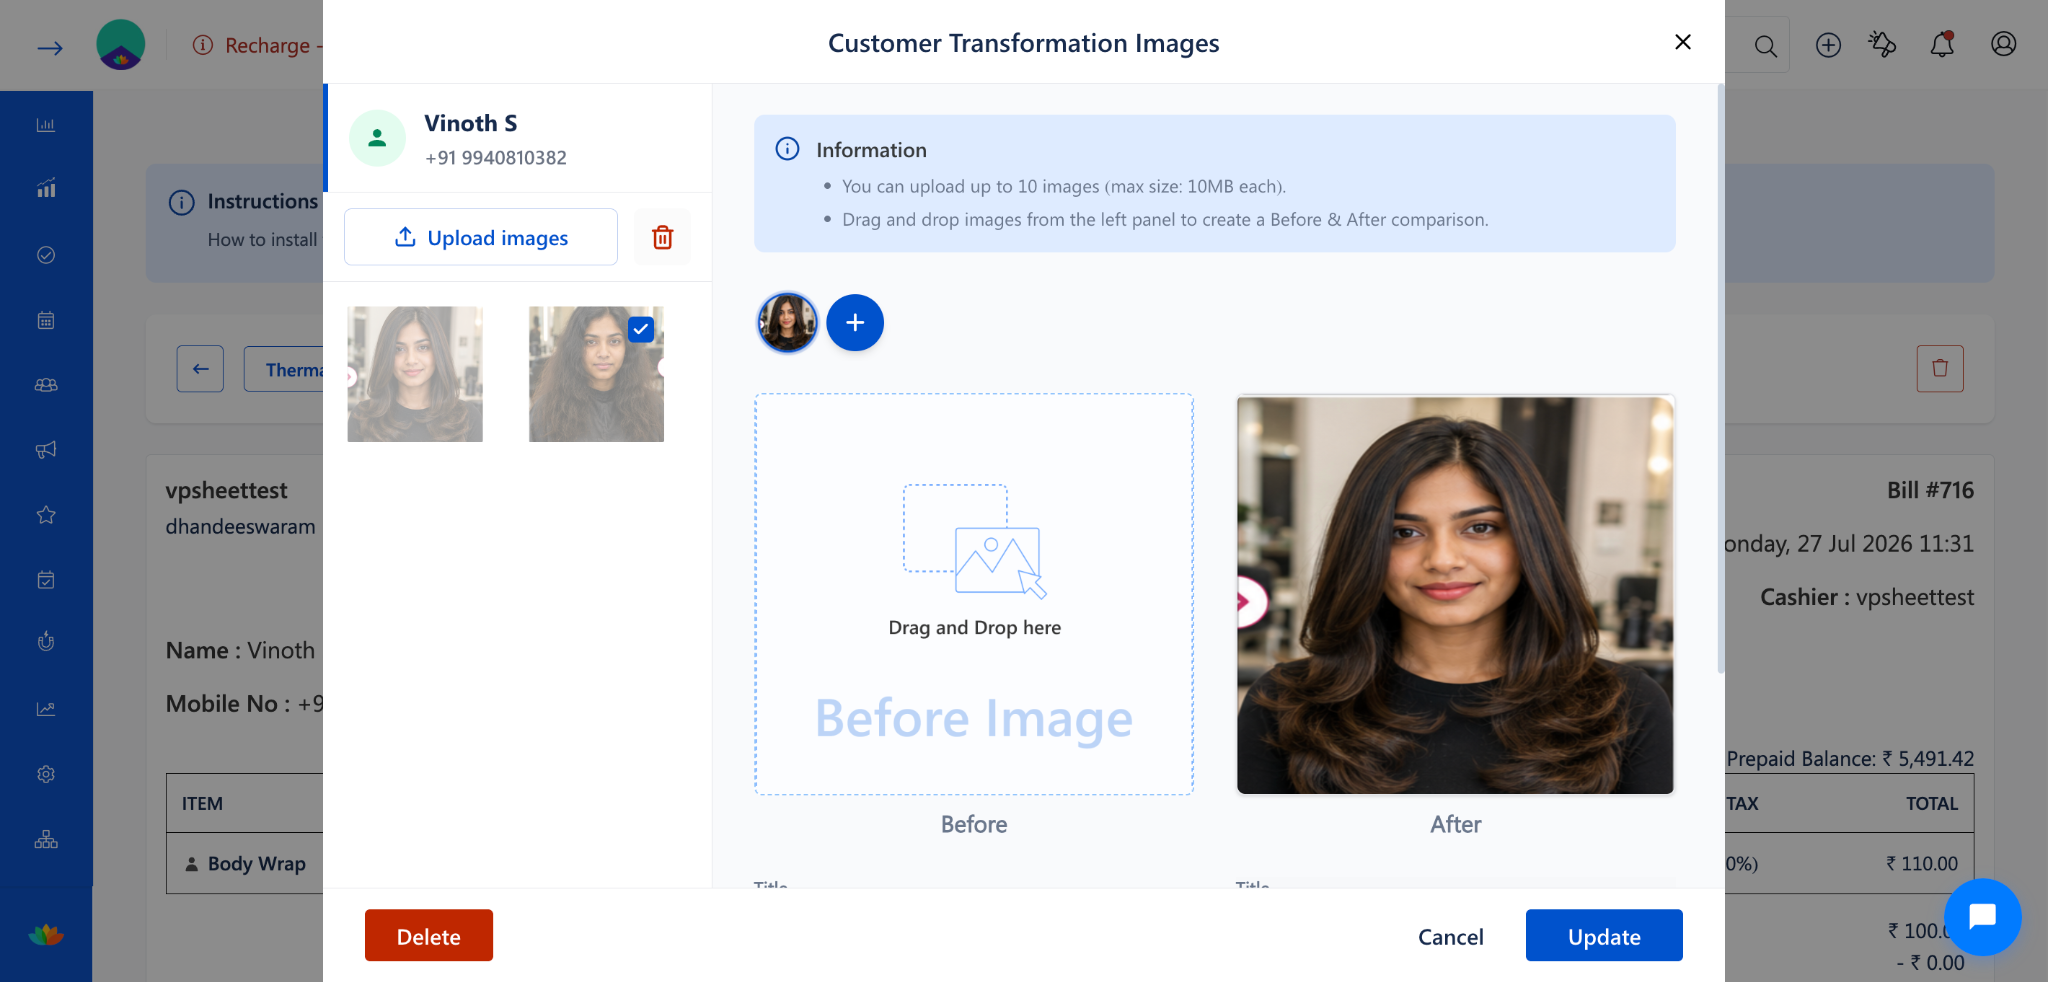
Click Actions --> Customer Transformation Images.
From Gallery List:
Navigate to Settings --> Gallery Settings --> Gallery List.
Search or filter for the customer record.
Click on the customer record.
Step 2: Locate the Uploaded Image Section
In the Customer Transformation Images dialog, the left panel shows all uploaded images.
Each image is displayed as a thumbnail.
Below the Client name, you will see the Upload images button and a delete (trash) icon.
Step 3: Select and Delete the Image
Identify the image you want to delete from the left panel.
Click the delete icon at the top of the uploaded images section.
The selected image will be removed from the uploaded images list.
NOTE
Deleting an image from the Uploaded Image Section permanently removes it. If the image was assigned to a Before & After comparison slot, it will also be removed from that slot.
Step 4: Save the Changes
Click the Save button to confirm the deletions.
To discard changes, click Cancel to close the dialog without saving.
Delete from Uploaded Section vs. Remove from Slot: Comparison
Use Cases
Permanently delete images that were uploaded by mistake or are no longer needed.
Remove low-quality or duplicate images from the customer's gallery.
Clean up the uploaded image section to keep only relevant transformation images.
Delete sensitive images as per customer's data deletion request.
Benefits
Provides permanent deletion for complete removal of unwanted images.
Clear distinction between removing from a slot and deleting permanently.
Keeps the uploaded image section clean and organized.
Supports data privacy by enabling complete image deletion when required.
+++++++
How to Delete the Added Gallery via the Insights
Overview
The Gallery List page in Gallery Settings serves as a centralized location to manage all uploaded customer transformation images.
From this page, you can search for a specific customer's gallery record using filters, open the Customer Transformation Images dialog, and remove individual images or entire comparison sets.
This approach is efficient when you need to clean up gallery entries without navigating to individual appointments or invoices.
Navigation Path
Settings → Gallery Settings → Gallery List → Select Customer Record
Steps to Remove the Added Gallery via the Insights
Step 1: Navigate to the Gallery List
From the left sidebar, click on Settings.
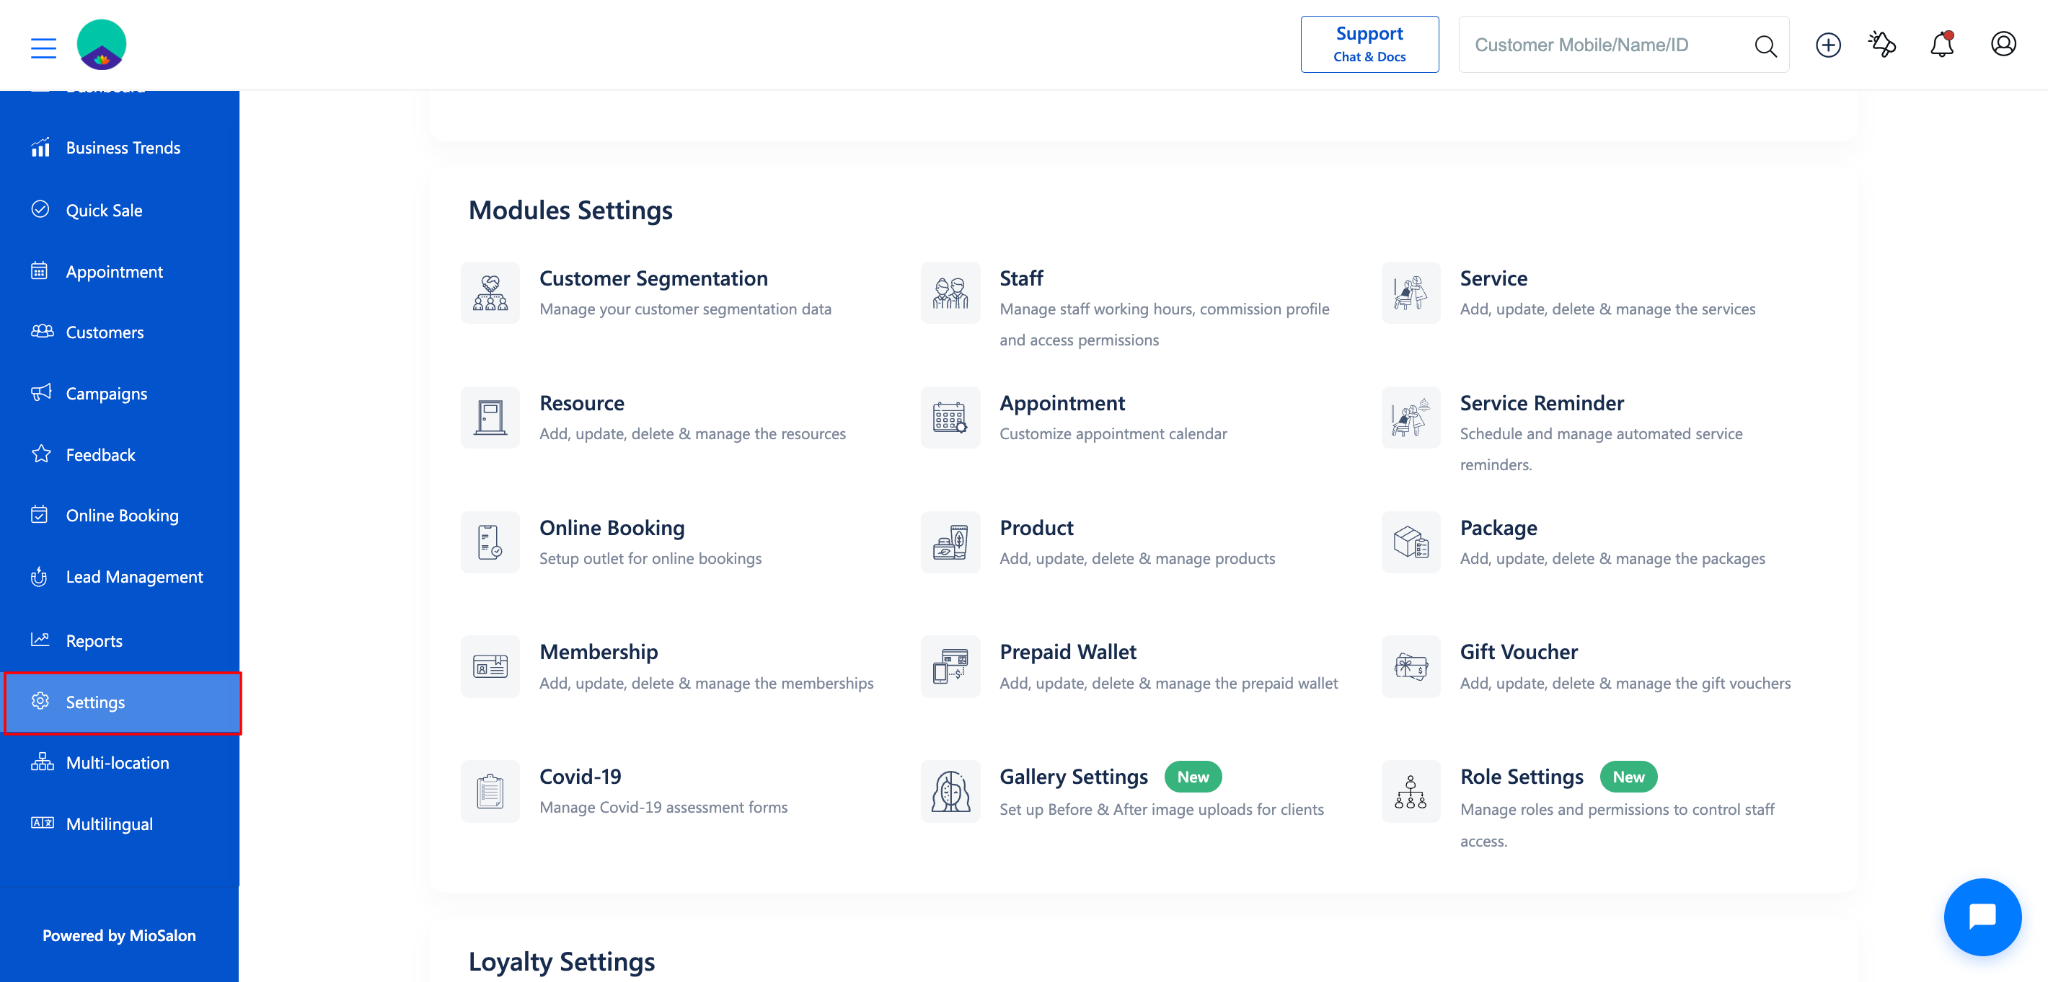
Under Settings, select Gallery Settings.
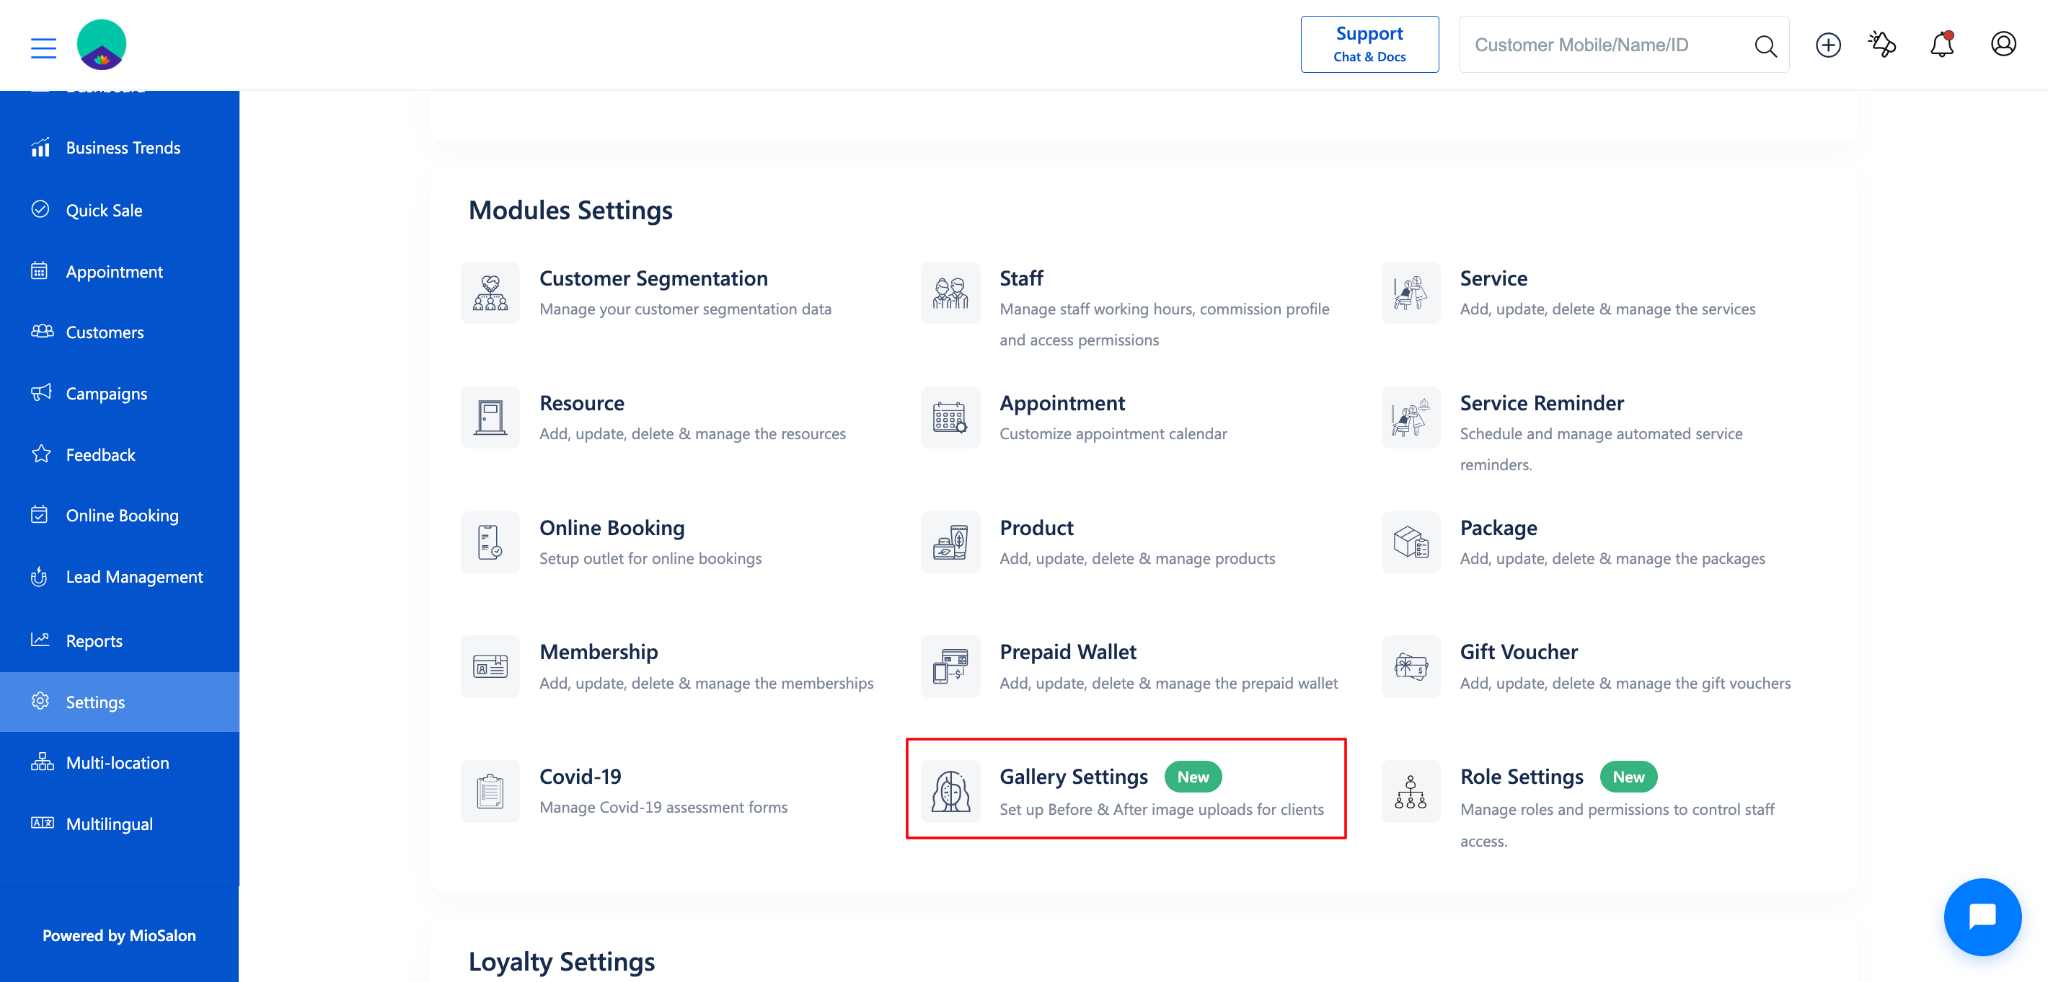
Click on Gallery List from the left-side menu.
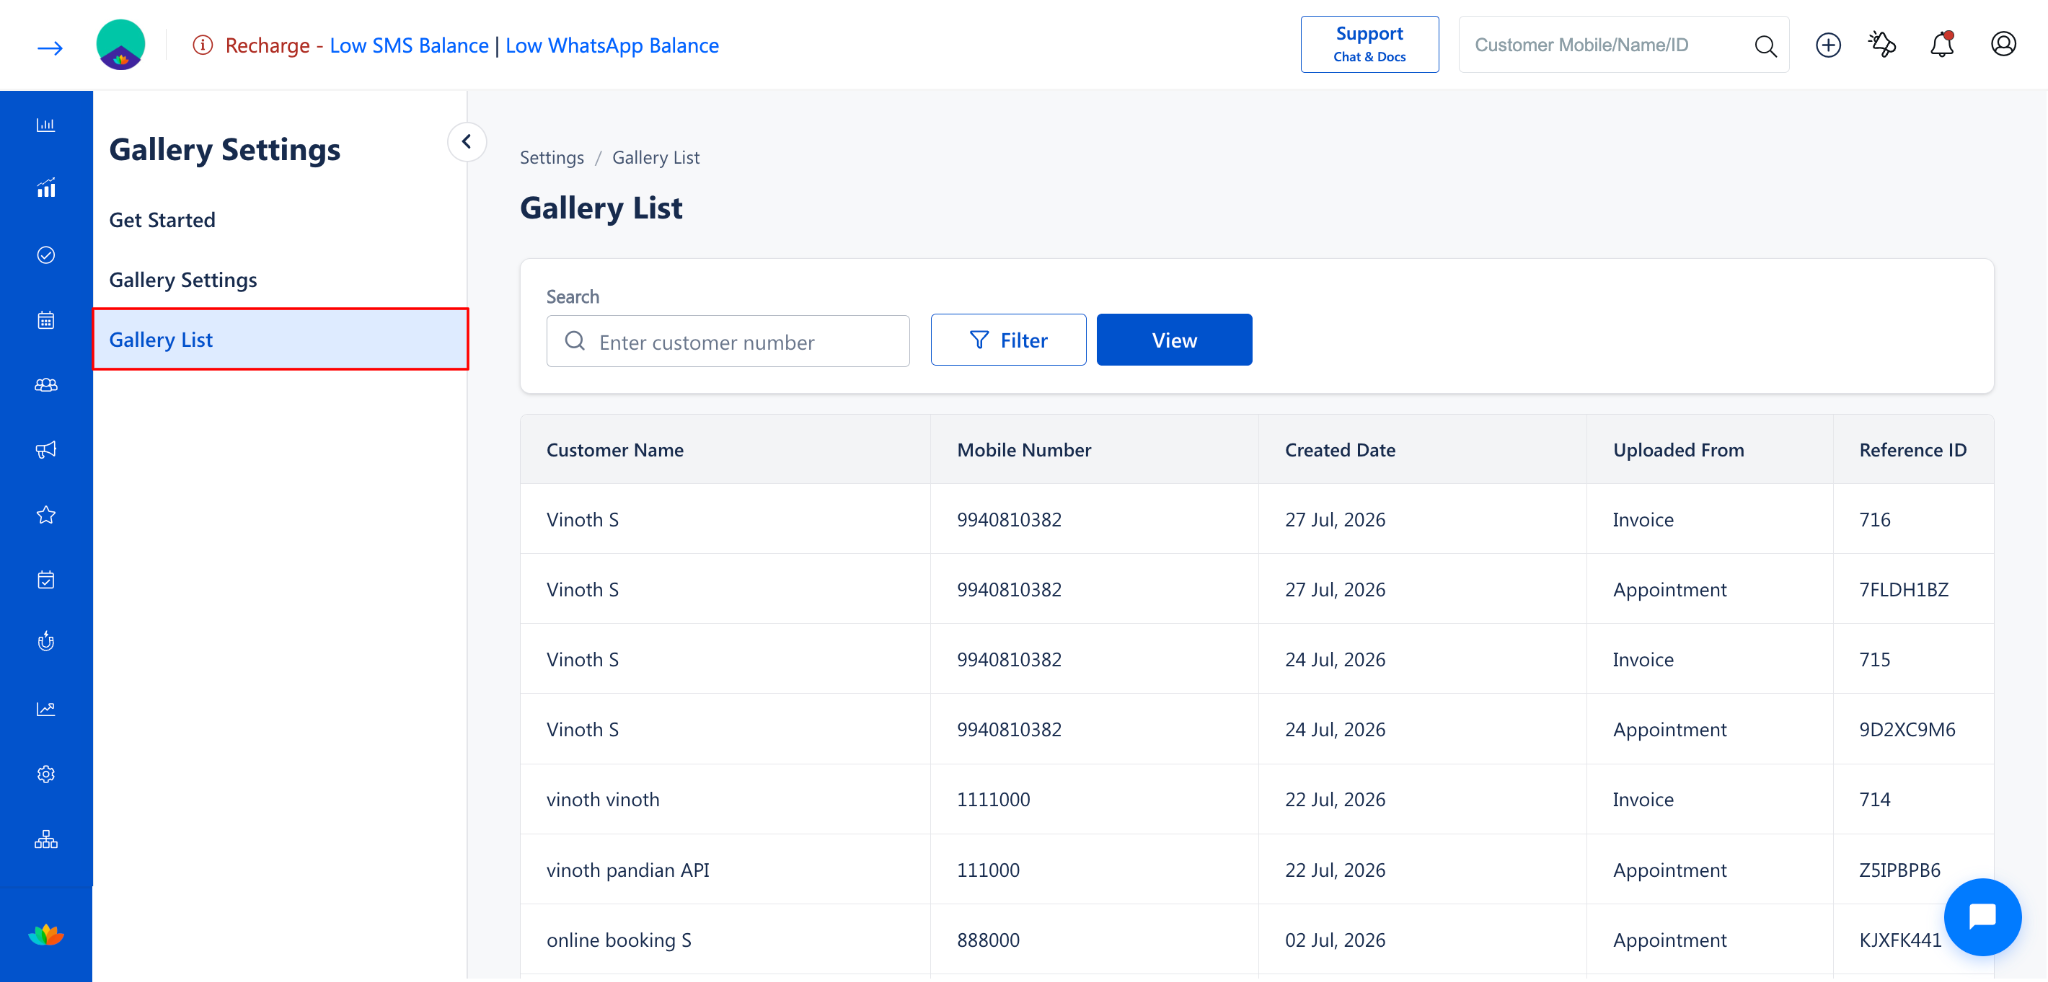
The Gallery List page will display all customer gallery records.
Step 2: Search or Filter the Customer Record
Use the Search field to enter the customer's mobile number, or click the Filter button.
In the Filter panel, select a Filter by option:
Customer Number
Appointment Number
Invoice Number
Optionally, set a Date range using Quick Filters or the calendar.
Click Apply to filter the results.
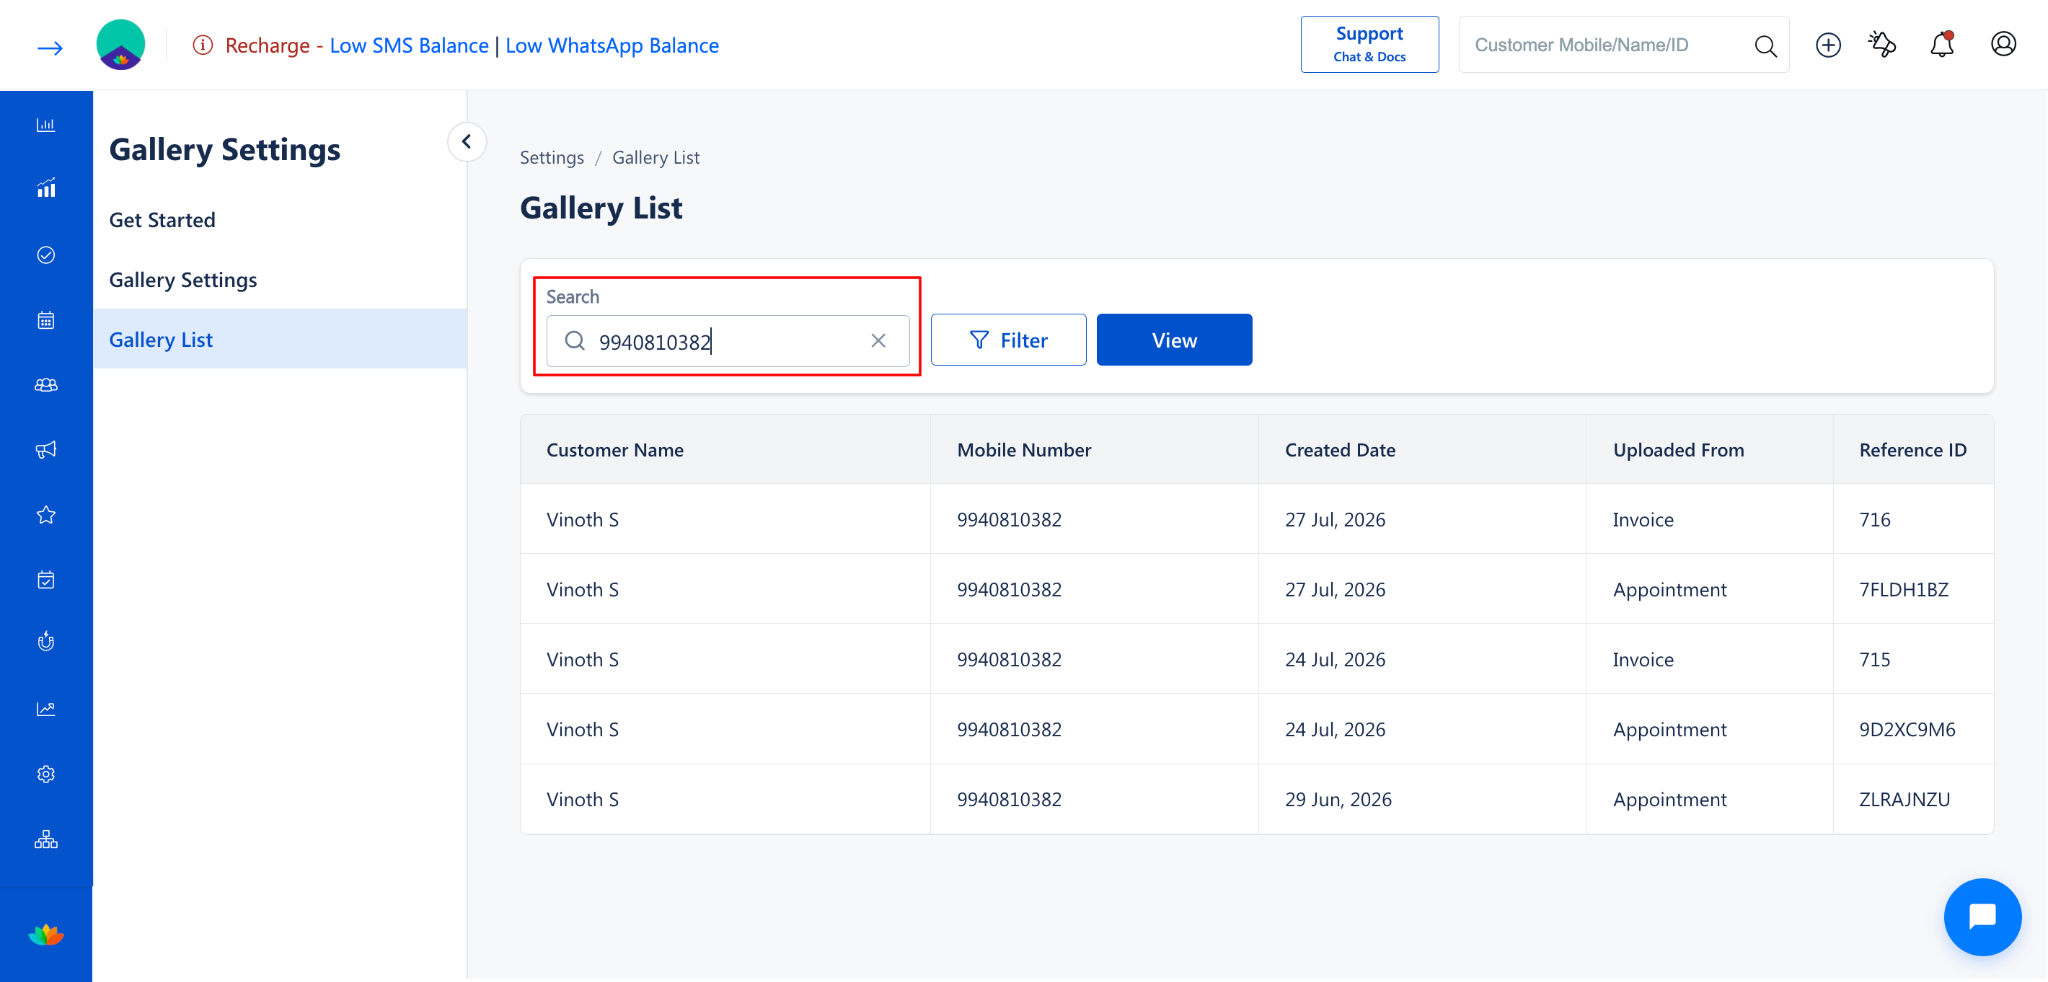
Step 3: View and Select the Customer Record
Review the filtered results in the Gallery List.
Click on the customer record you want to modify.
The Customer Transformation Images dialog will open.
Step 4: Delete the Gallery Images from the Customer
In the Customer Transformation Images dialog:
To Delete an image from a comparison slot: Hover over the image and click the Cancel button.
To delete an image permanently: Click the Delete Button on the image in the left panel.
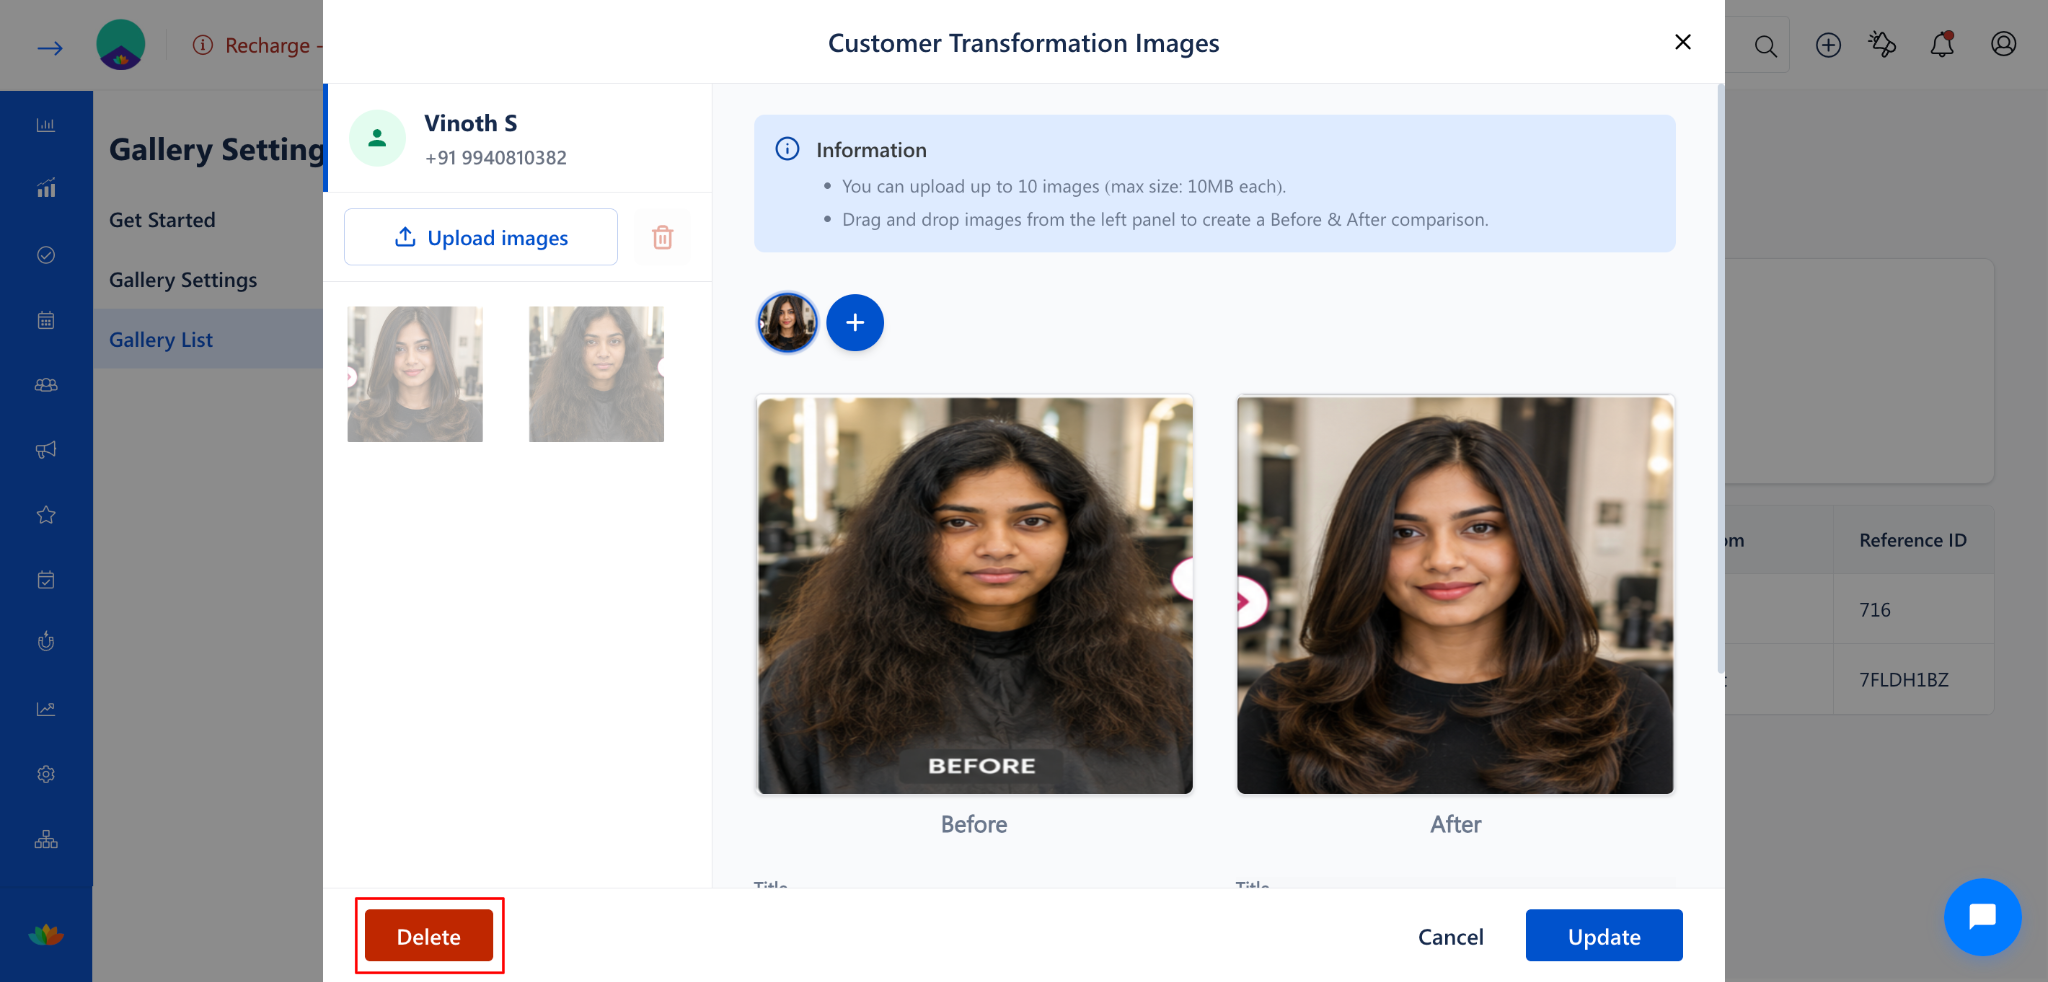
Step 5: Save the Changes
Click the Save button to confirm the removal.
To discard changes, click Cancel to close the dialog without saving.
Use Cases
Remove gallery entries for customers who have requested deletion of their images.
Clean up old transformation records during periodic maintenance.
Delete images for customers whose records need to be consolidated.
Remove test or sample images uploaded during system setup.
Benefits
Centralized management of all gallery entries from a single page.
Efficient bulk cleanup using search and filter options.
Reduces navigation effort compared to visiting individual appointments or invoices.
Supports compliance with customer data deletion requests.
Was this article helpful?
That’s Great!
Thank you for your feedback
Sorry! We couldn't be helpful
Thank you for your feedback
Feedback sent
We appreciate your effort and will try to fix the article