How to Redeem a Purchased Package Service During an Appointment in MioSalon
Overview
When a client has already purchased a package, the front-desk staff can redeem sessions from that package while booking an appointment.
The Purchased Package option on the New Appointment screen allows staff to view all available services within the client’s package, check remaining session counts, select the services to redeem, and schedule the appointment — all in one seamless flow.
No additional payment is required for redeemed sessions since the package has already been paid for.
Navigation Path
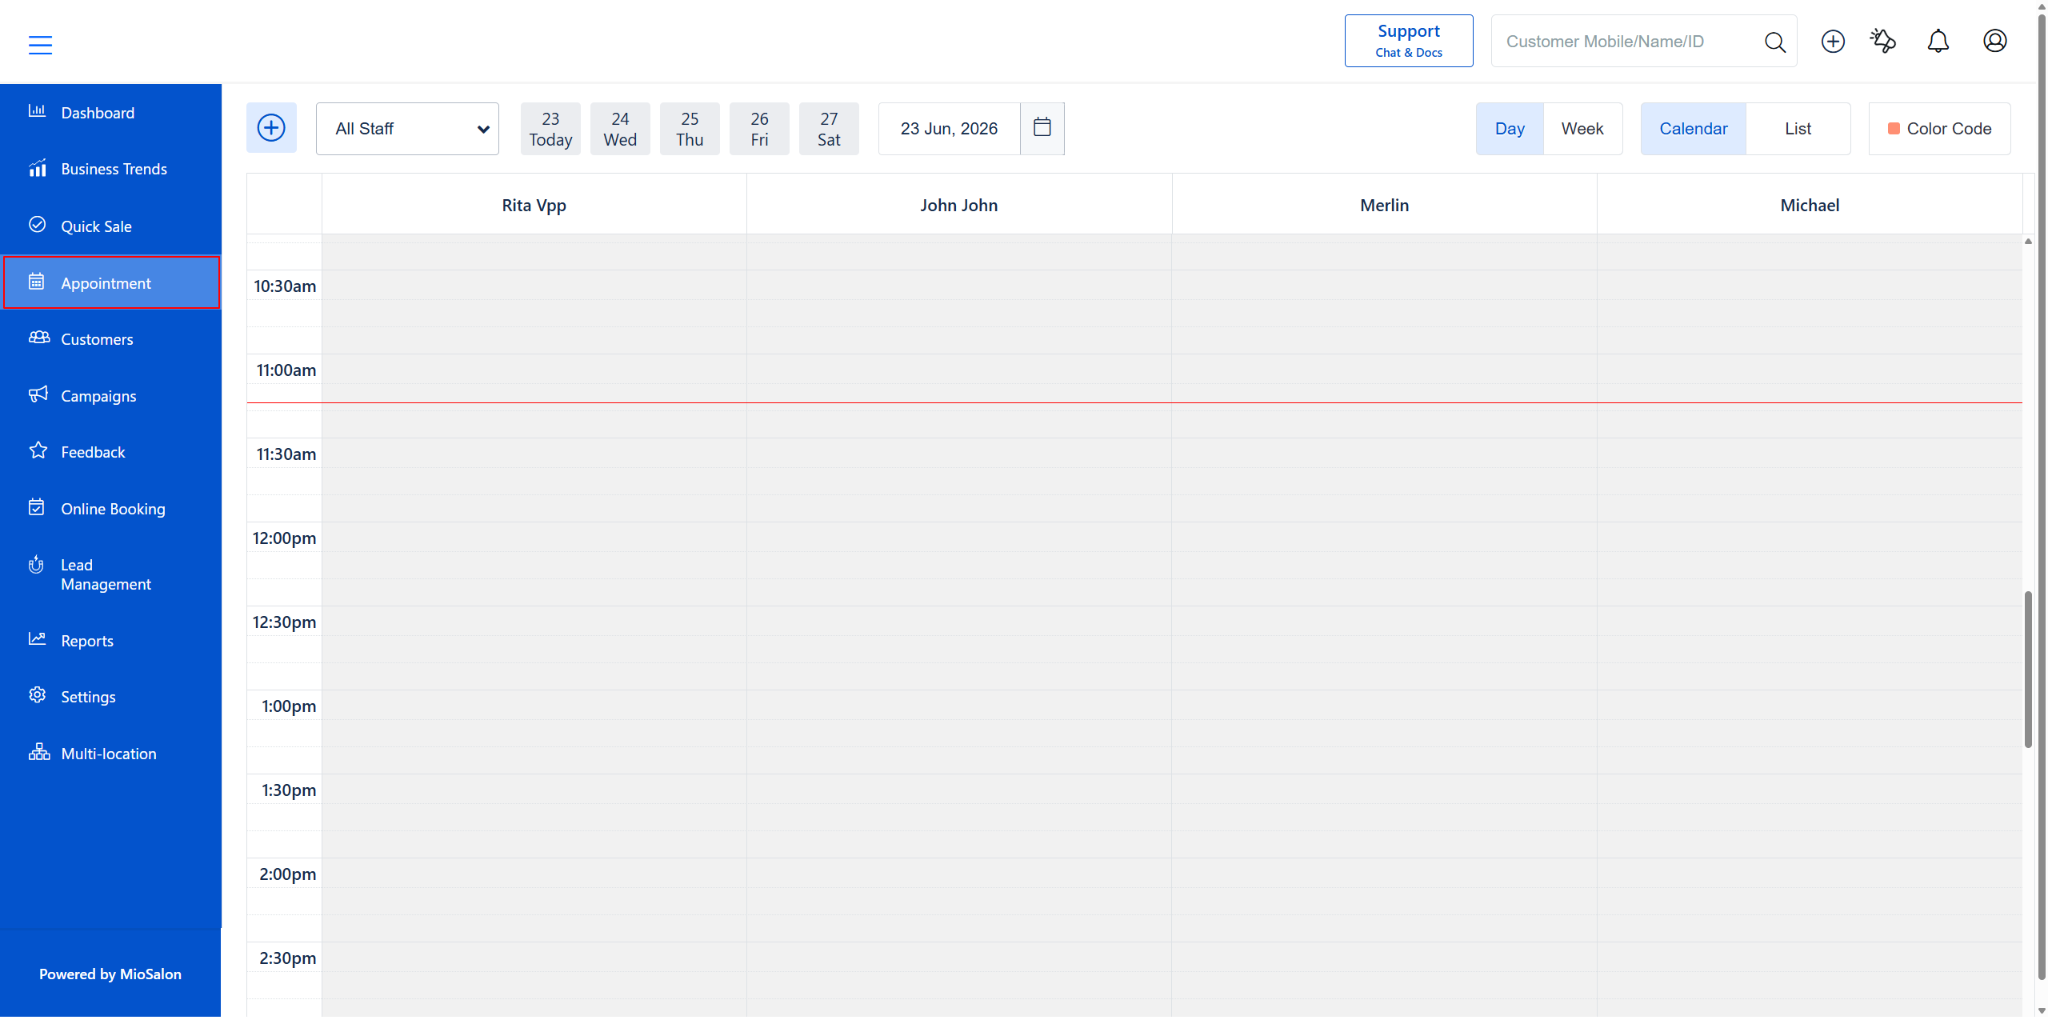
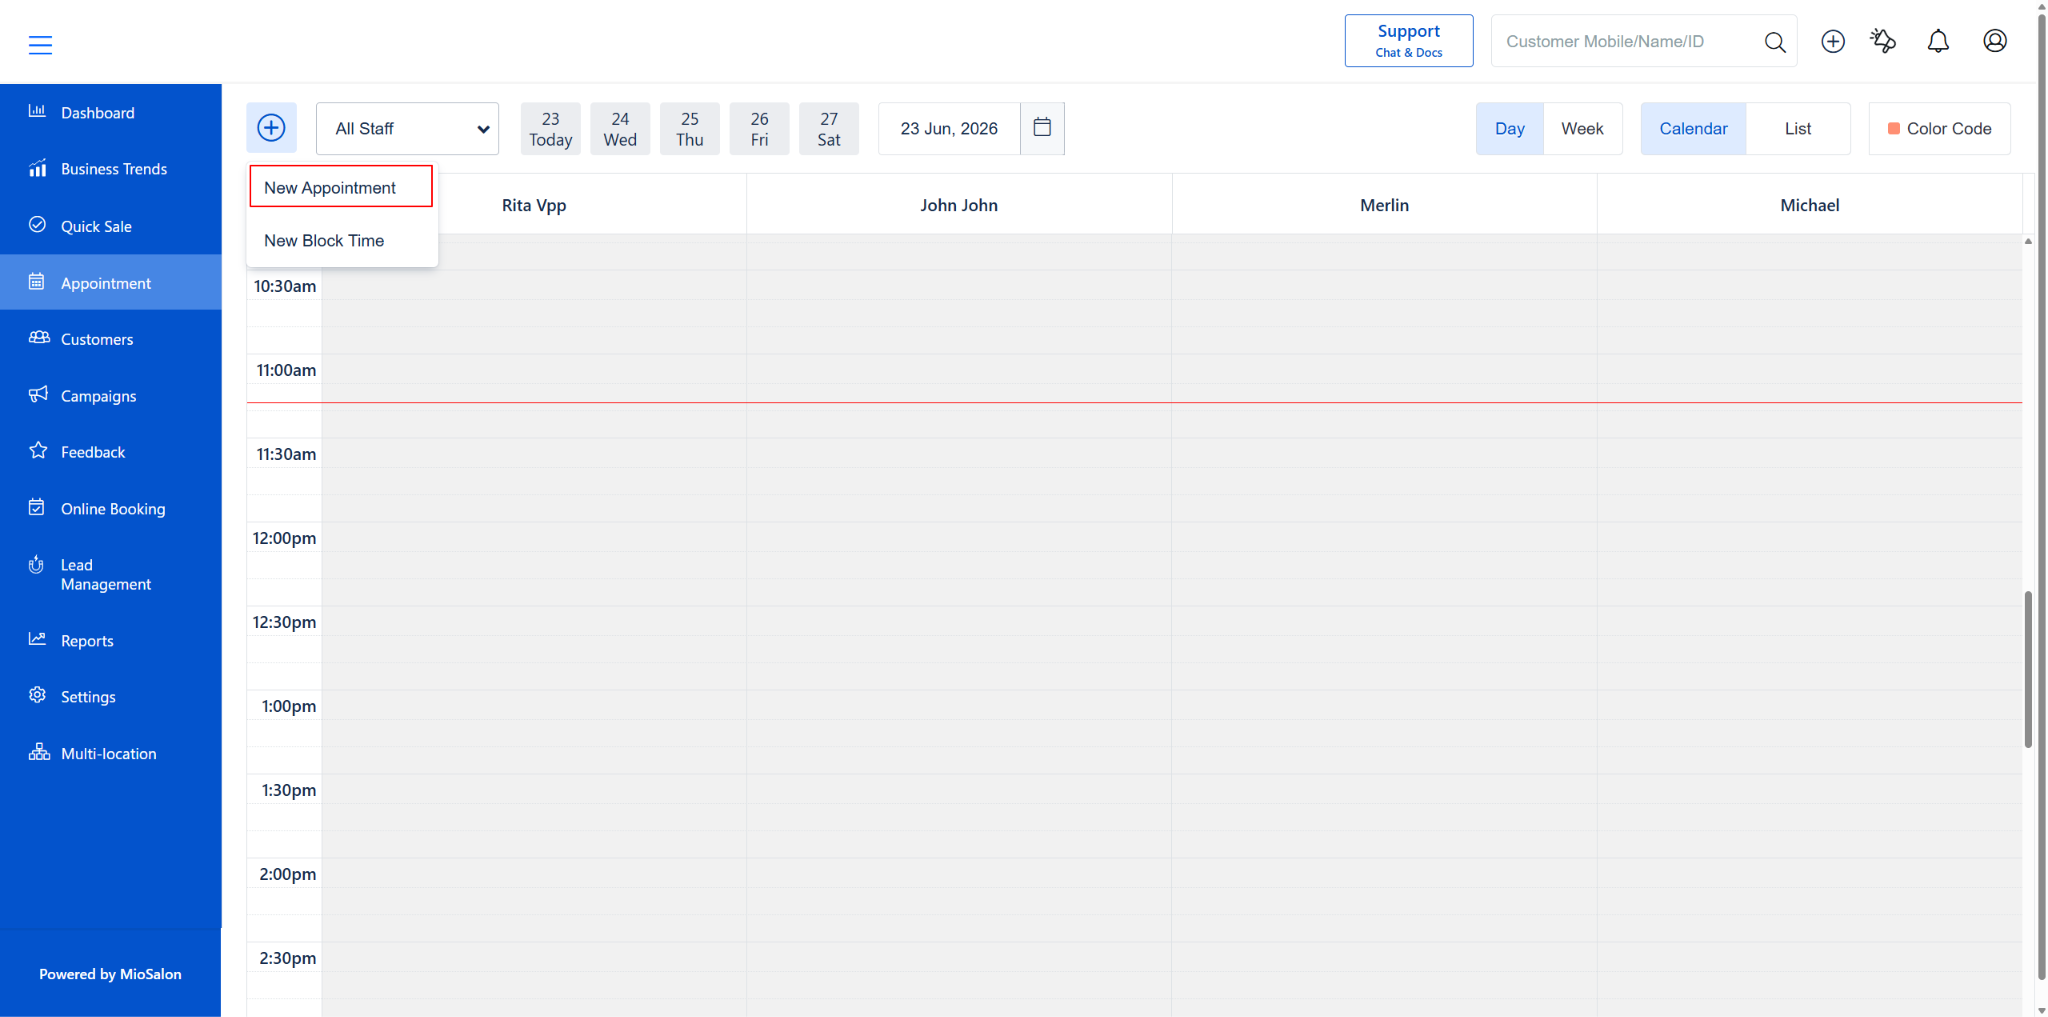
Appointment (left menu) → Plus (+) icon (top-left) → New Booking → Search Client → Click “Purchased Package”
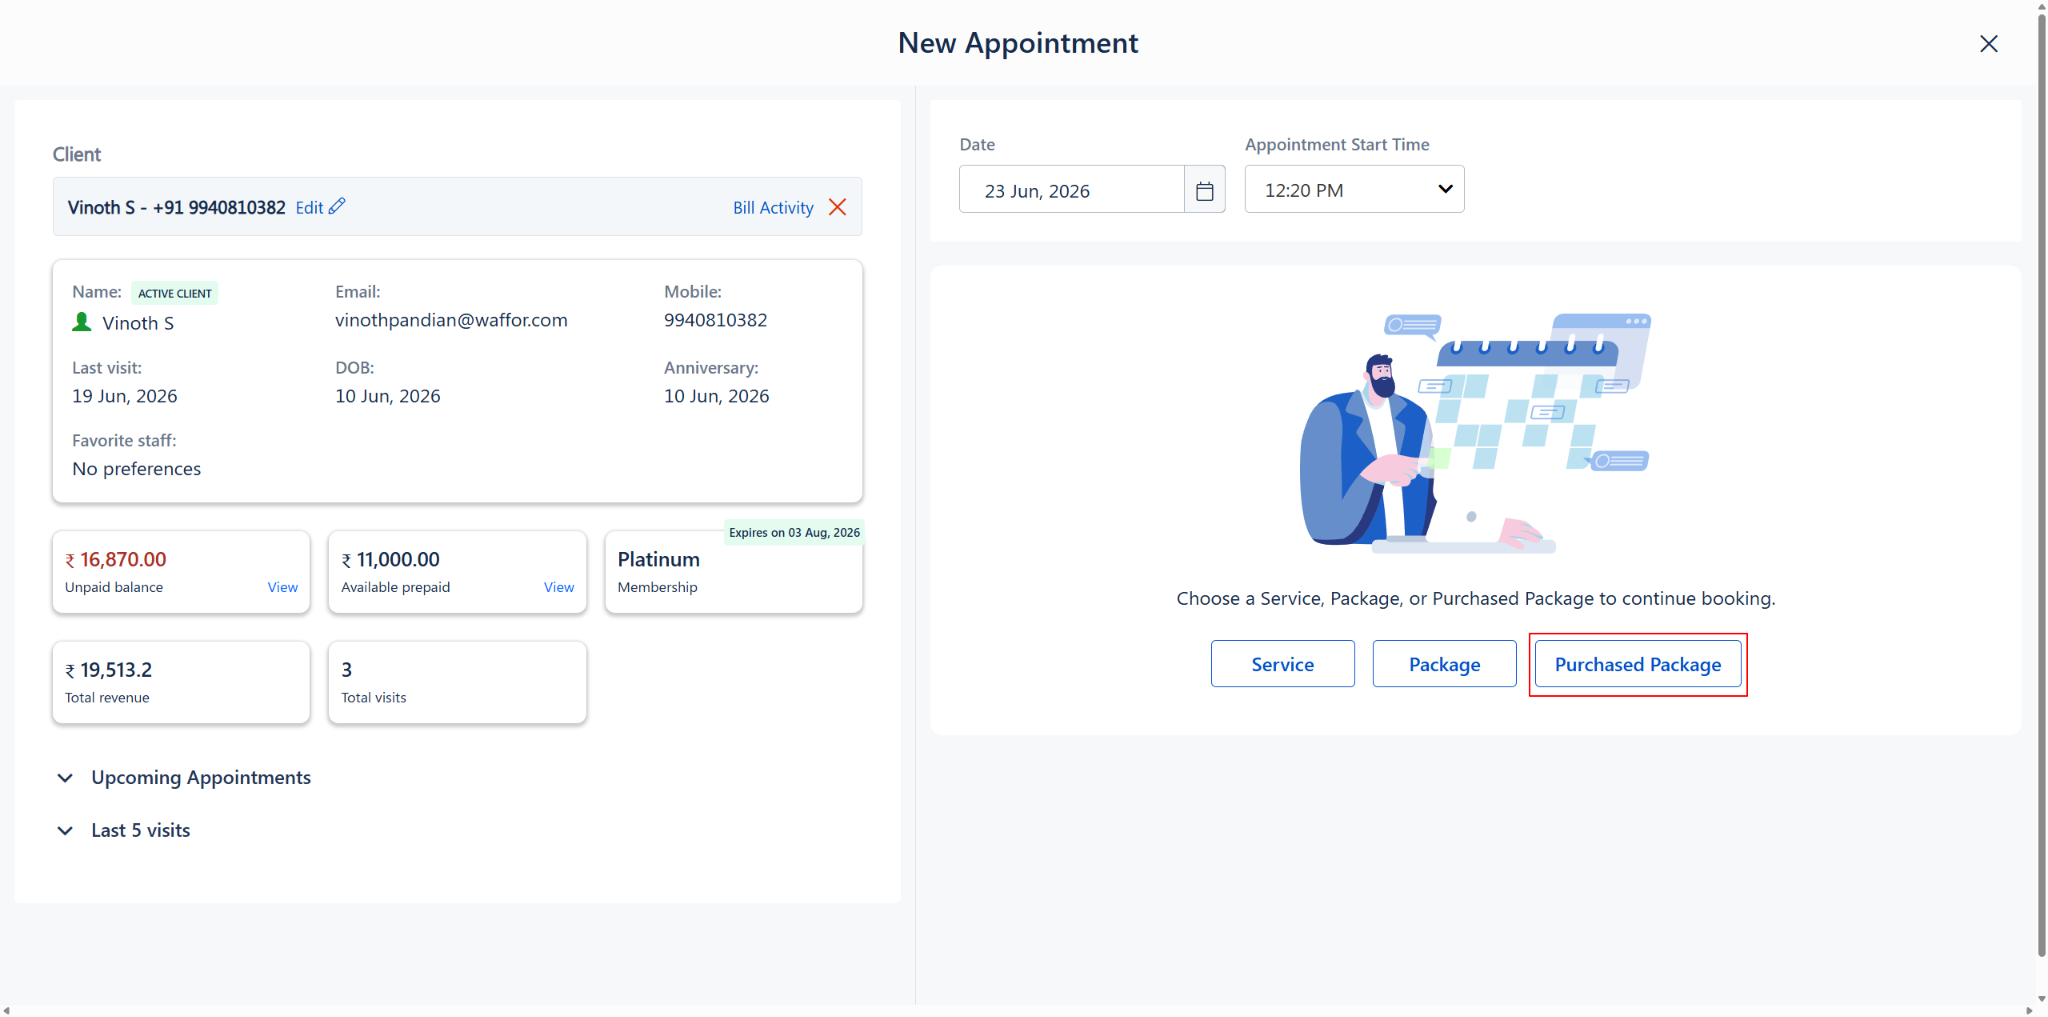
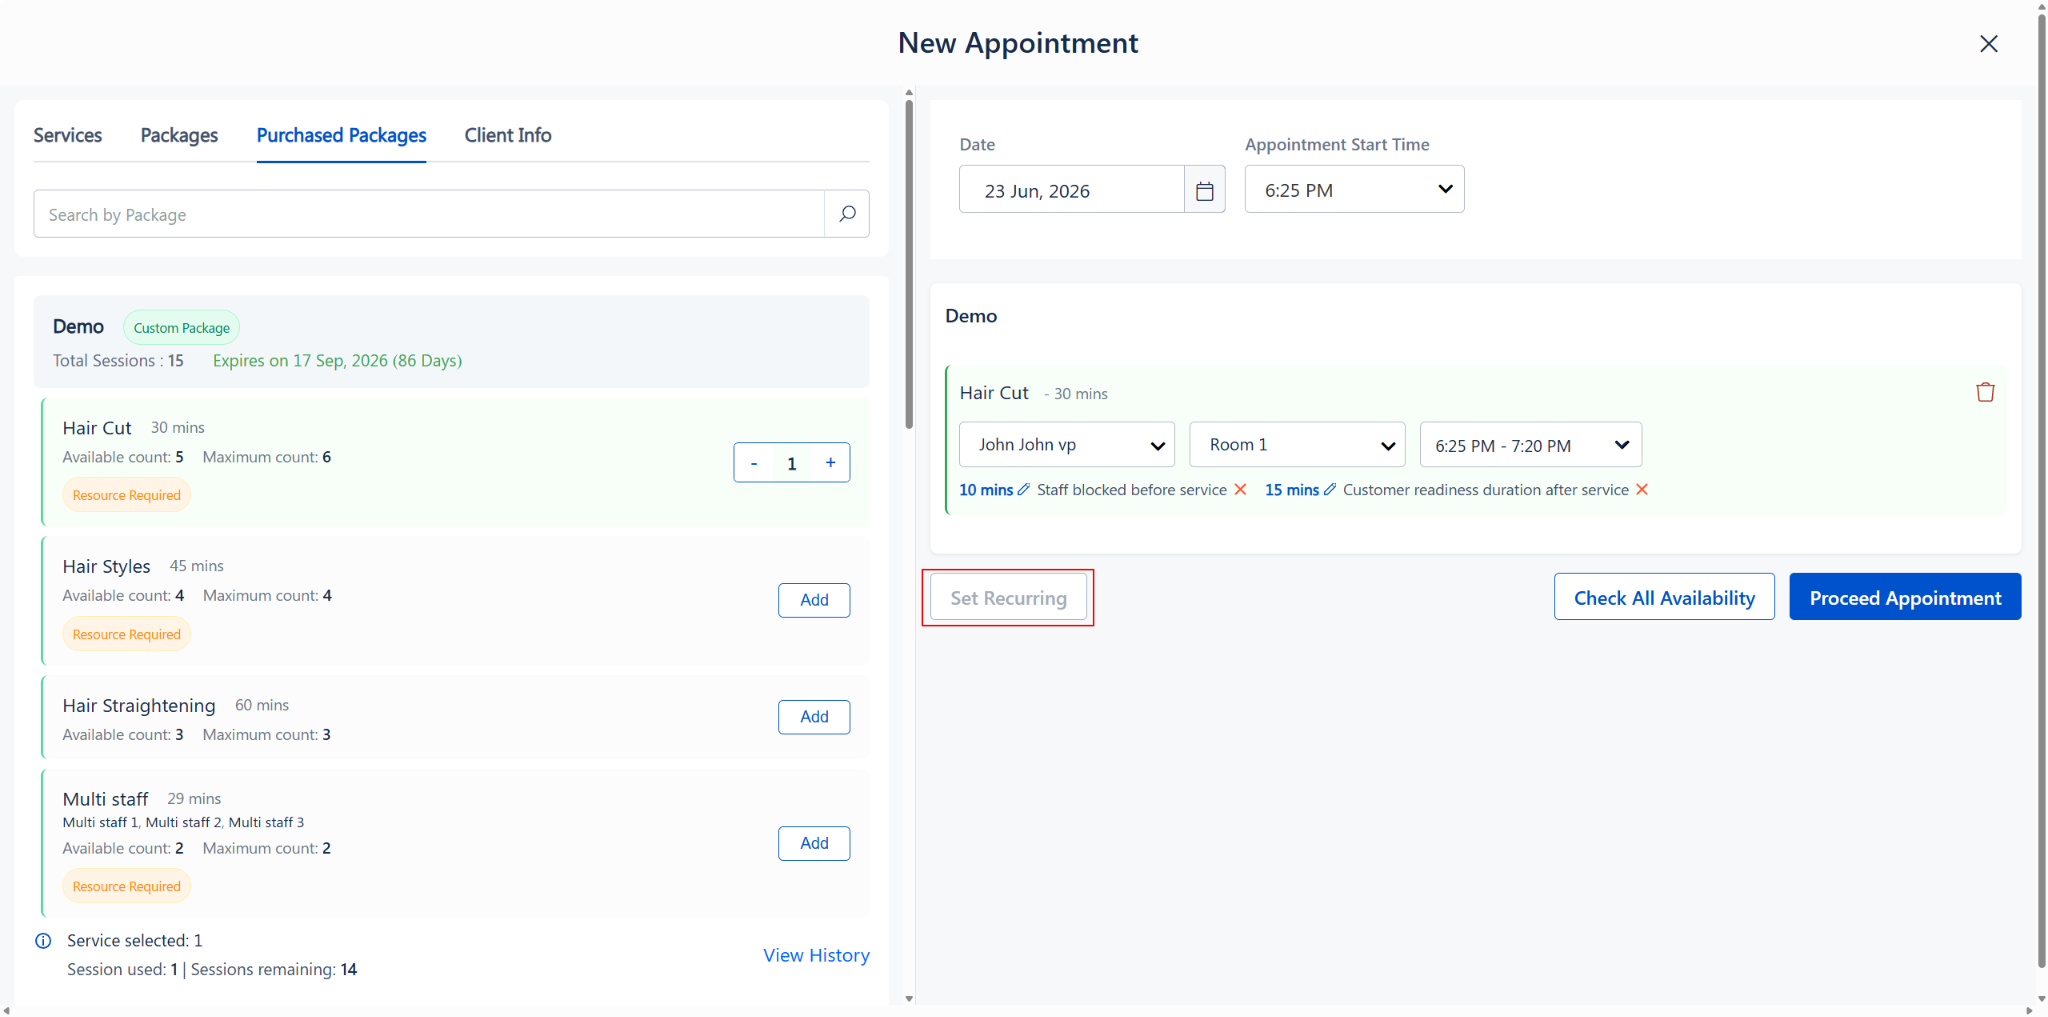
Important Notes:
1. Recurring Appointments: Recurring appointments are not allowed for package service redemptions. The “Set Recurring” option is not available when redeeming a purchased package service.
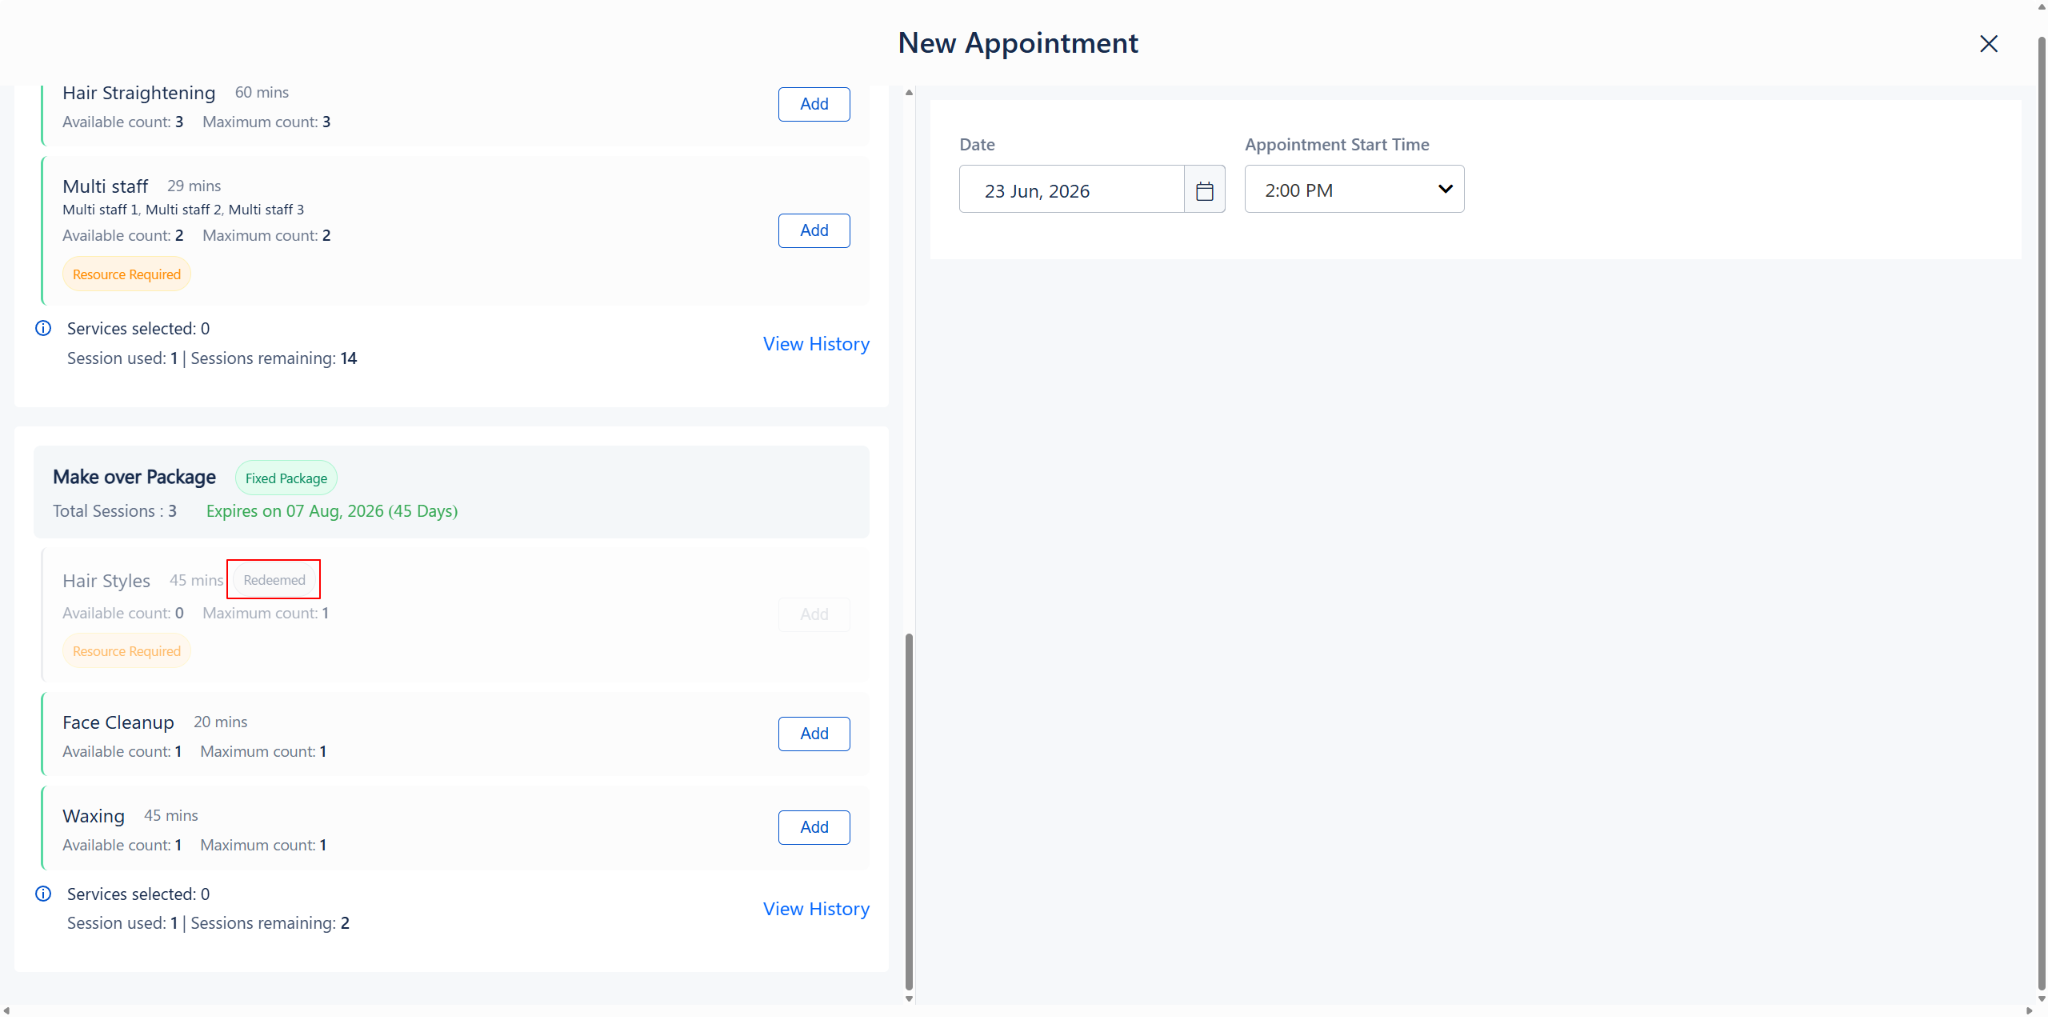
2. Session Tracking: Each service in the package has an Available count (remaining sessions) and a Maximum count (total sessions). Once all sessions for a service are redeemed, that service will show a “Redeemed” badge and the “Add” button will be disabled.
Step-by-Step Instructions
Step 1: Open the Appointment Popup and Select a Client
1. Log in to MioSalon and go to Appointment from the left menu.
2. Click the Plus (+) icon in the top-left corner, then select “New Booking”.
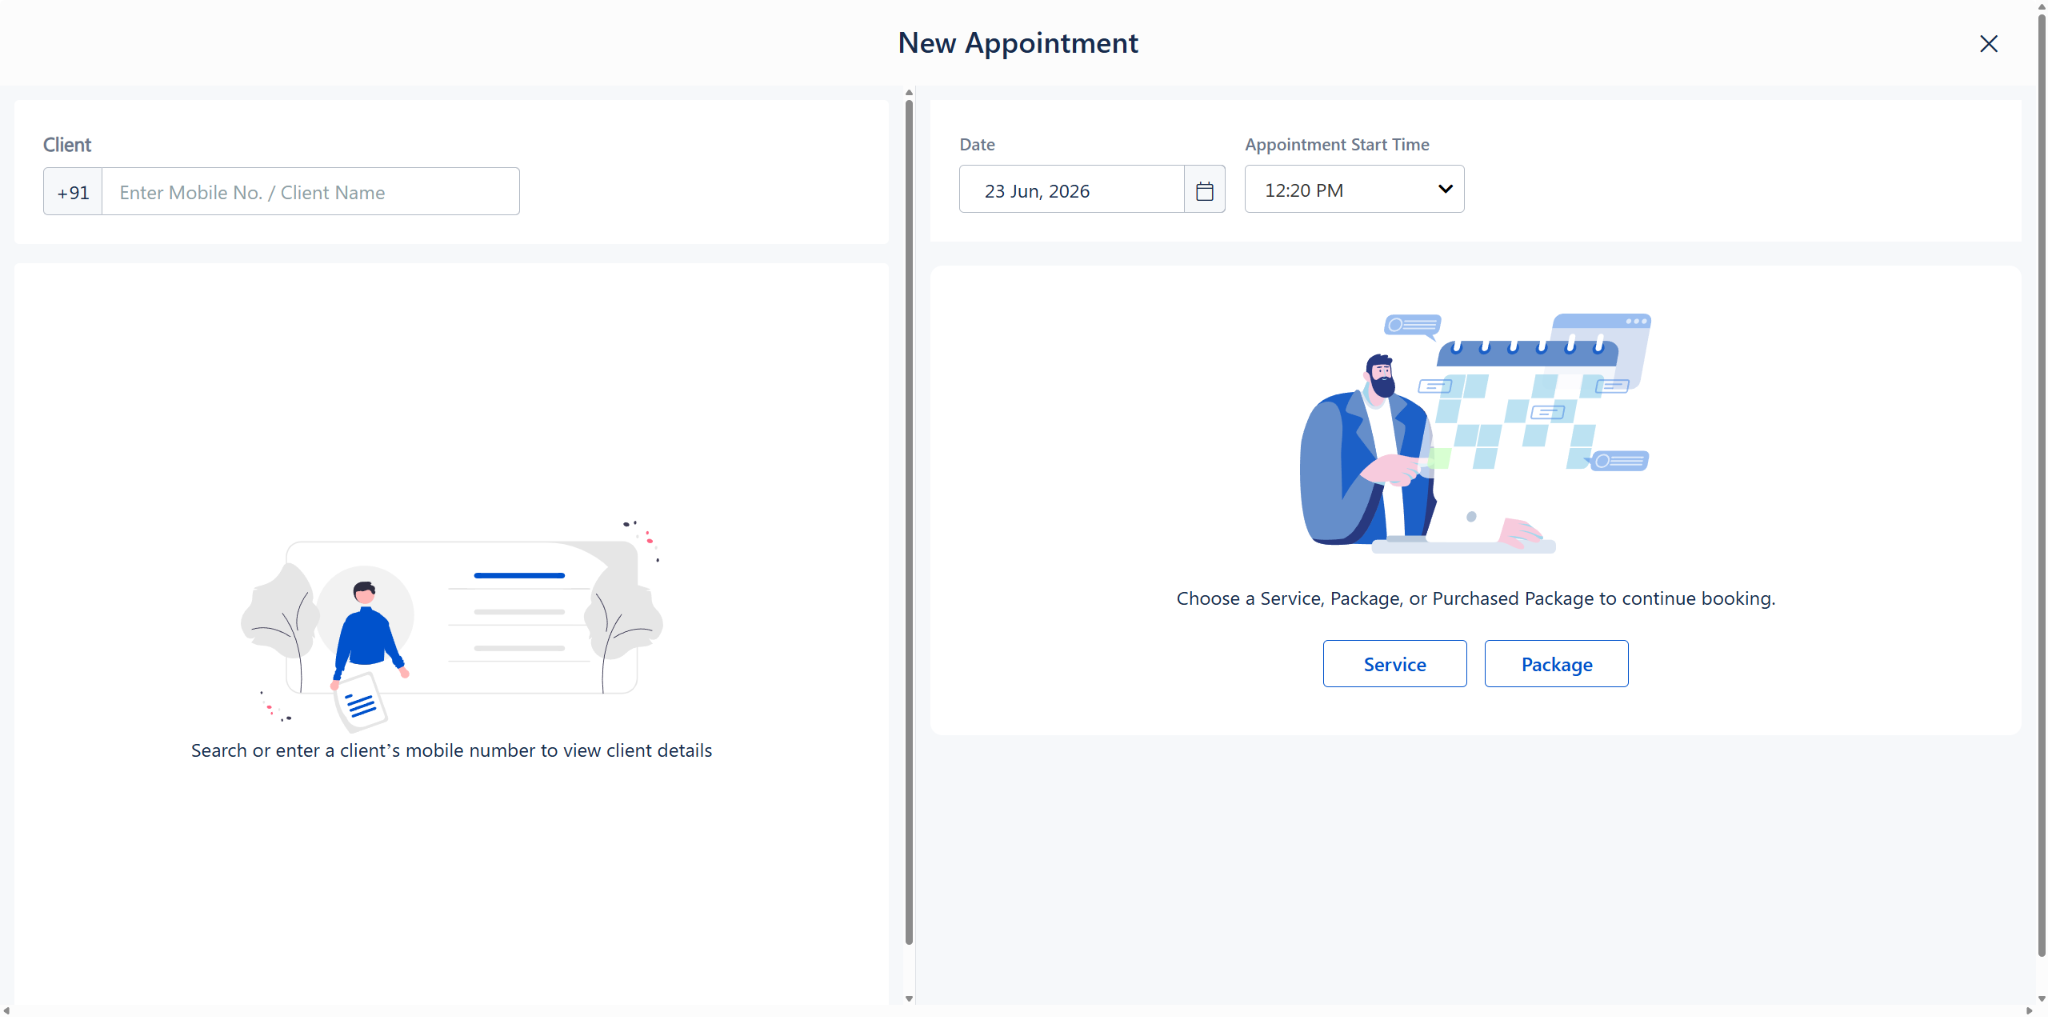
3. In the Client section (left panel), enter the client’s mobile number or name.
4. The Date and Appointment Start Time on the right panel are automatically set to the current date and time. You only need to change these if you want to schedule the appointment for a different date or time.
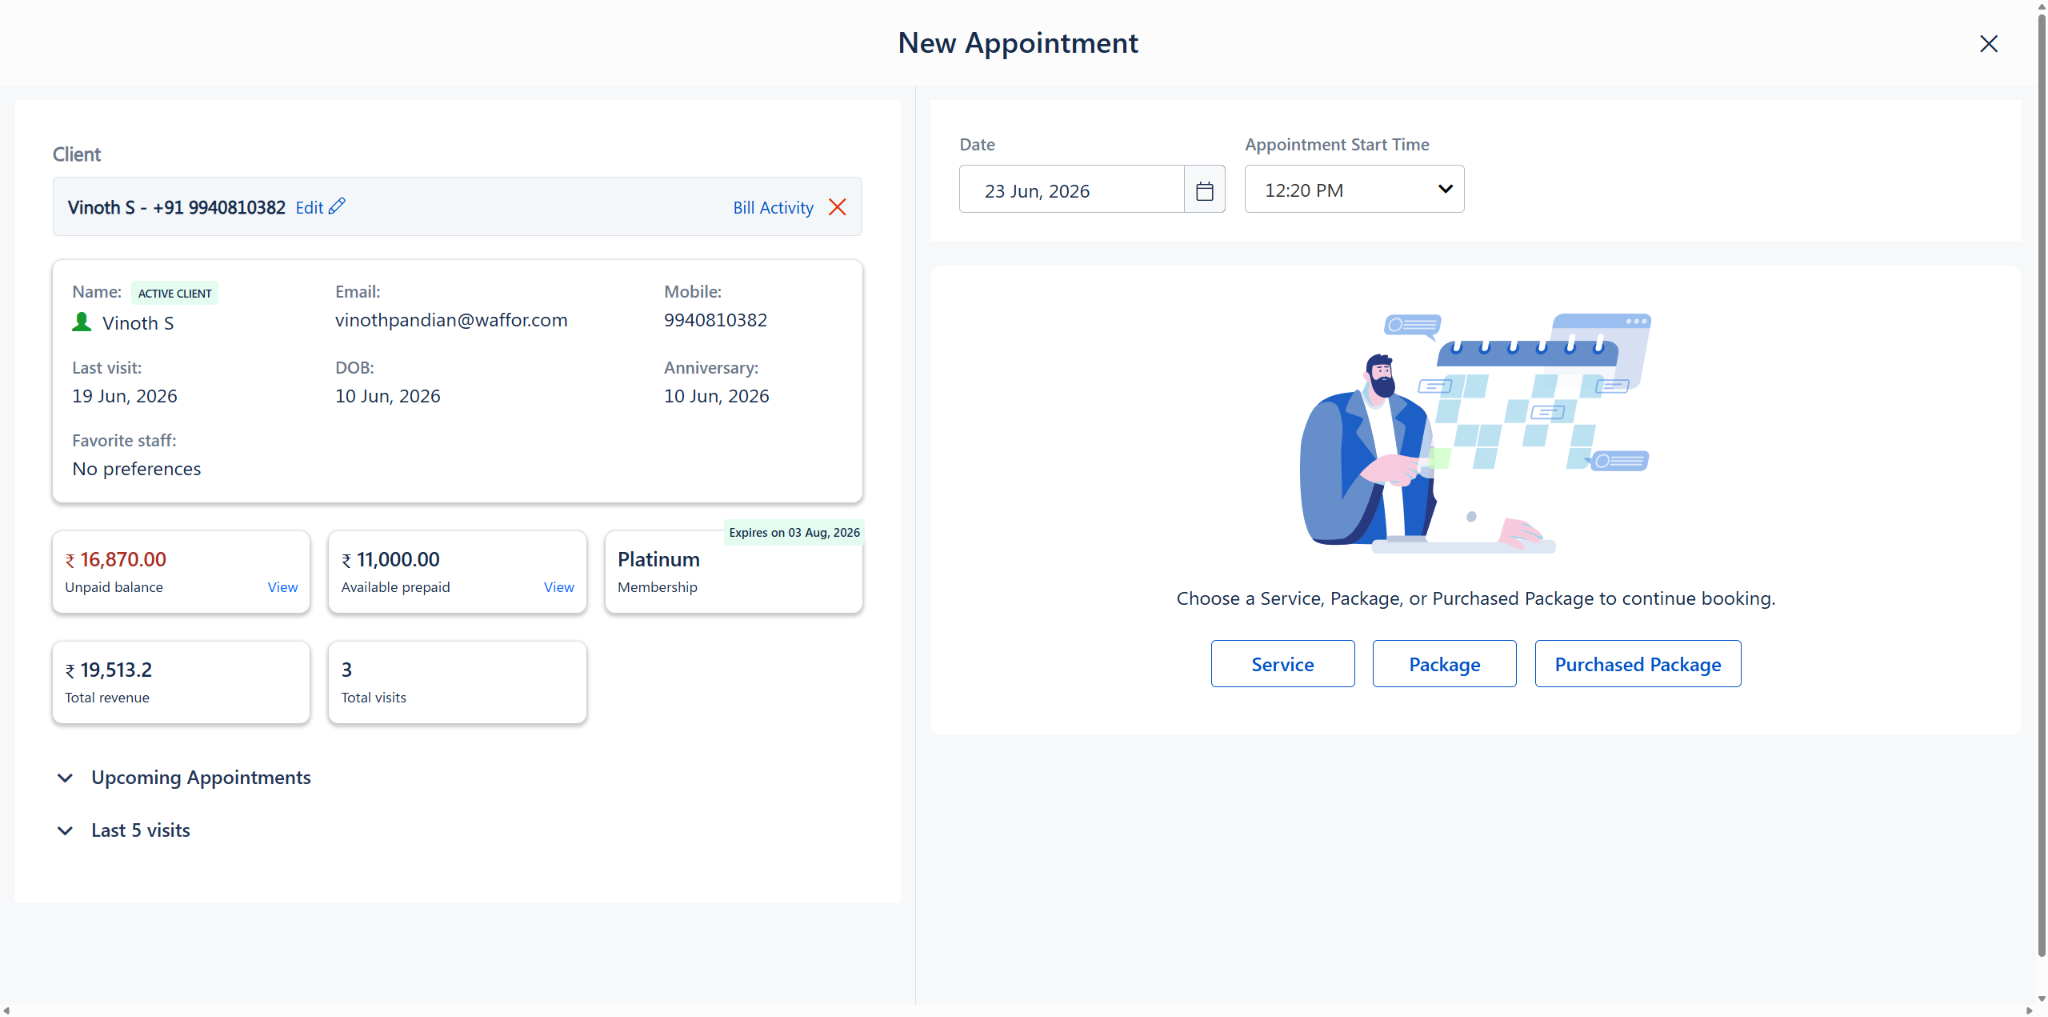
Once the client is selected, the Client Information Card loads on the left panel with their profile, financial summary tiles (Unpaid Balance, Available Prepaid, Membership, Total Revenue, Total Visits), and sections for Upcoming Appointments and Last 5 Visits.
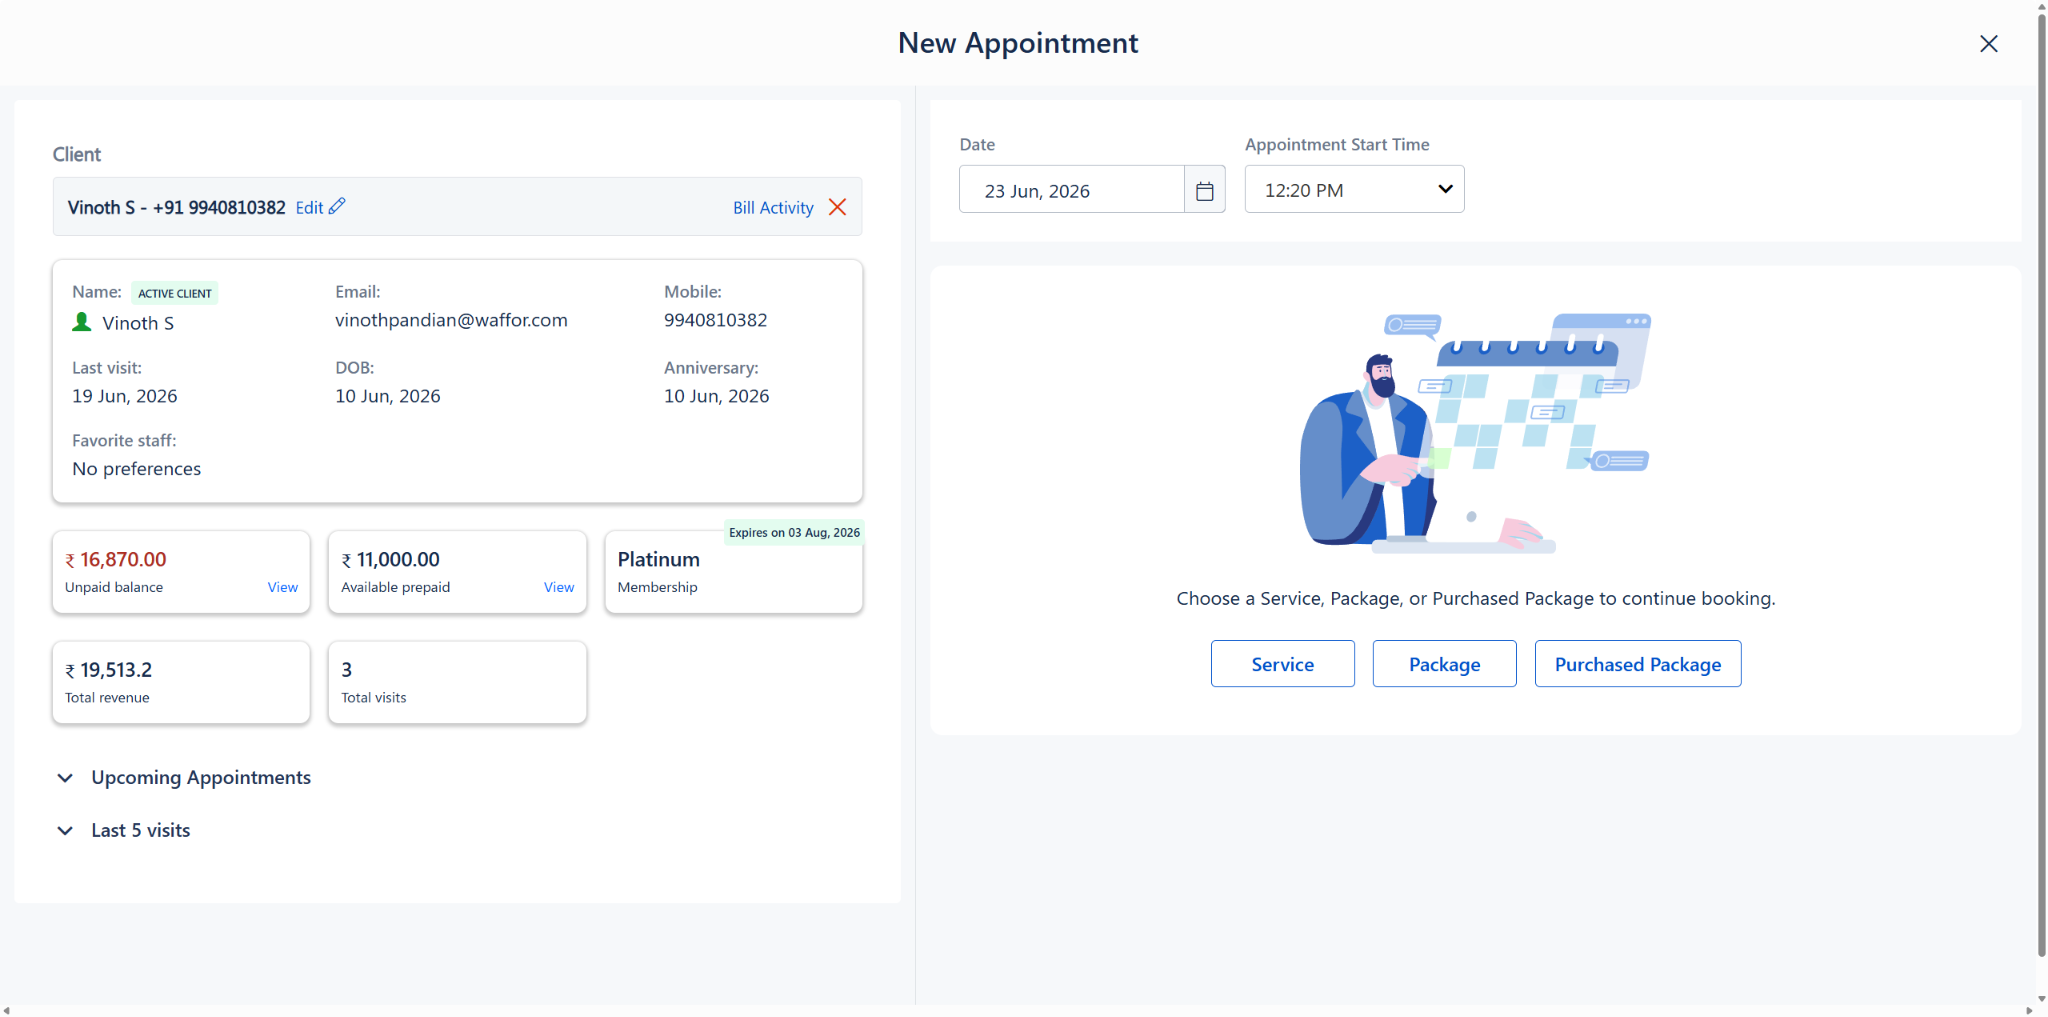
Client selected with profile details and Purchased Package button visible
Step 2: Choose “Purchased Package” as the Booking Type
On the right panel, the prompt reads: “Choose a Service, Package, or Purchased Package to continue booking.”
Click the “Purchased Package” button. This option is only visible when the selected client has an active purchased package on their profile.
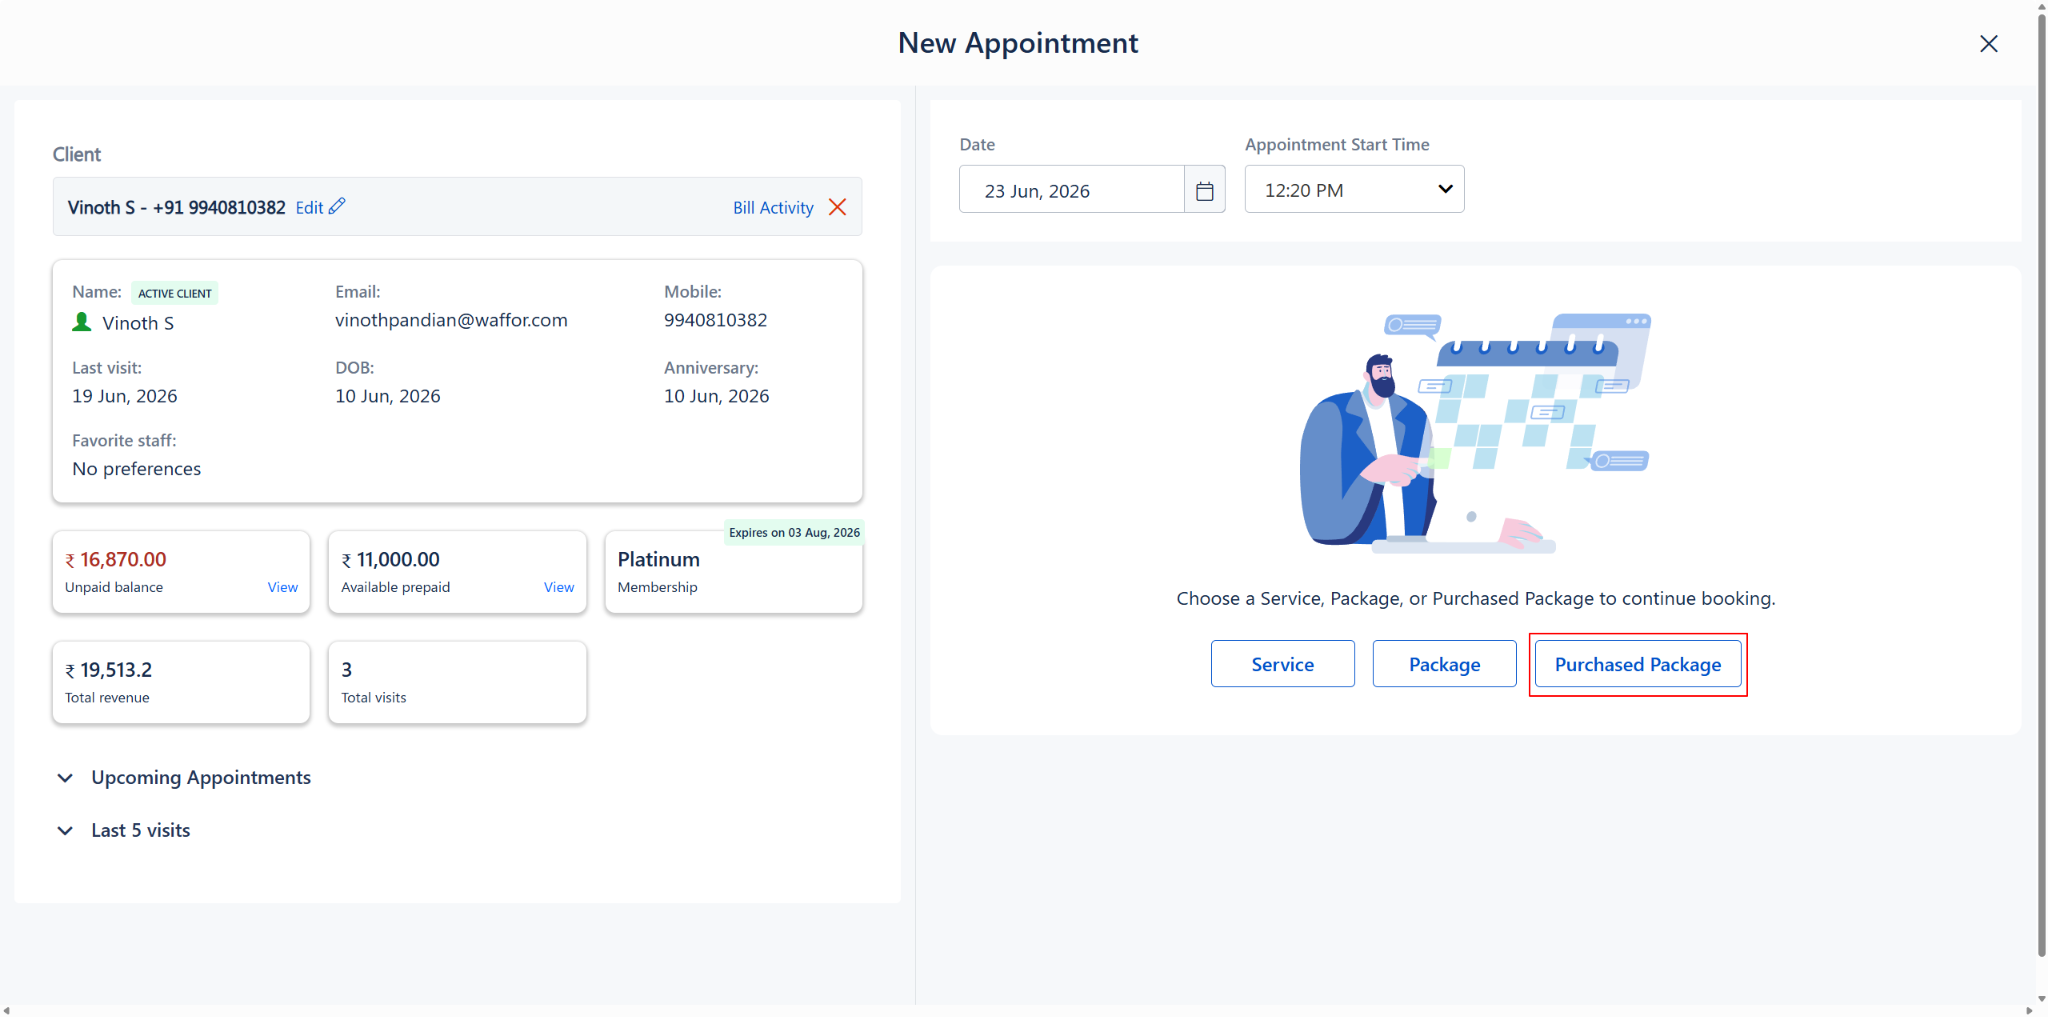
New Appointment popup with Purchased Package button highlighted
Step 3: Browse Available Services in the Purchased Package
After clicking “Purchased Package”, the left panel switches to the Purchased Packages tab. The client’s purchased package is displayed with the following details:
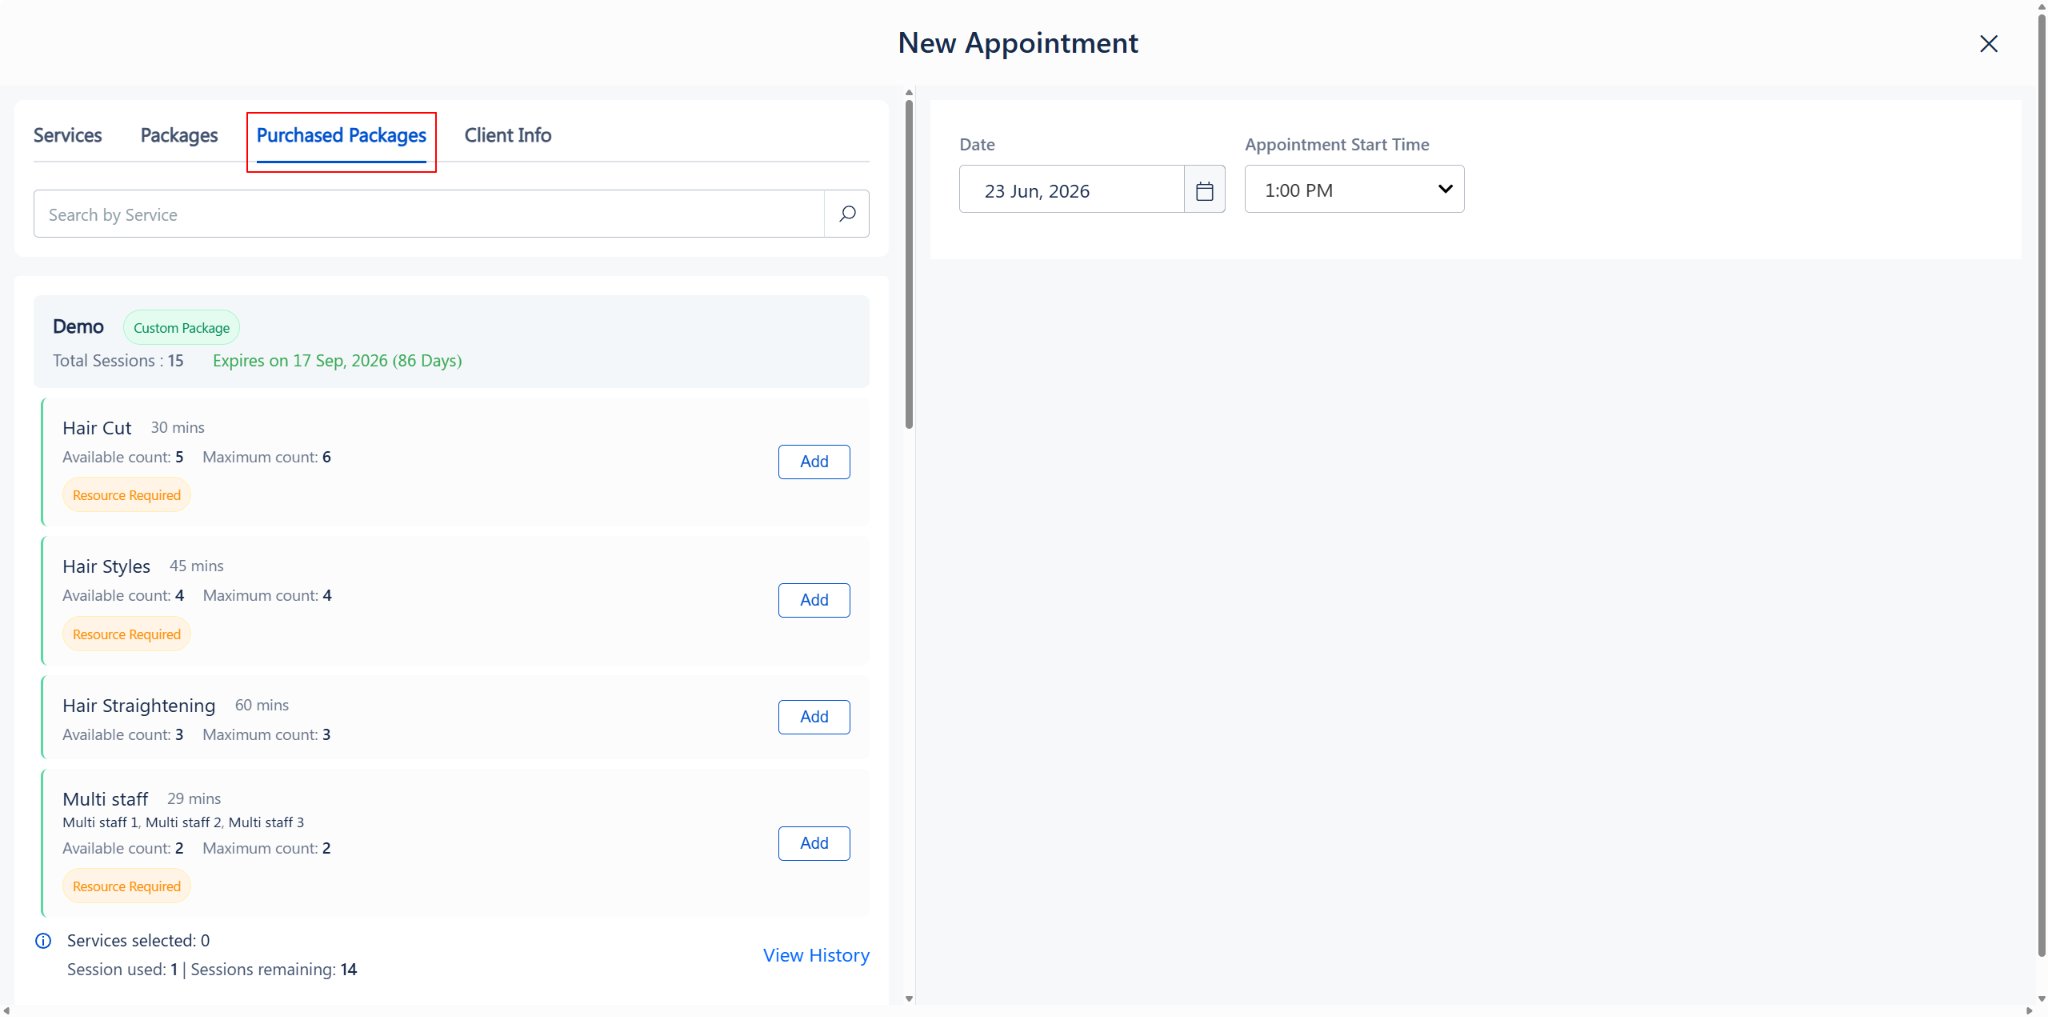
· Package Name and Type (e.g., Pongal offer — Custom Package)
· Total Sessions — The total number of sessions included in the package
· Expiry Date and Validity (e.g., Expires on 30 Sep, 2026 — 100 Days)
Below the package header, all services included in the package are listed. Each service card shows:
At the bottom of the panel, a session tracker displays:
- Services selected — Number of services added to this appointment
- Session used — Total sessions already redeemed from this package
- Sessions remaining — Sessions still available for future bookings
- View History — Click to view the complete redemption history
Purchased Packages tab showing available services with session counts
Step 4: View Package Redemption History
Click the “View History” link at the bottom-right of the left panel to open the Purchased Package History popup. This popup shows:
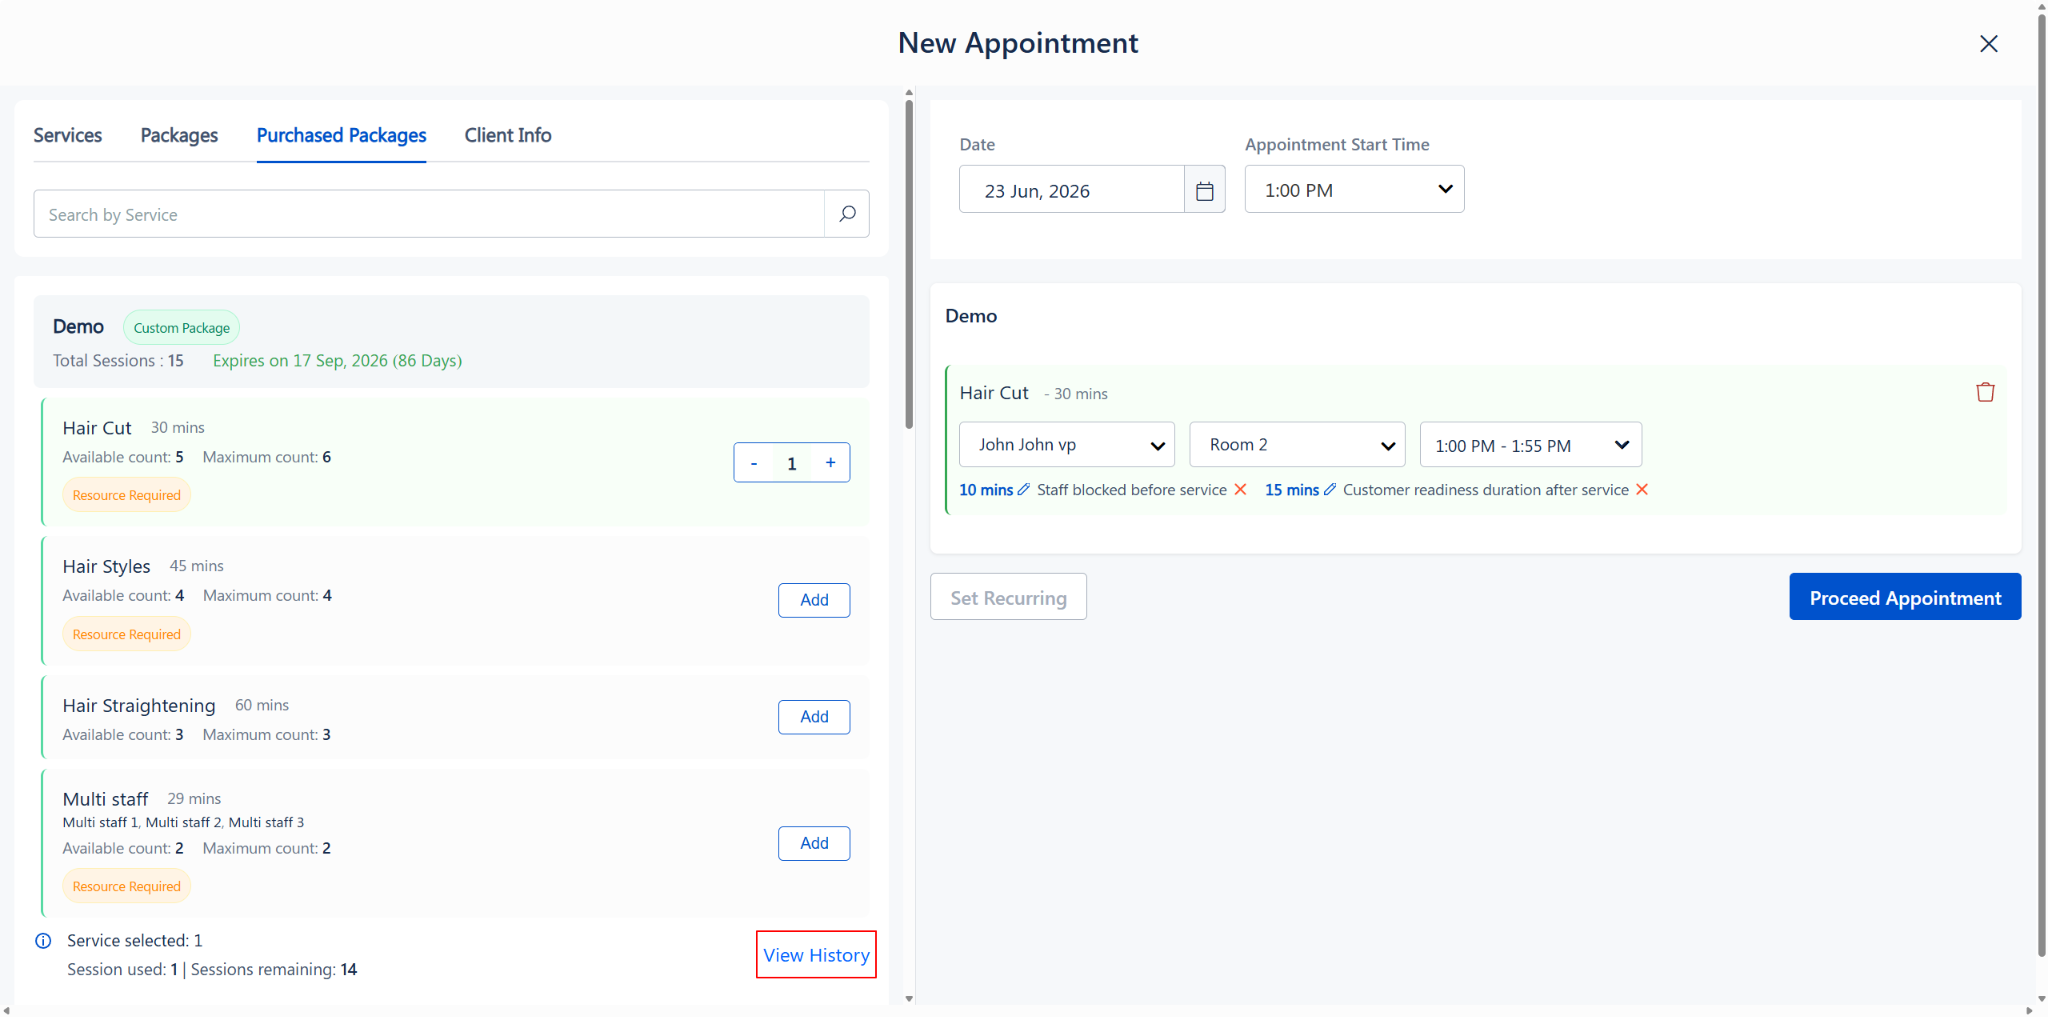
· Package name, type, total sessions, and expiry details
· A table listing all previously redeemed sessions with the Date and Service name along with the staff who performed it
This helps staff verify what the client has already availed before scheduling the next session.
NOTE: -
The redemption records in this popup are displayed only after the redeemed service has been converted into a bill. If a redeemed service has not yet been billed, it will not appear in the history.
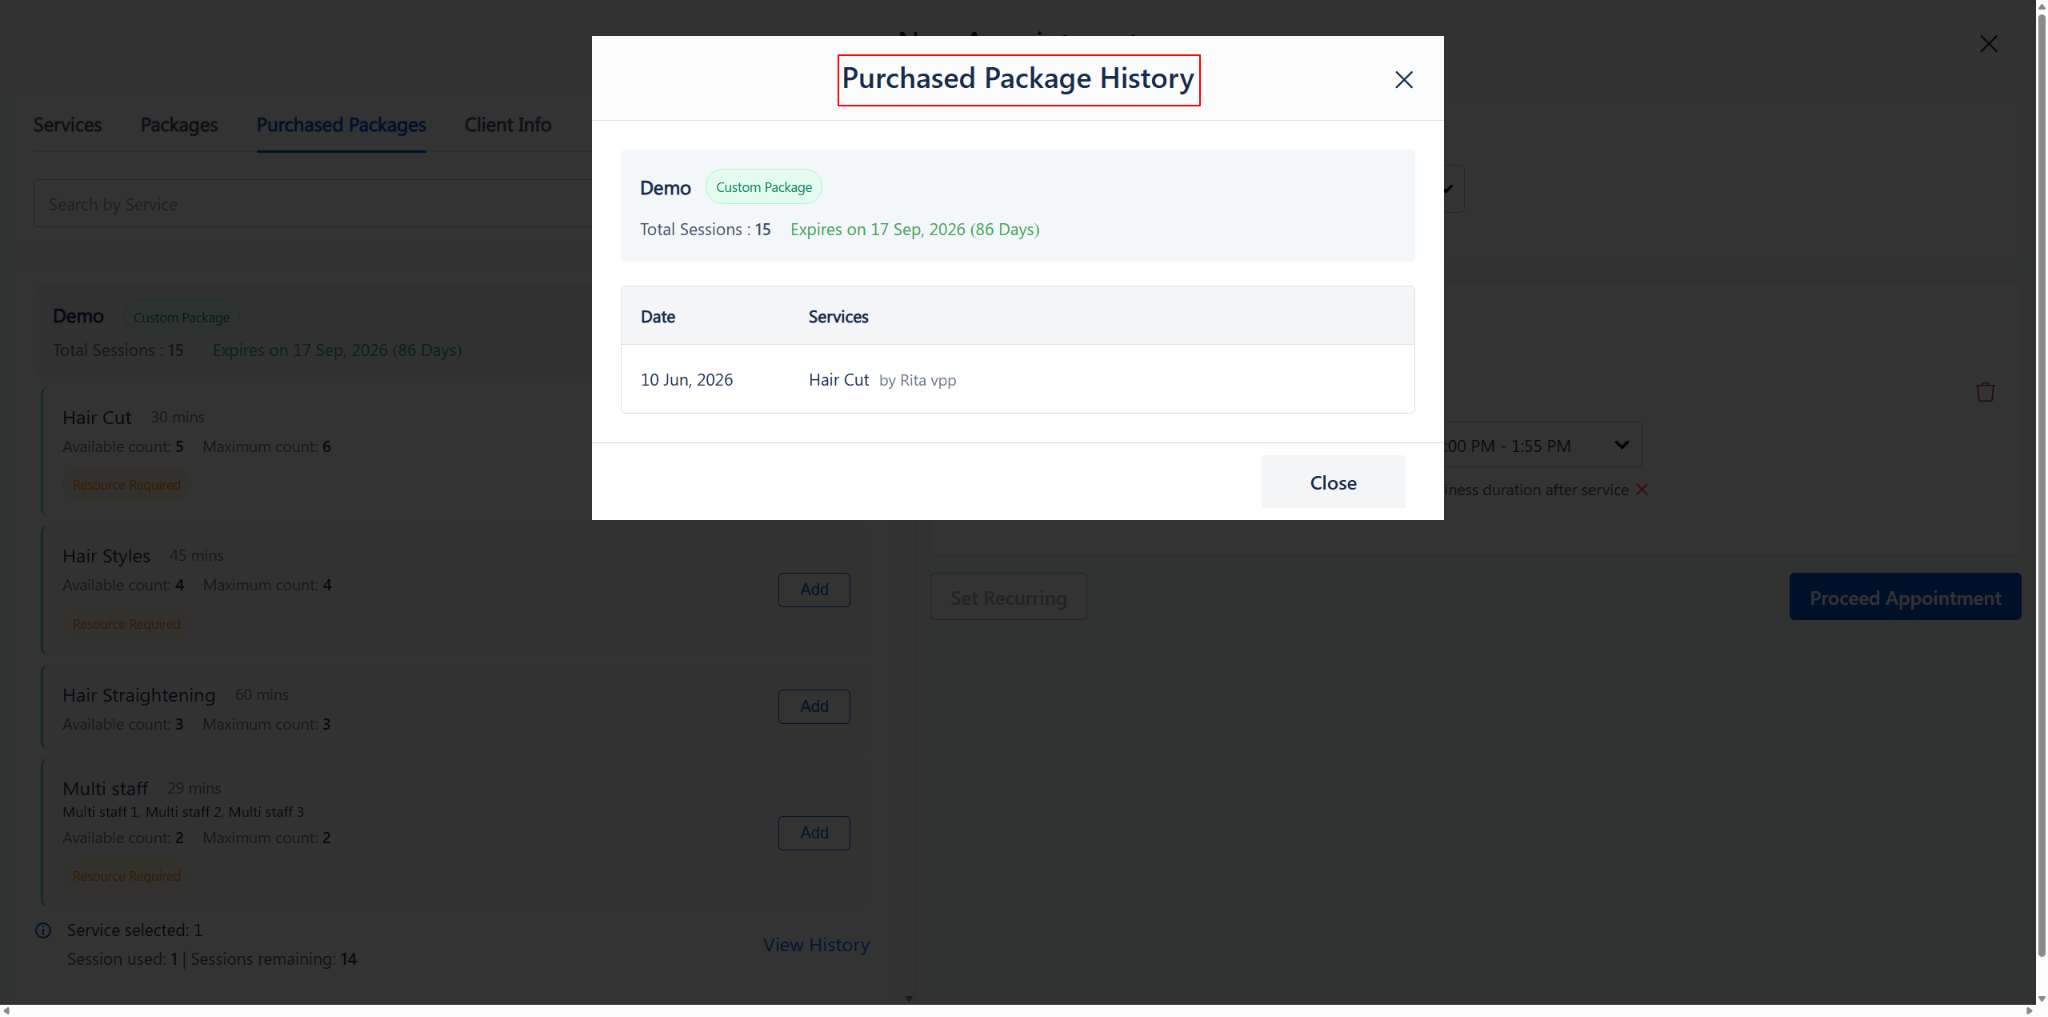
Purchased Package History popup showing past redemption records
Step 5: Add Services to the Appointment
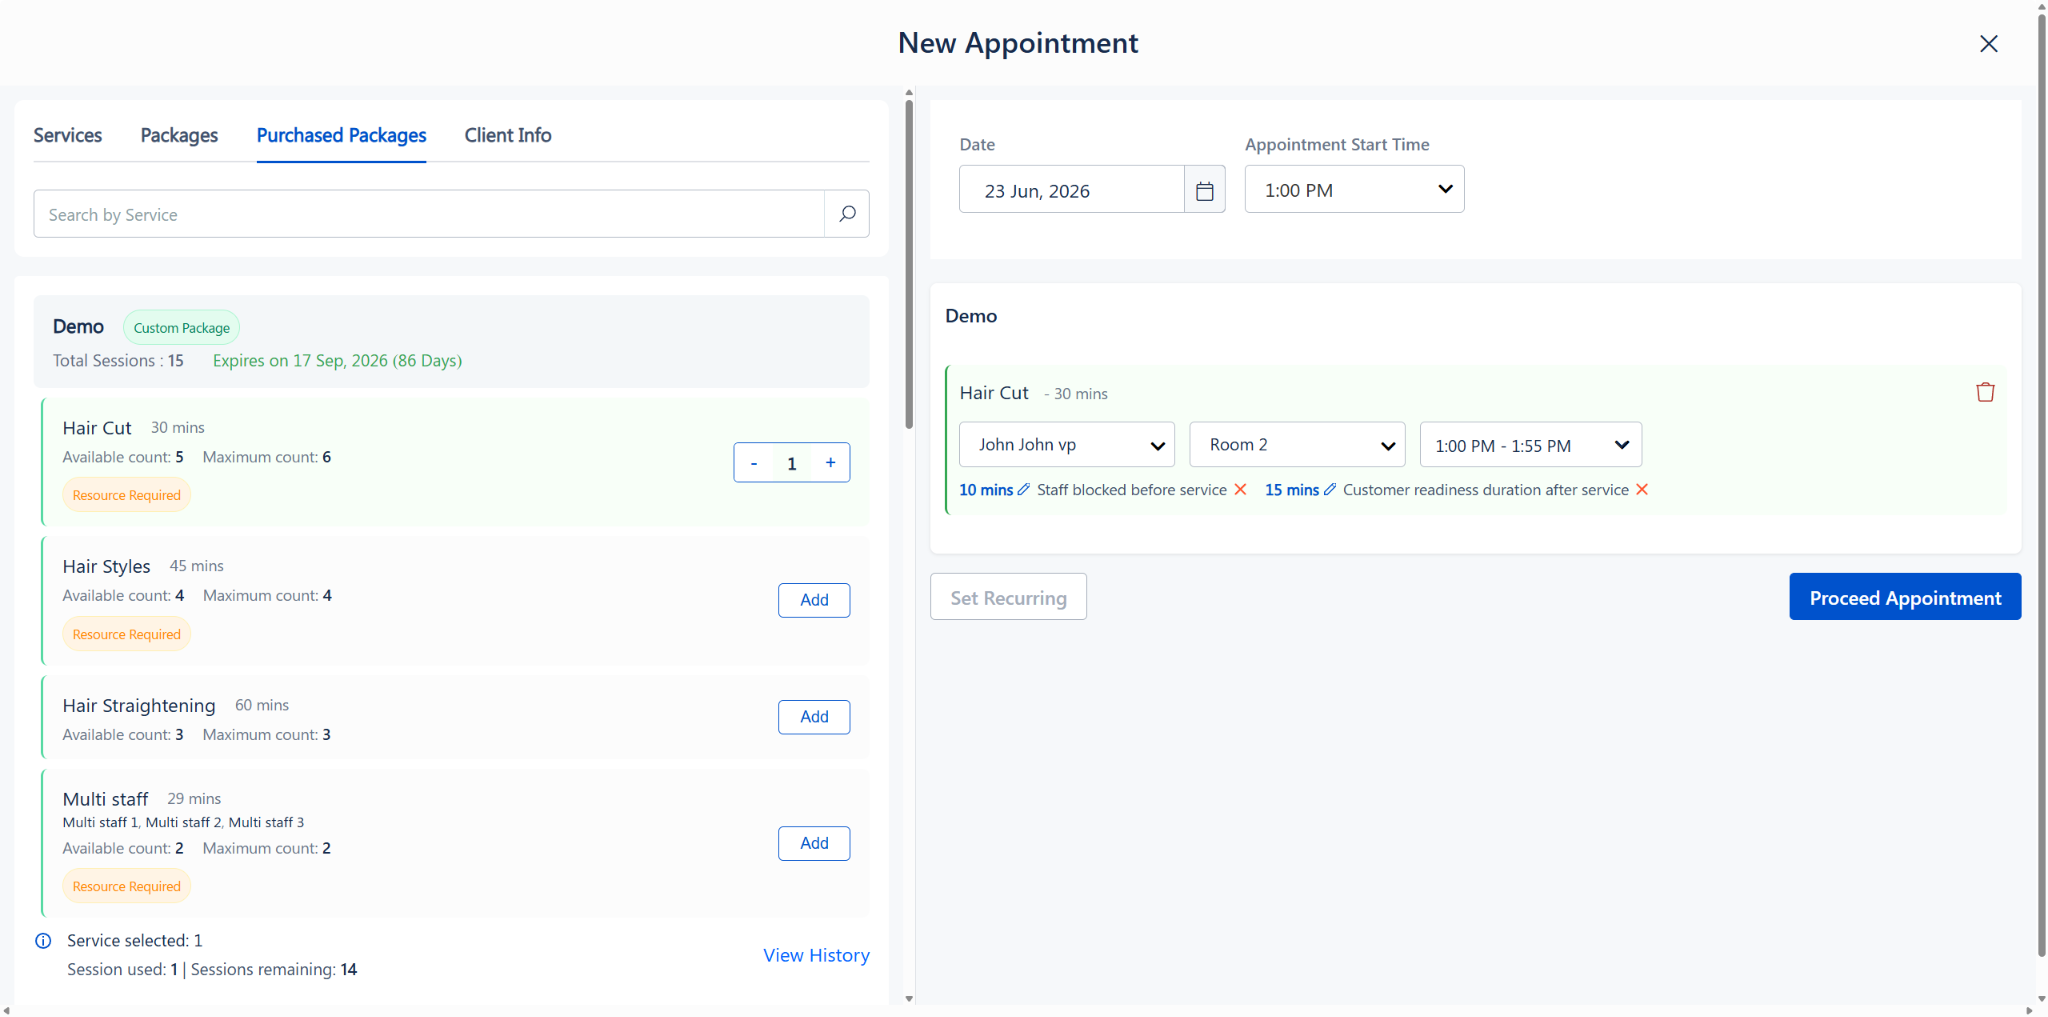
1. Click the “Add” button next to the service the client wants to redeem today.
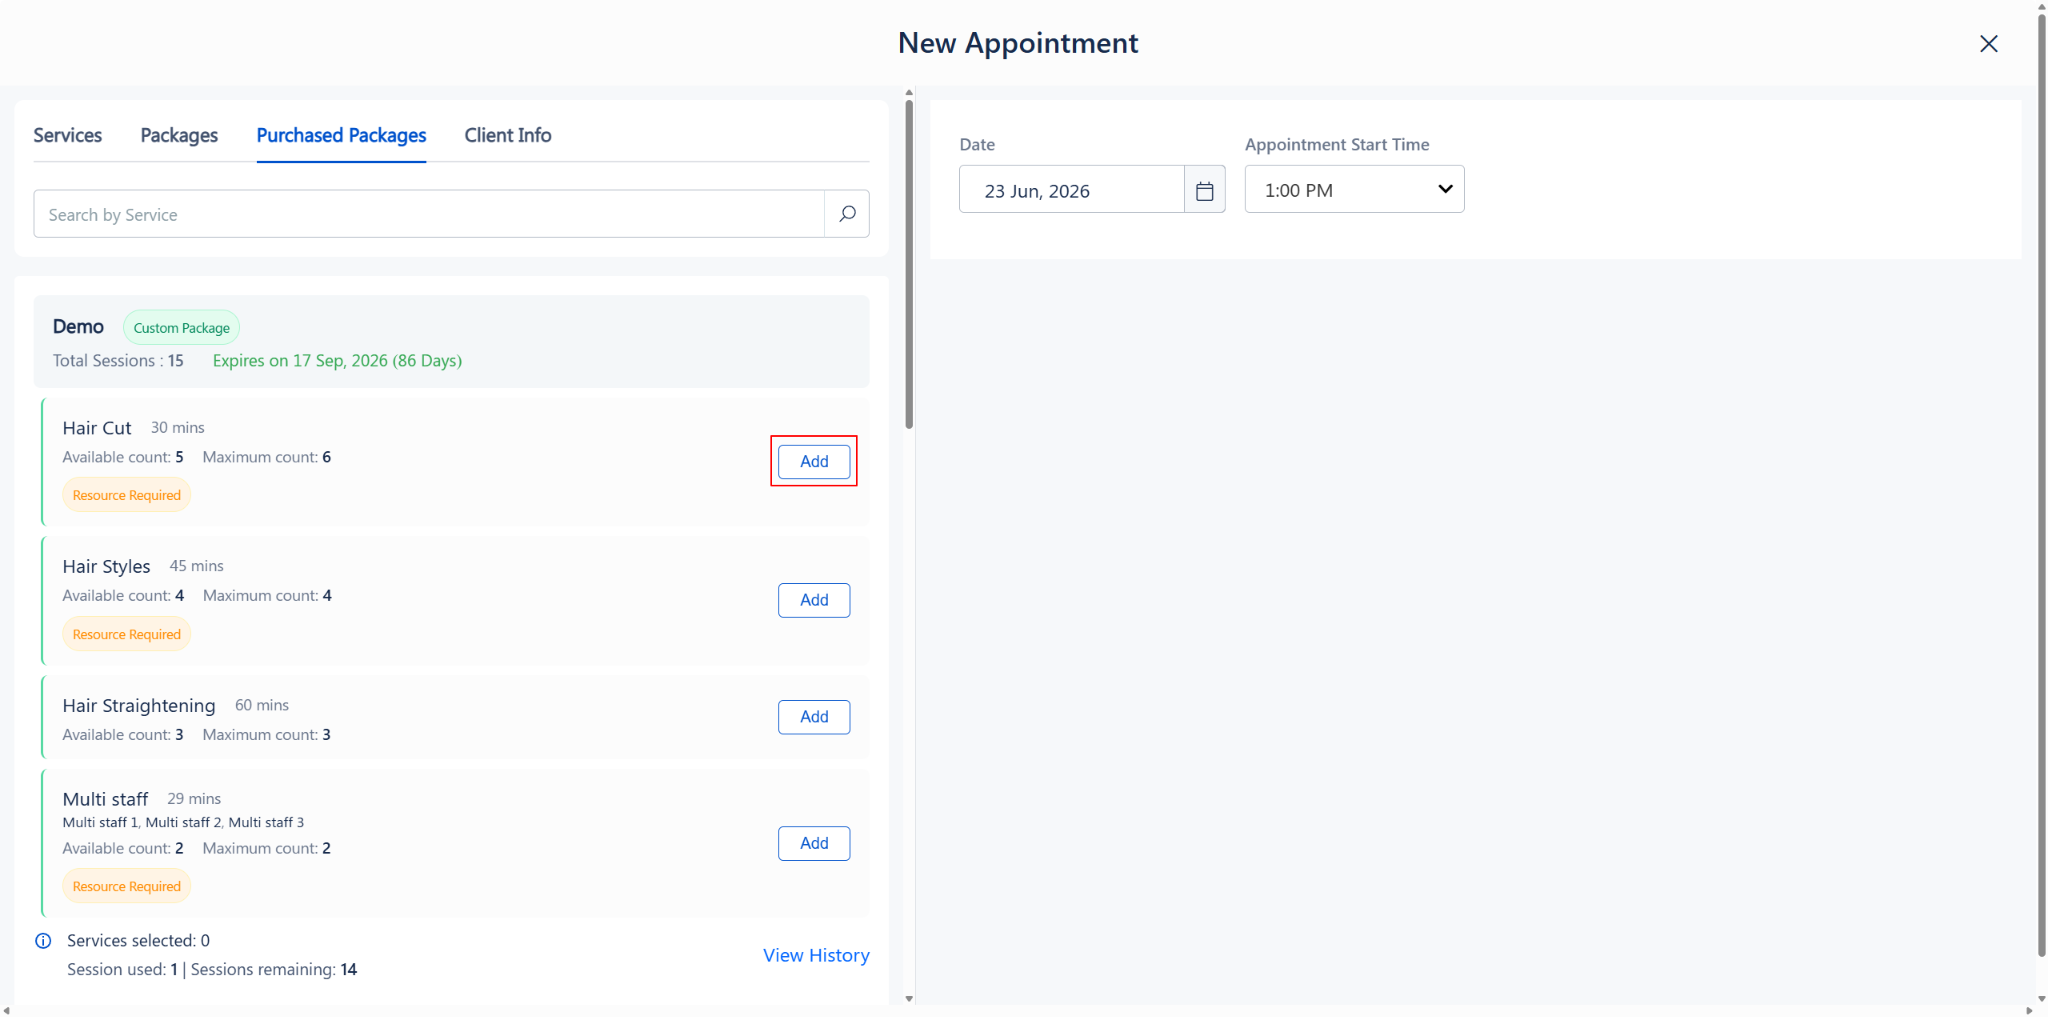
2. For services that allow multiple sessions, use the quantity selector (– / +) to increase the number of sessions. For example, if the client wants 4 Hair Styles sessions, increase the count to 4.
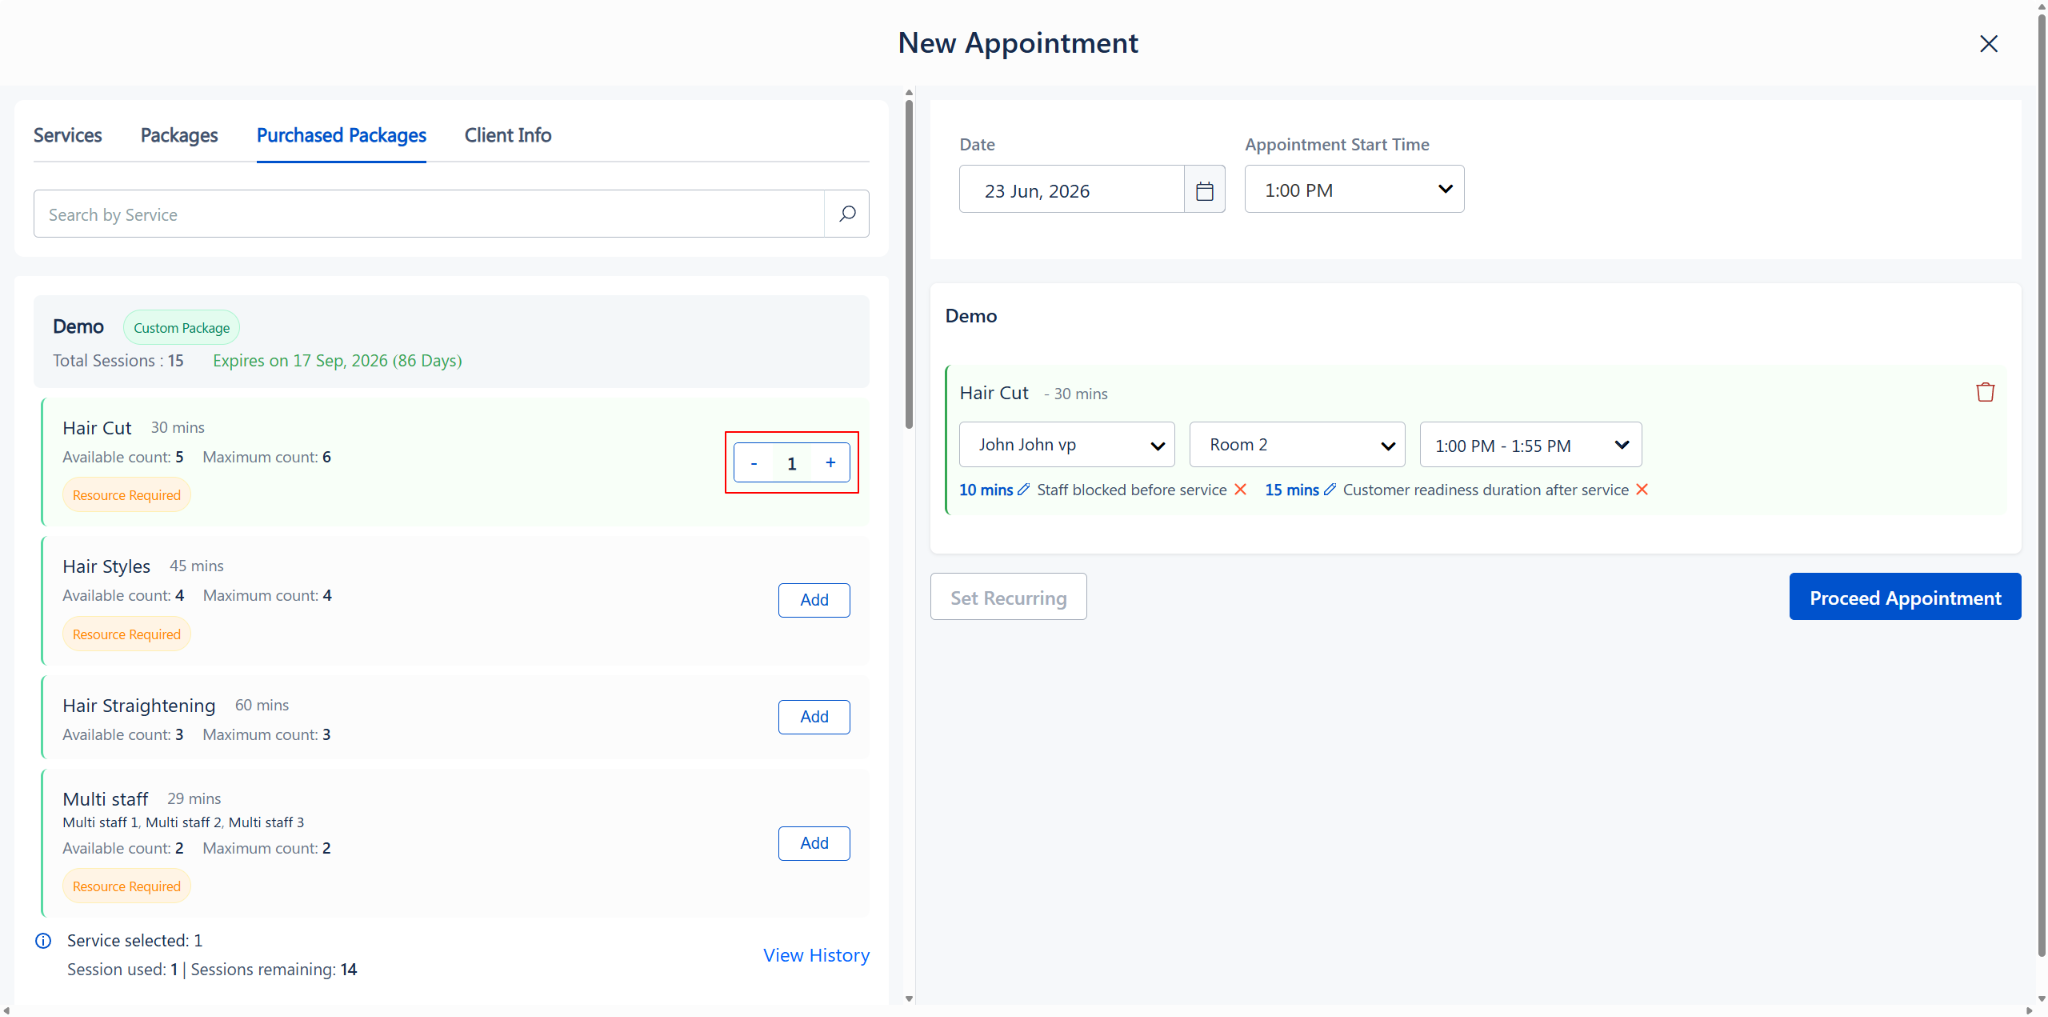
3. The “Services selected” counter at the bottom will update accordingly.
Each added service appears on the right panel with fields to configure: - Staff — Select the staff member performing the service - Resource — Select the resource (e.g., Room 1) if required - Time Slot — The system auto-assigns consecutive time slots based on the service duration
If a time slot falls outside work hours, a warning message is displayed beneath that service entry.
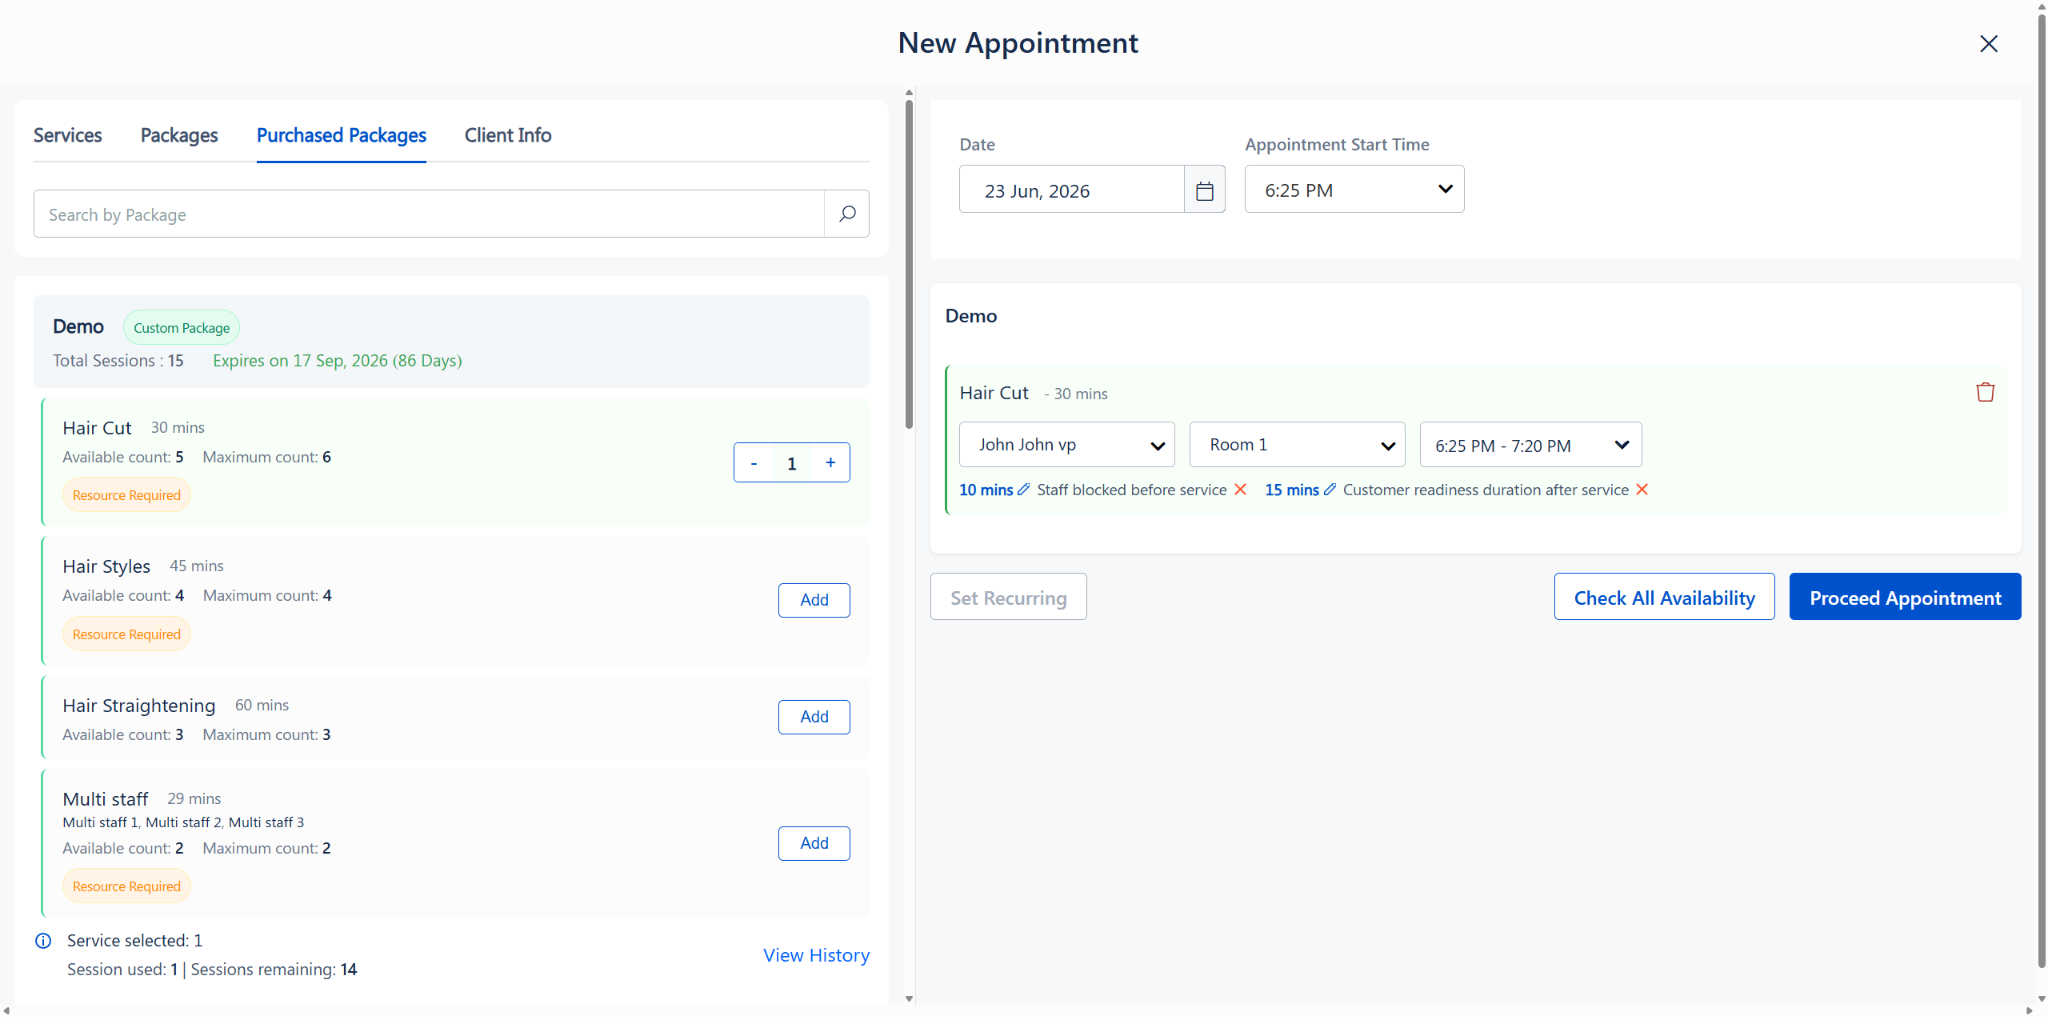
Multiple sessions added with staff, resource, and time slots assigned
Step 6: Check Availability
1. Click “Check All Availability” to open the availability grid.
2. The grid displays time slots with colour-coded indicators:
o Selected Staff Available — The assigned staff is free
o Selected Resource Available — The assigned resource is free
o Slots with other staffs and resource — Alternative staff/resource combinations are available
o No Staff/Resource Available — No availability at that time
3. The grid is split into Early Hours and Late Hours sections for easier navigation.
4. Verify that all selected time slots show availability, then click “Proceed Appointment”.
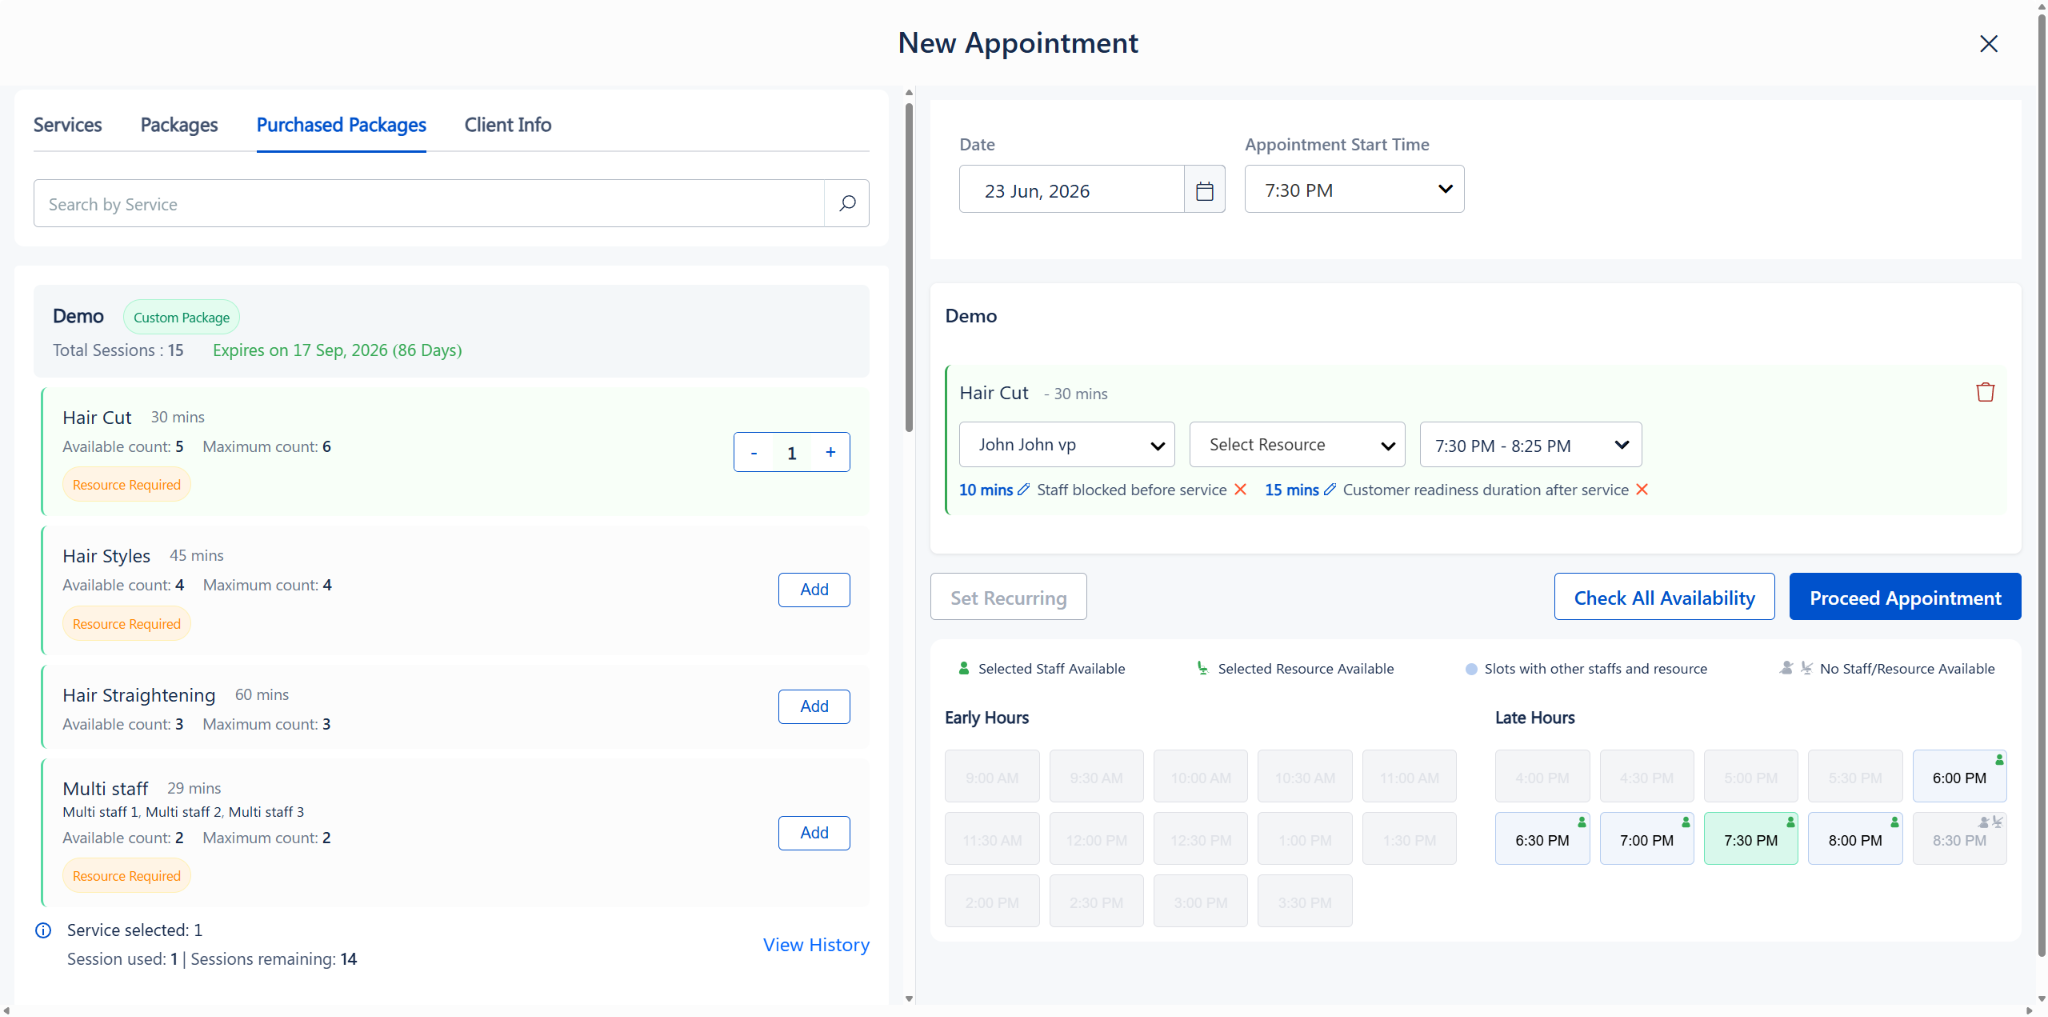
Availability grid showing time slots with colour-coded staff and resource indicators
Step 7: Review the Appointment Summary
On the Appointment Summary screen:
1. The package name is displayed with a “Redemption – Custom Package” badge, confirming this is a redemption booking (not a new purchase).
2. The expiry date and validity are shown for reference.
3. All redeemed services are listed with their assigned Staff, Resource, and Time Slot.
4. The session tracker shows: Services selected: [X] | Sessions available for future bookings: [Y].
5. Add any Appointment Notes if needed.
6. Set the Appointment Status (e.g., New In-App Booking, Arrived, Started, No Show, Completed).
7. The Item Total and Tax will display as ₹ 0.00 since the package is already paid for.
8. Click “Save” to finalize the appointment, or “Checkout” if needed.
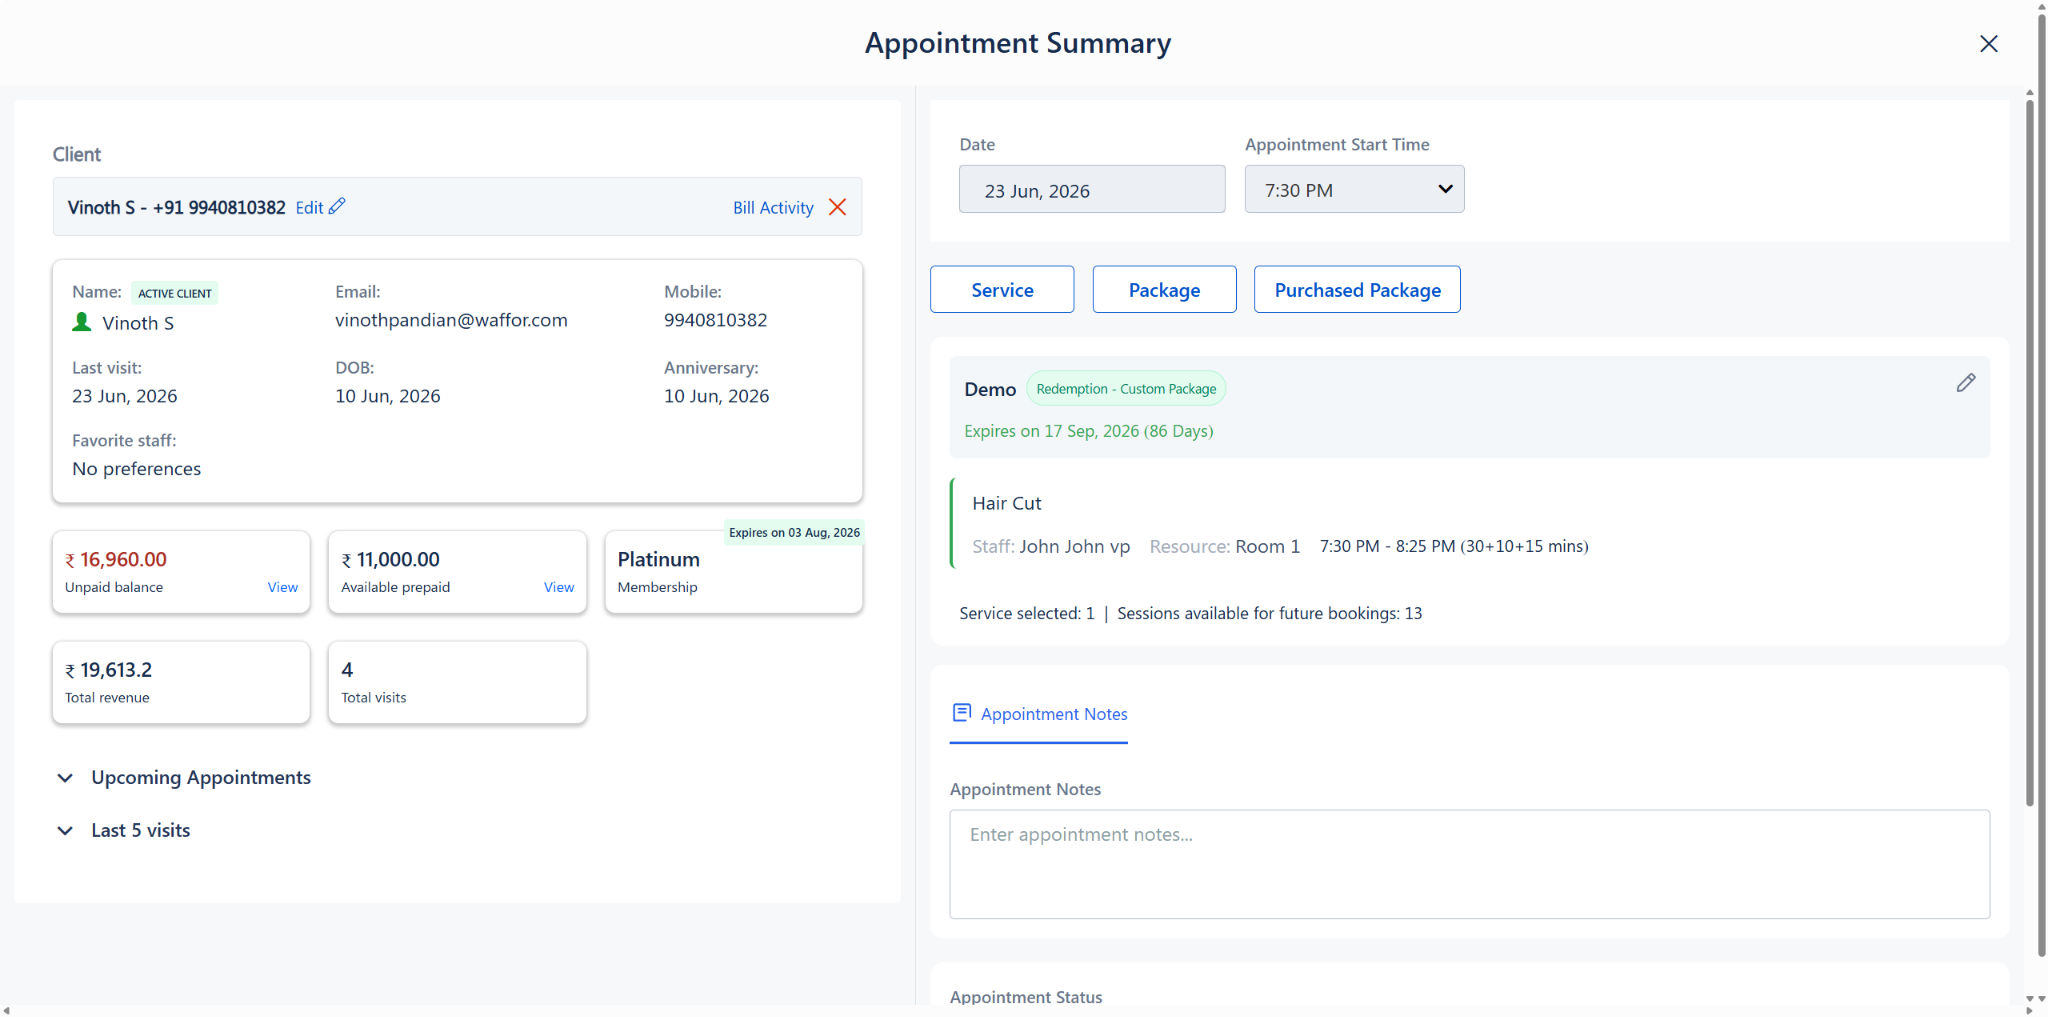
Appointment Summary showing redeemed package services with session tracker
Step 8: Verify Updated Session Counts
After saving, navigate back to the Purchased Packages tab for the same client. You will notice the updated session counts:
· Services that have been fully redeemed will show a “Redeemed” badge, and the “Add” button will be greyed out (disabled).
· The Available count will be reduced accordingly.
· The Sessions used and Sessions remaining counters at the bottom will reflect the latest totals.
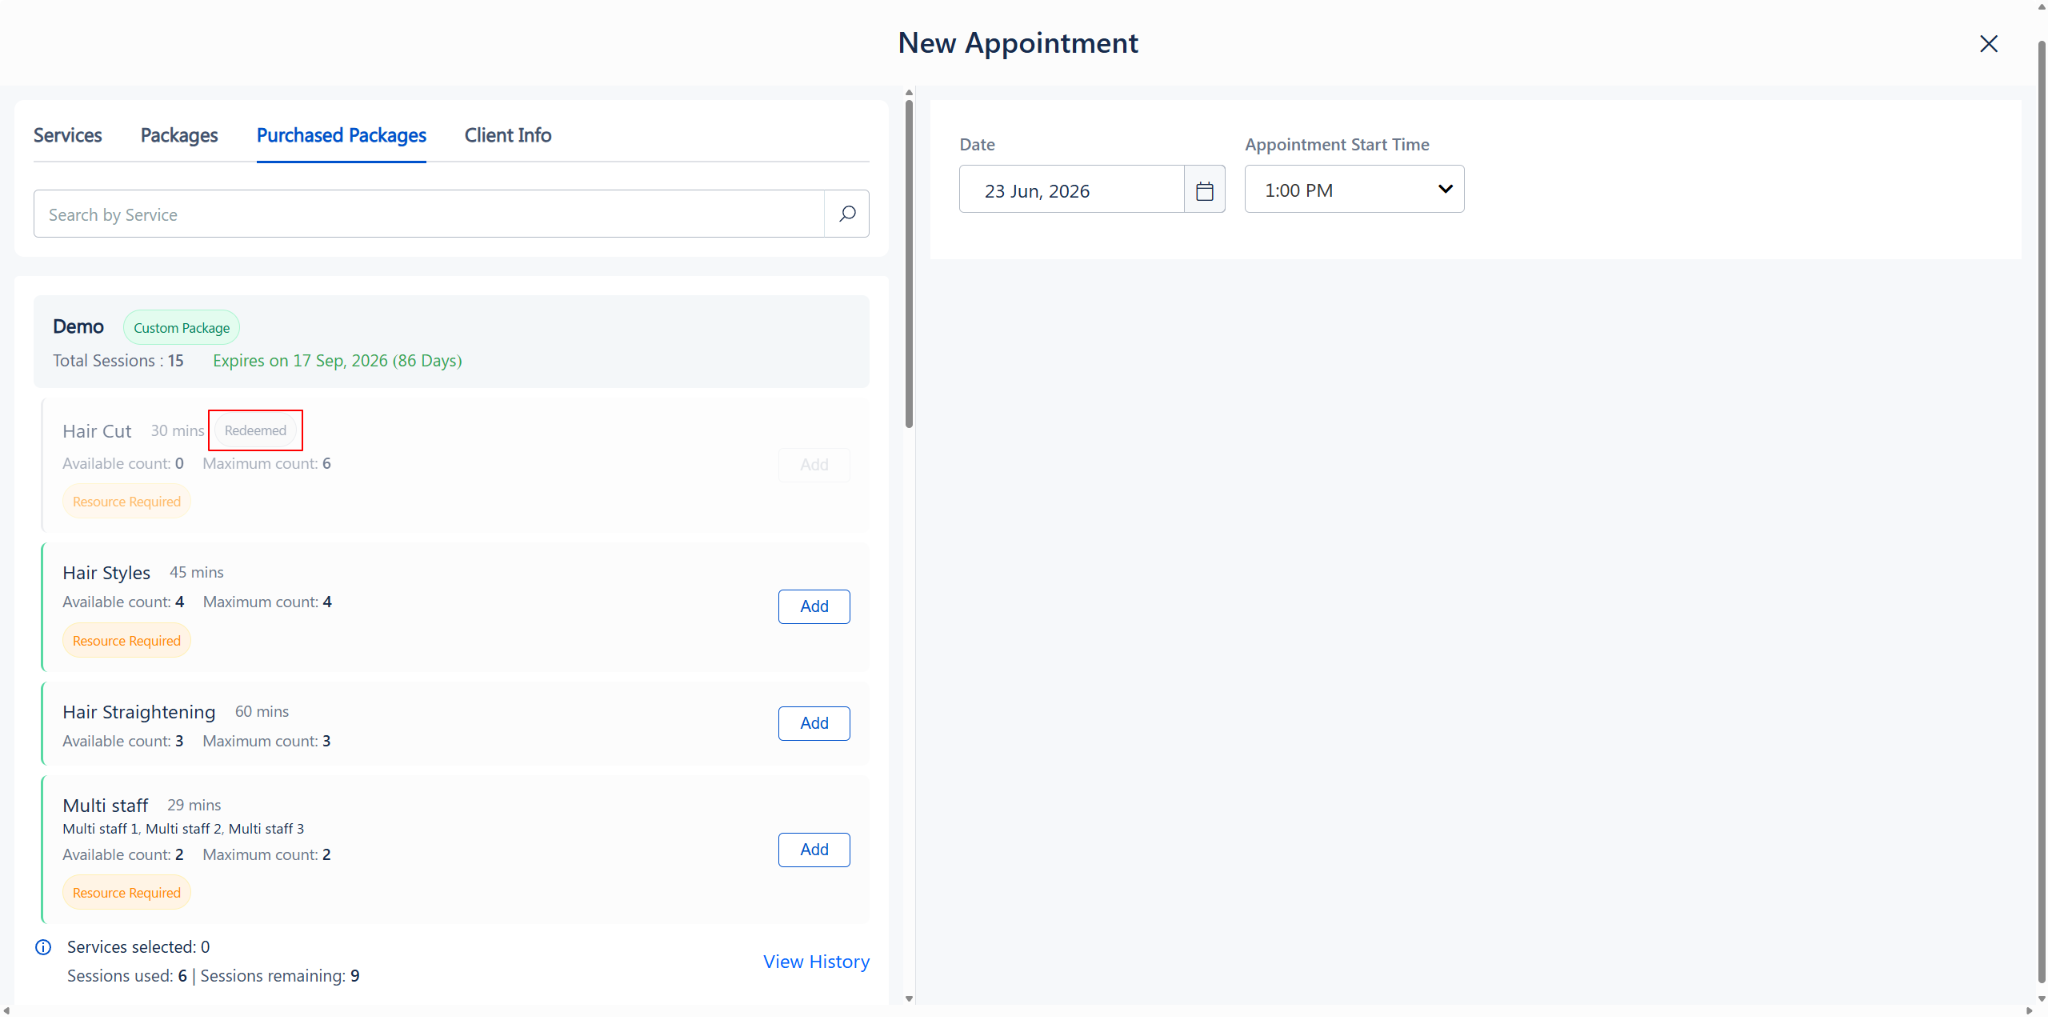
Updated Purchased Packages tab showing Redeemed badge on fully used services
Use Cases
· Regular Package Clients: A client with a 15-session custom package visits for their weekly Hair Styles session — the staff redeems one session from the package during the booking.
· Multiple Sessions in One Visit: A client wants to use multiple sessions in a single visit (e.g., 4 Hair Styles sessions back-to-back) — staff can add multiple sessions using the quantity selector.
· Session Verification: Before booking, the staff clicks “View History” to confirm how many sessions the client has already used and what services were performed.
Benefits
· Zero-Payment Bookings: Since the package is pre-paid, redeemed appointments show ₹ 0.00, eliminating the need for additional payment processing at checkout.
· Transparent Session Tracking: Both staff and clients can clearly see Available count vs. Maximum count for every service, preventing over-redemption.
· Redemption History: The “View History” popup provides a complete audit trail of all past redemptions for accountability.
· Automatic Session Updates: After each booking, session counts update automatically — fully redeemed services are clearly marked with a “Redeemed” badge.
Was this article helpful?
That’s Great!
Thank you for your feedback
Sorry! We couldn't be helpful
Thank you for your feedback
Feedback sent
We appreciate your effort and will try to fix the article