How to Access Appointment Details to Edit a Purchased Package Redemption
Before you can Raise Sale a redeemed package service, you need to open the appointment details. MioSalon gives you two ways to do this:
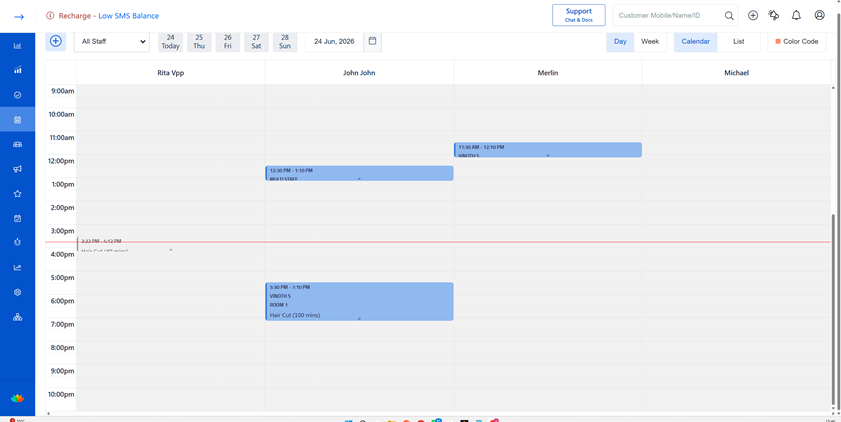
Option 1: Via Calendar View
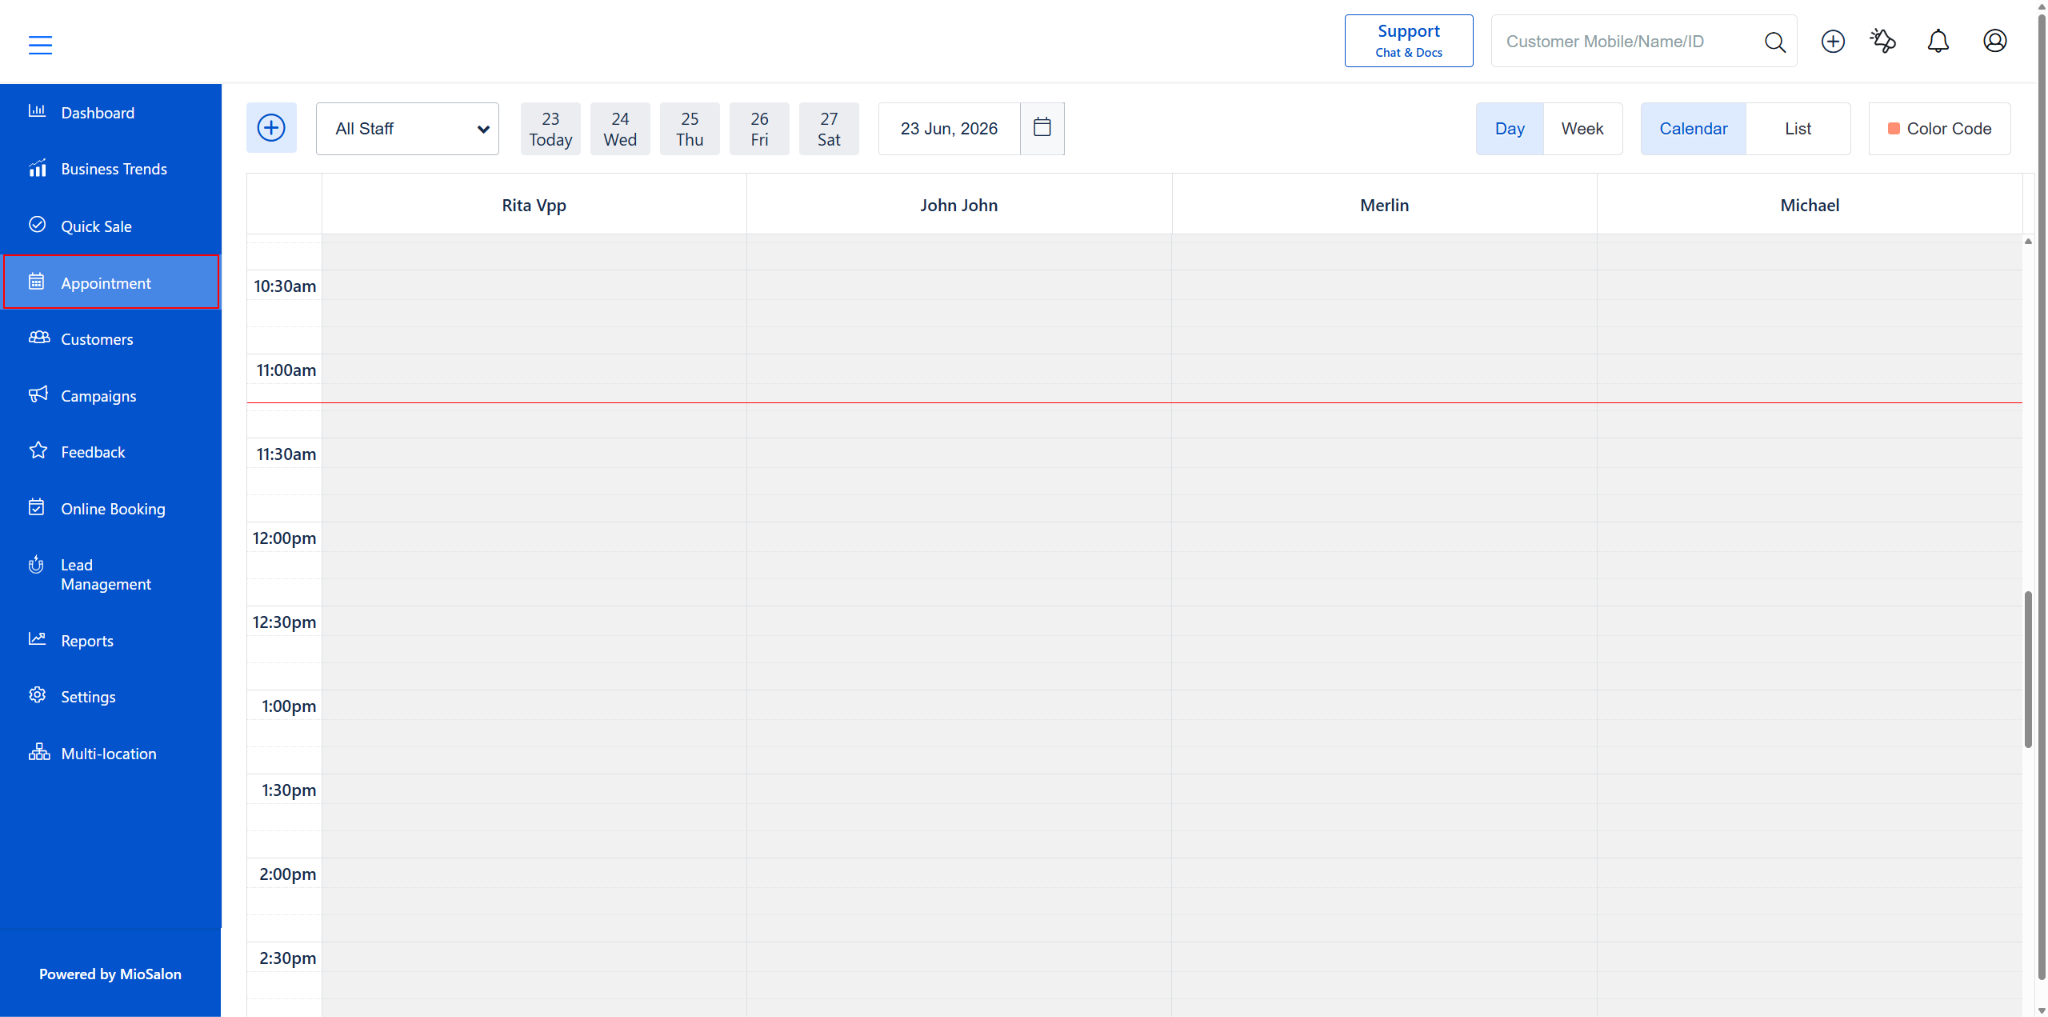
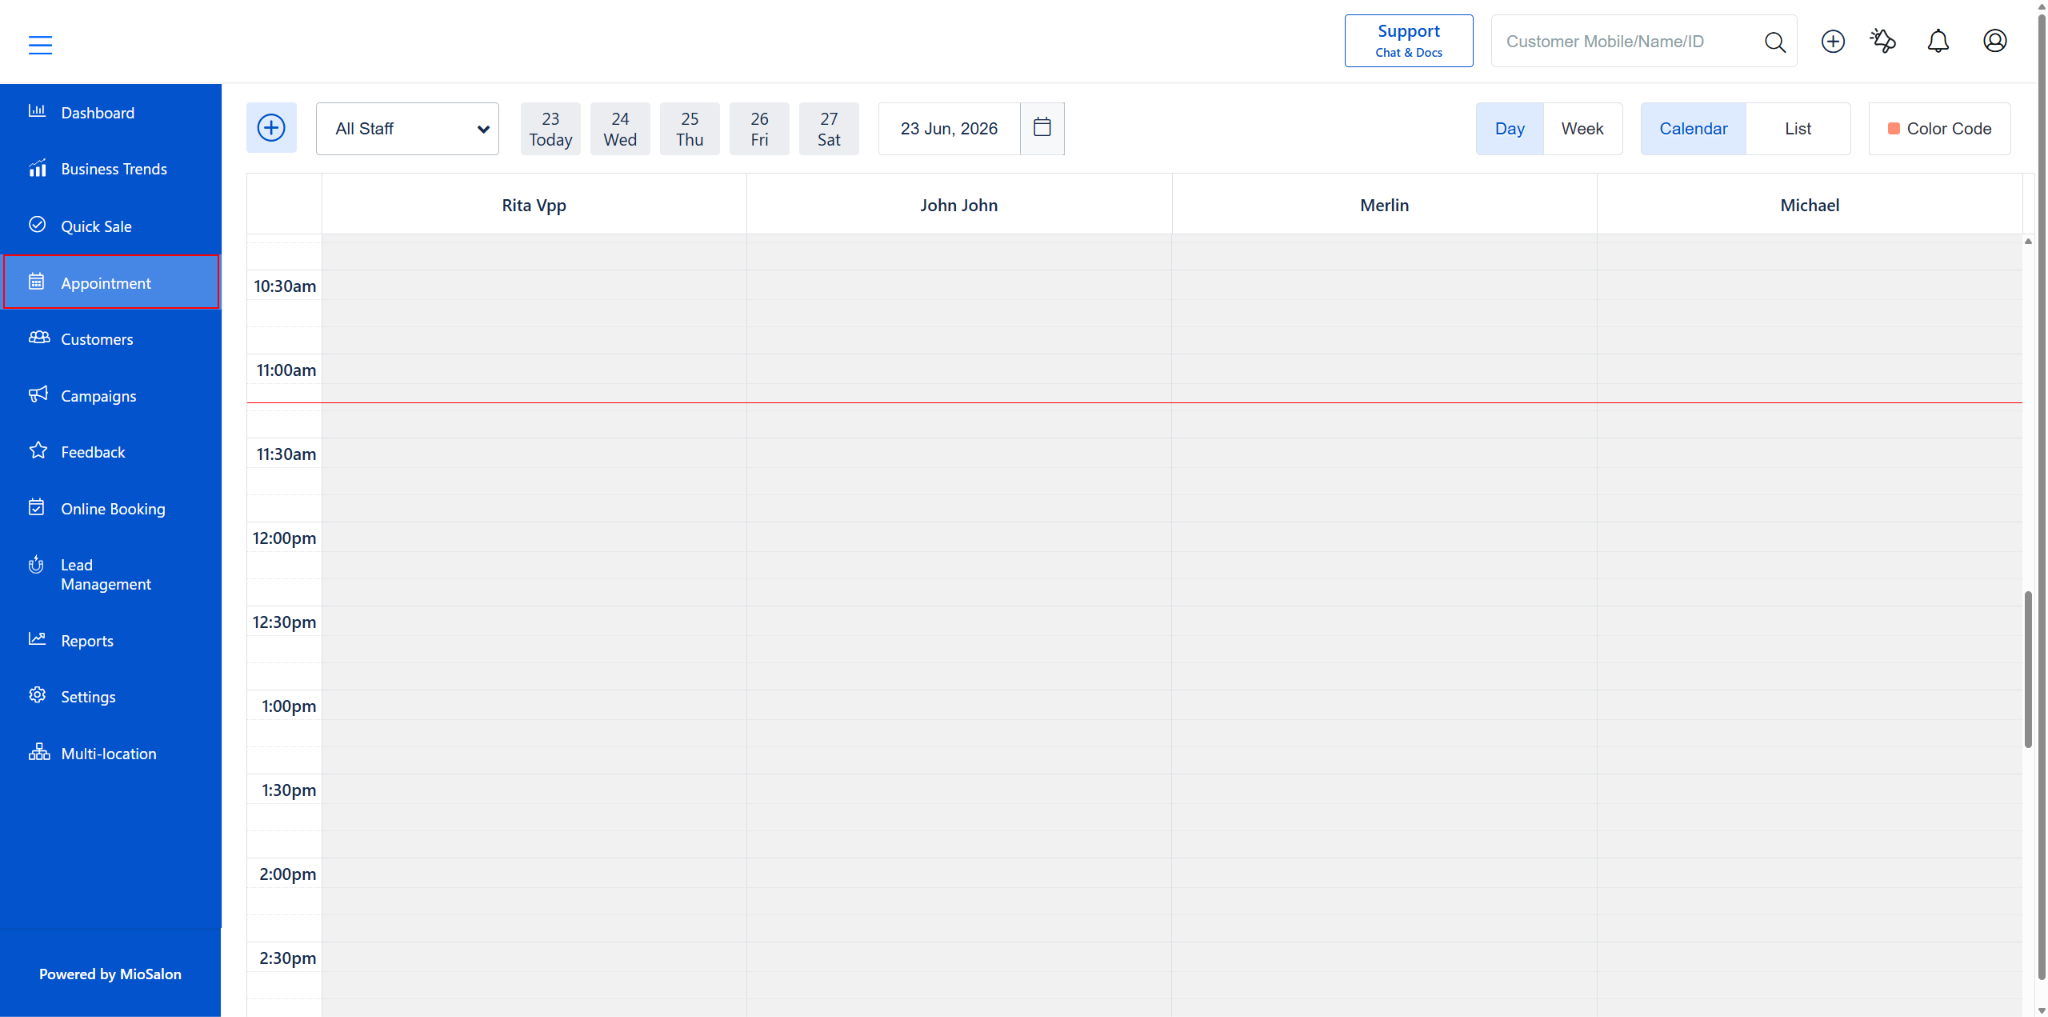
1. Go to Appointment from the left menu.
2. Make sure you’re on the Calendar view (top-right toggle).
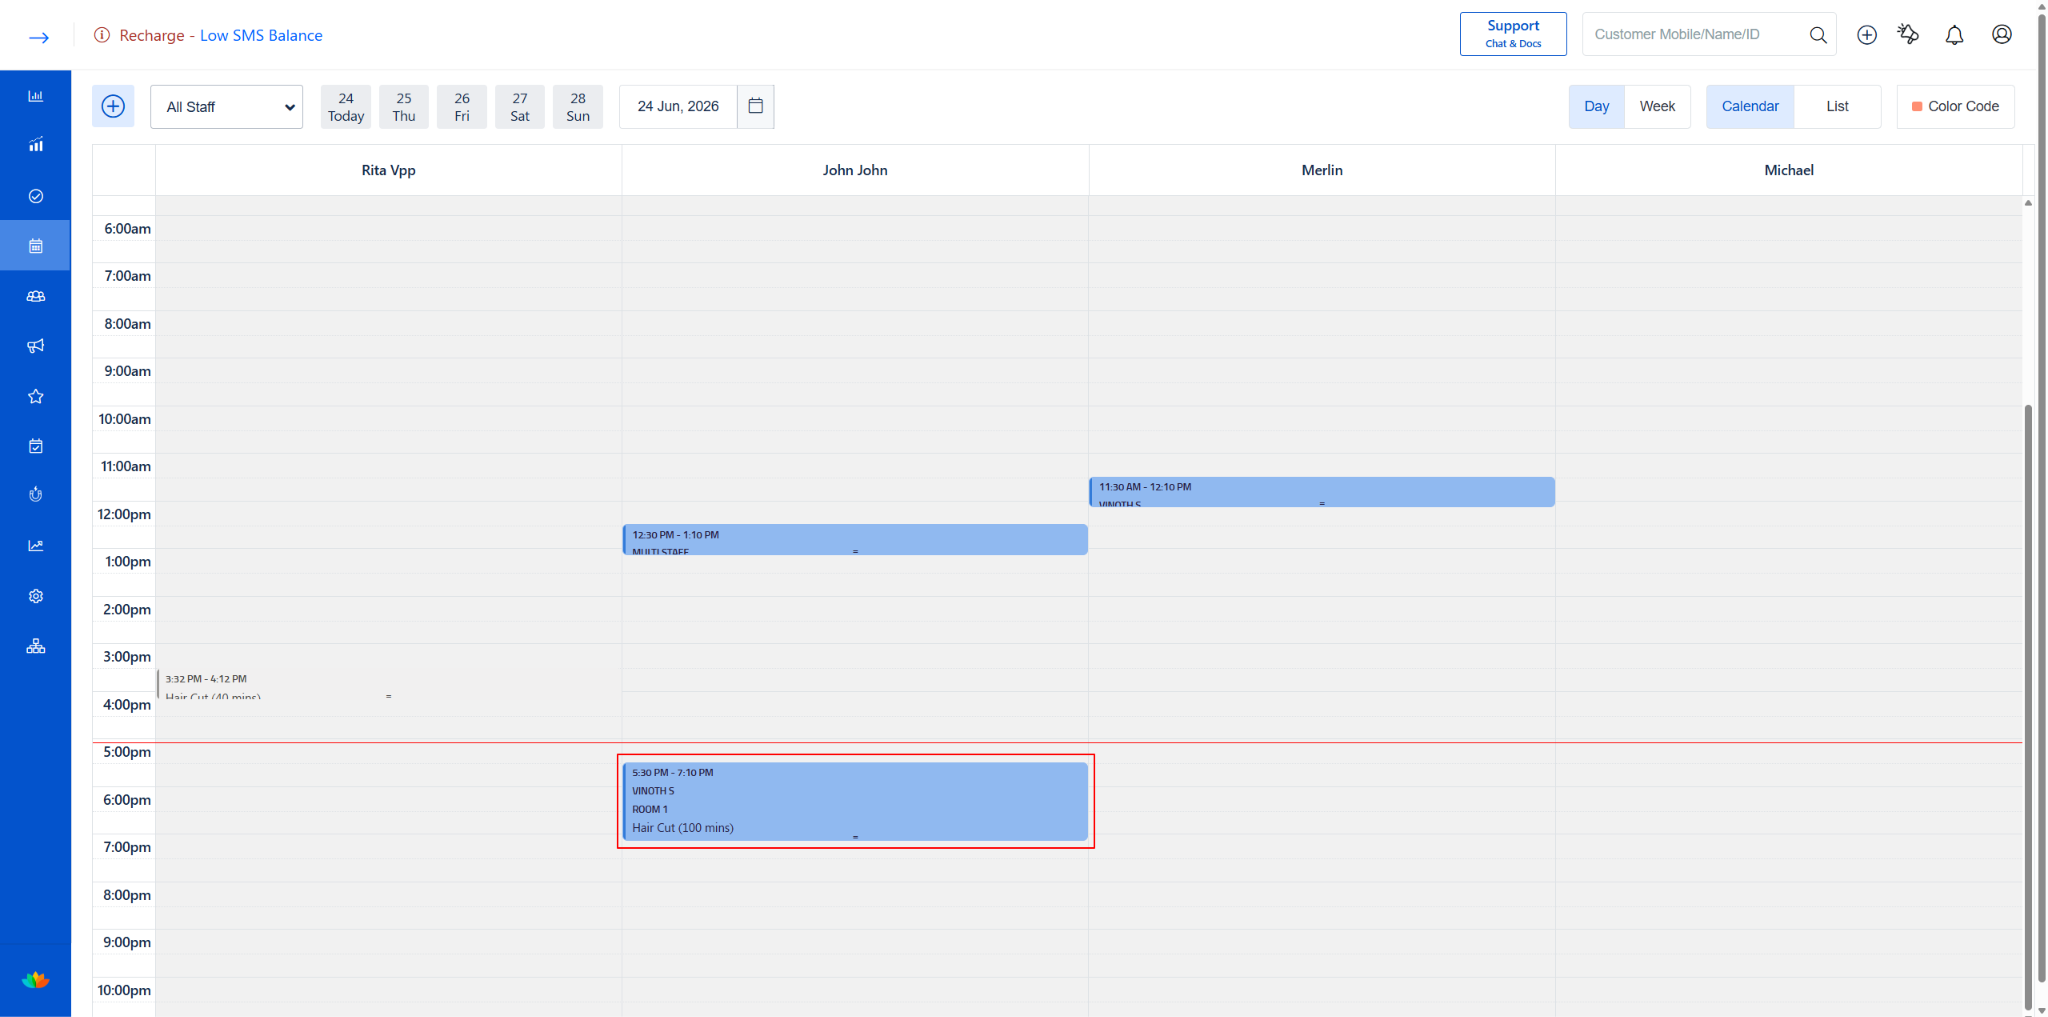
3. The redeemed service appointment appears as a coloured block under the assigned staff column.
4. Click on the appointment block to open the Appointment Details popup.
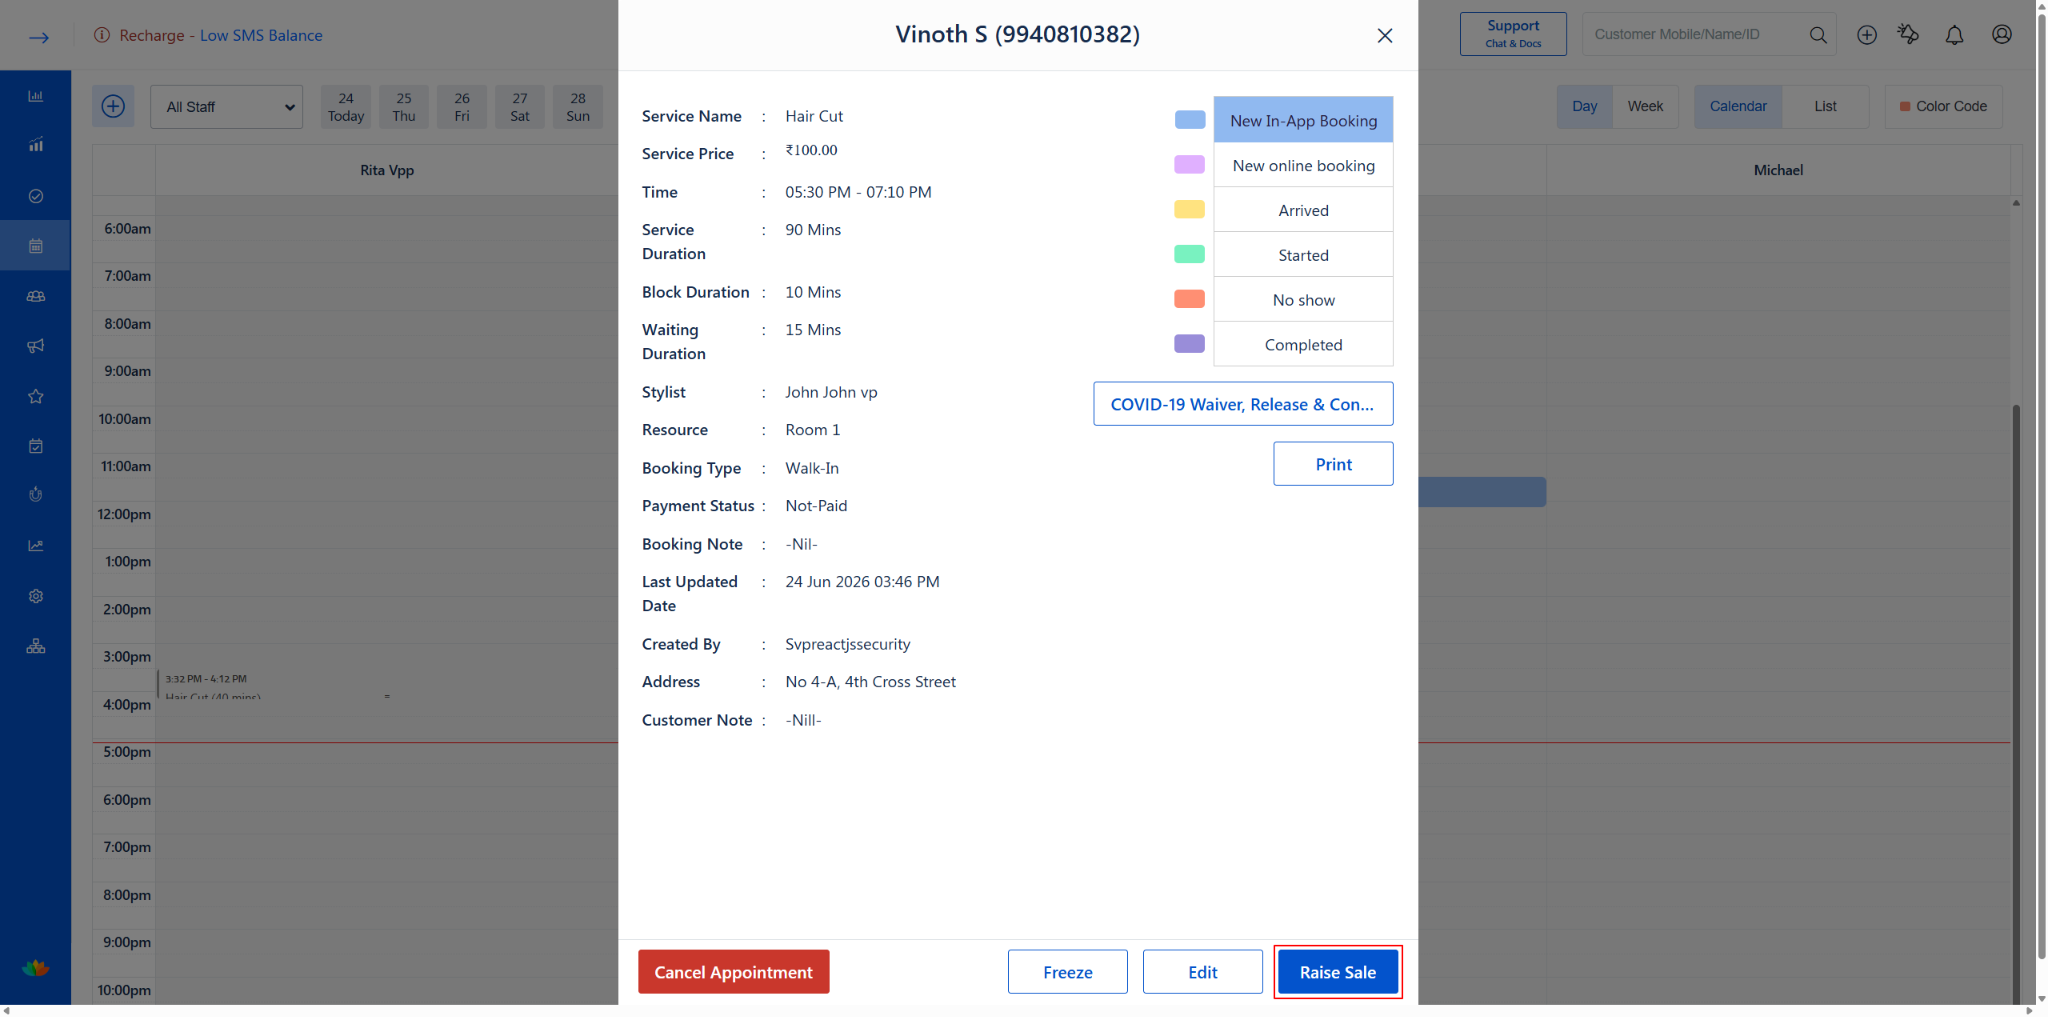
Appointment Details popup (Calendar view) displays:
· On the right side, you’ll see the Appointment Status options.
· At the bottom, you have four action buttons:
o Cancel Appointment (red) — Cancel this appointment
o Freeze — Freeze the appointment
o Edit — Edit the appointment details
o Raise Sale — Raise a sale/bill for this appointment
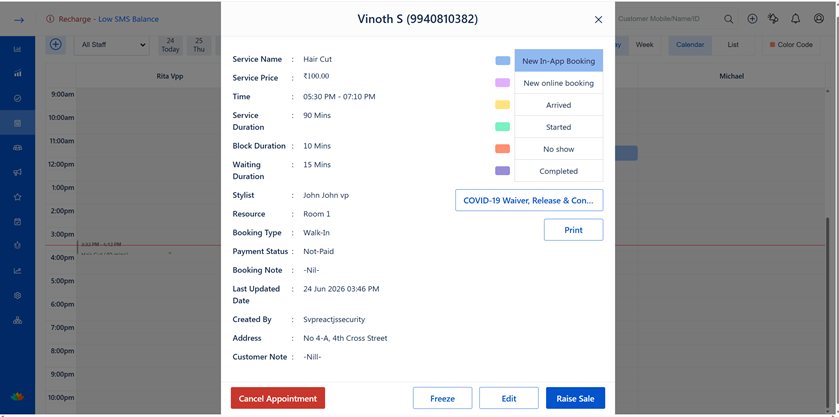
Appointment Details popup showing redeemed package info, status options, and action buttons
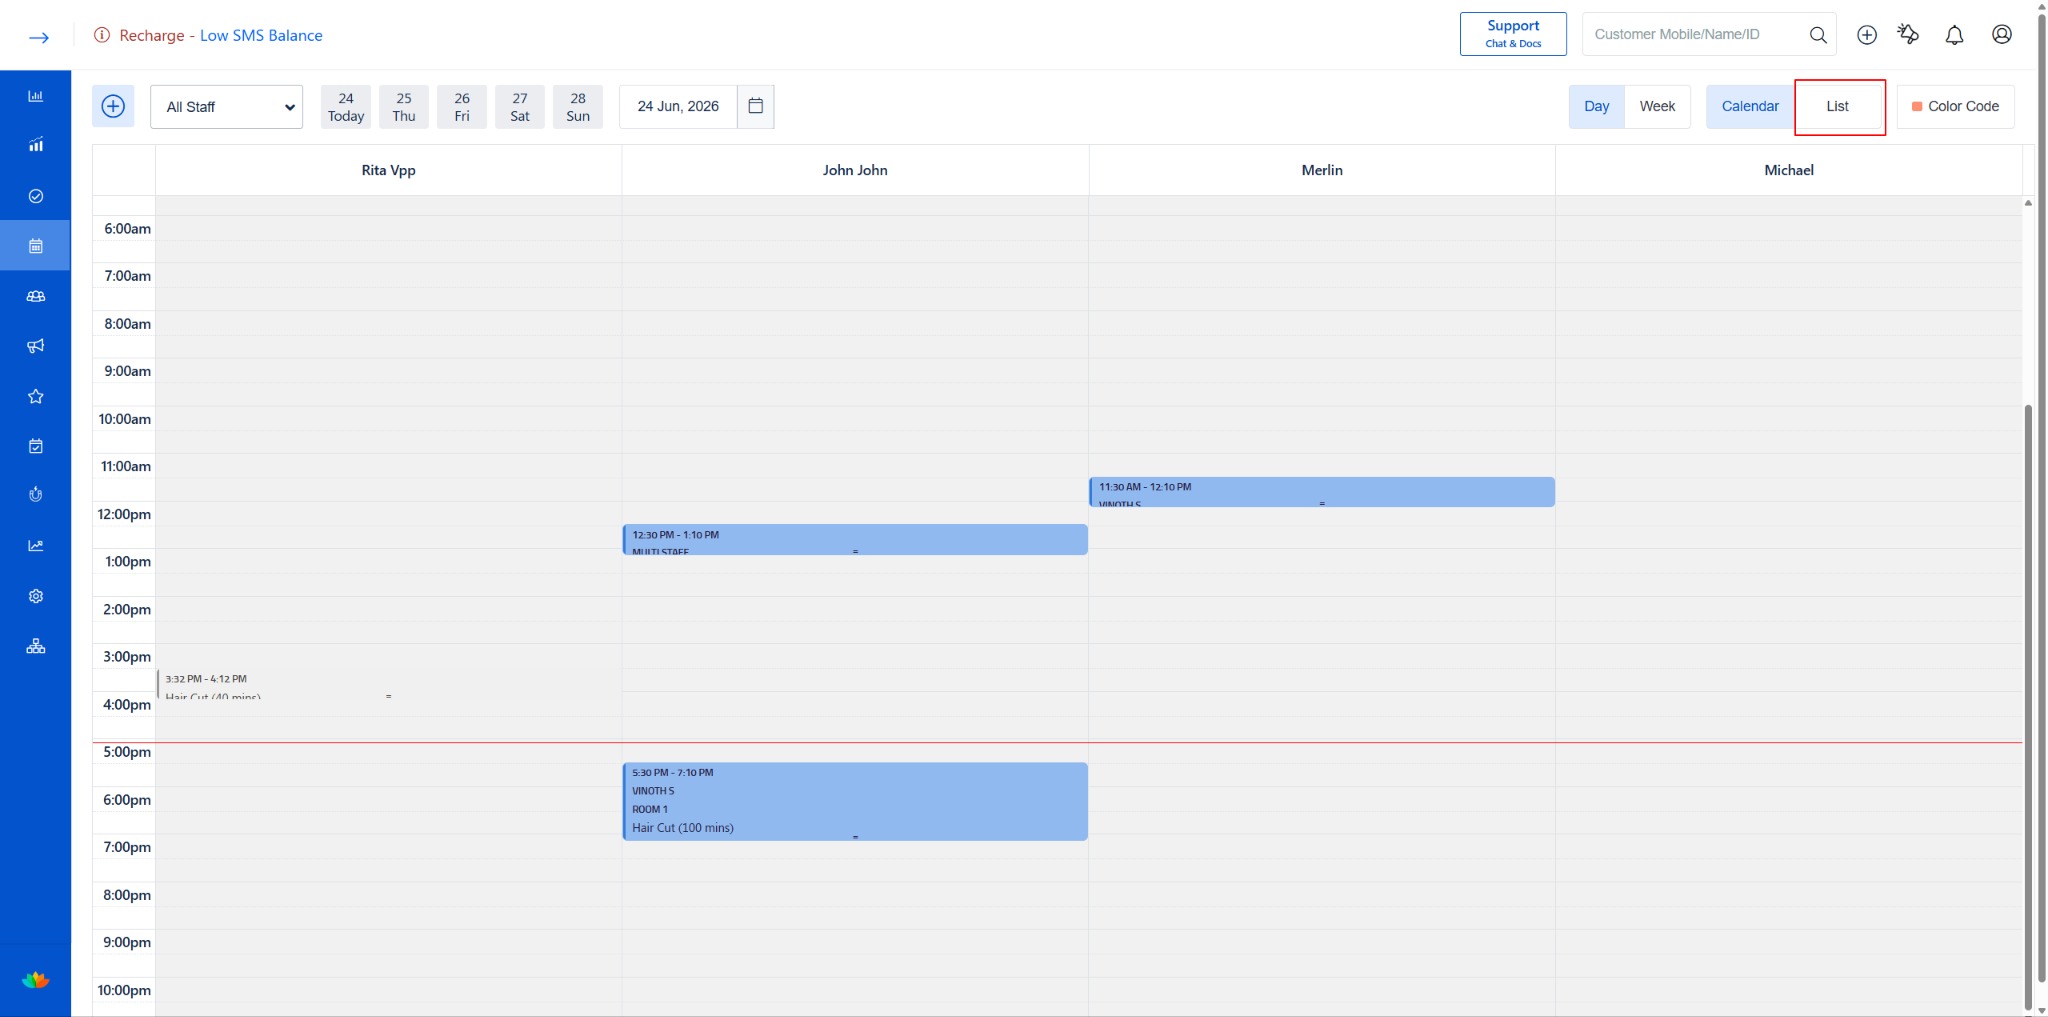
Option 2: Via List View
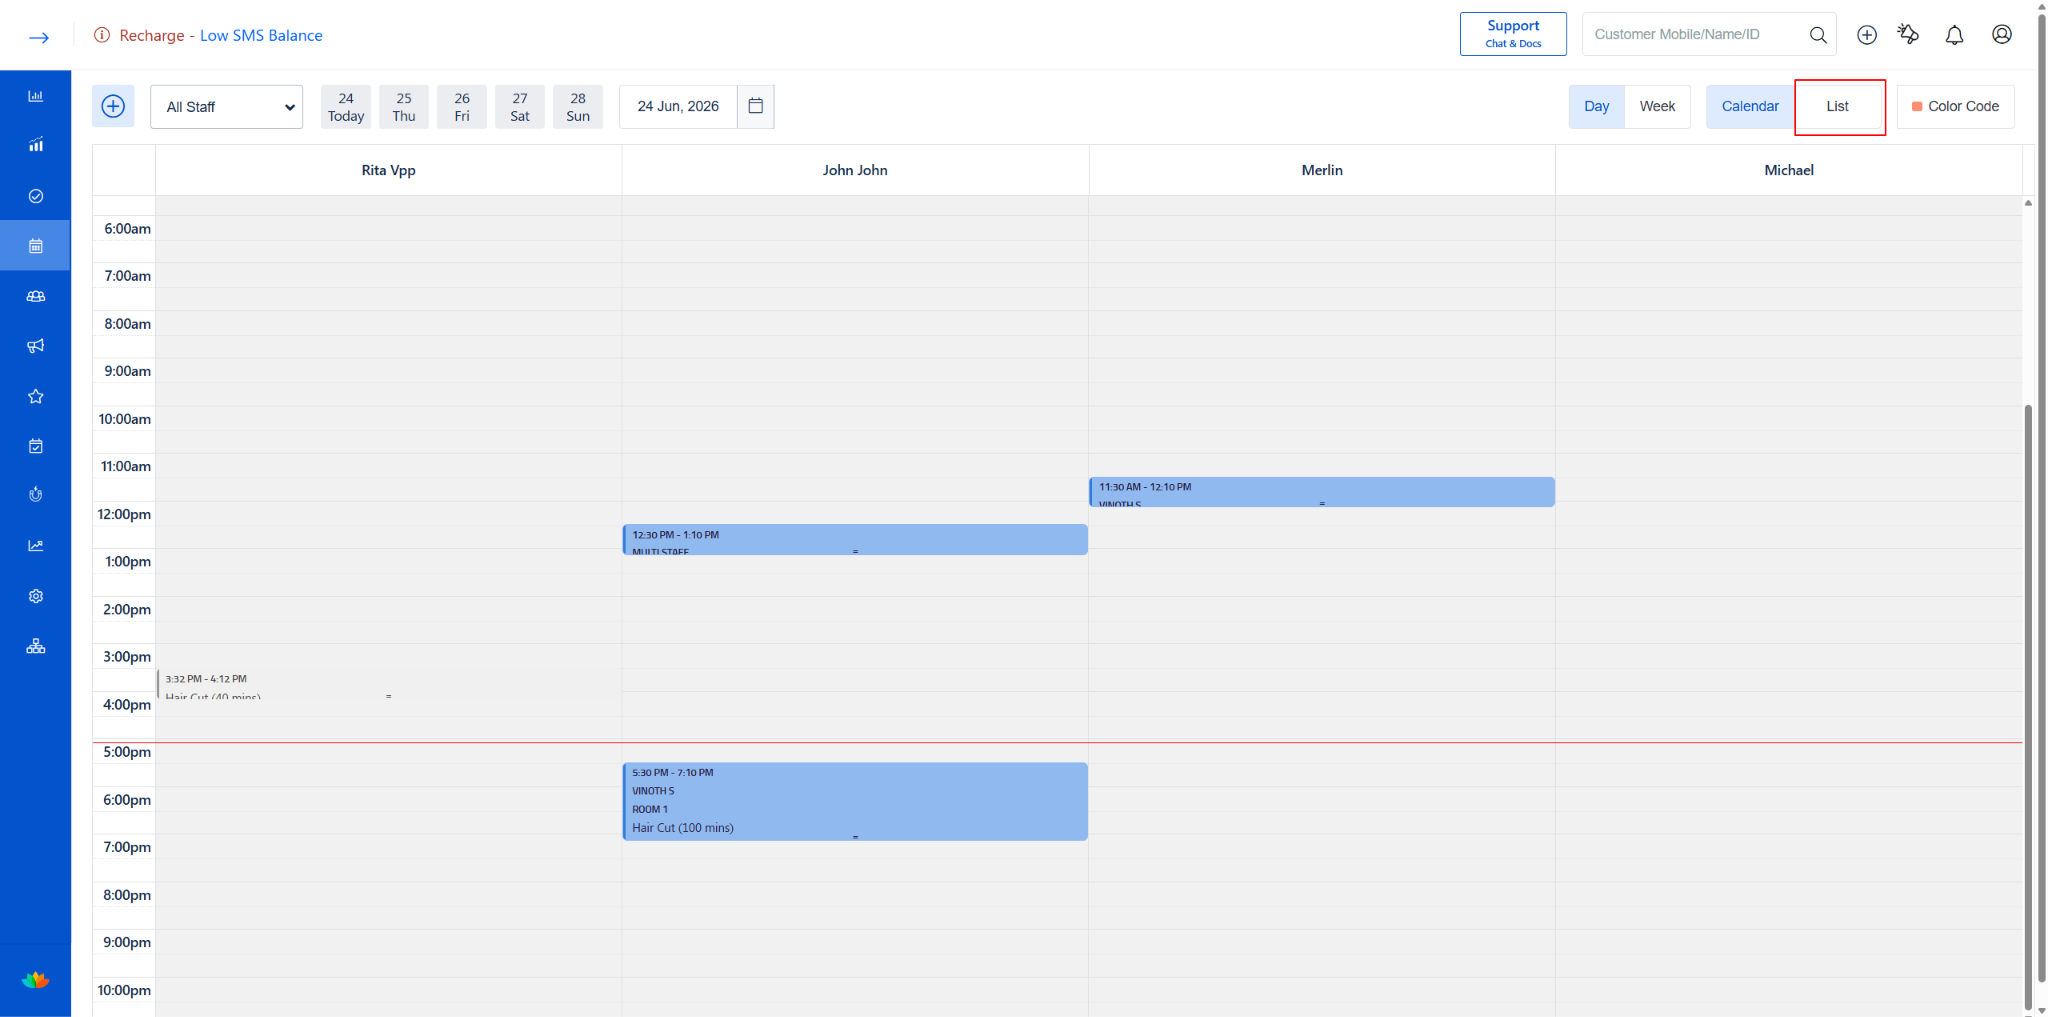
1. Go to Appointment from the left menu.
2. Click the “List” toggle in the top-right corner (next to Calendar).
3. All appointments are displayed as individual cards.
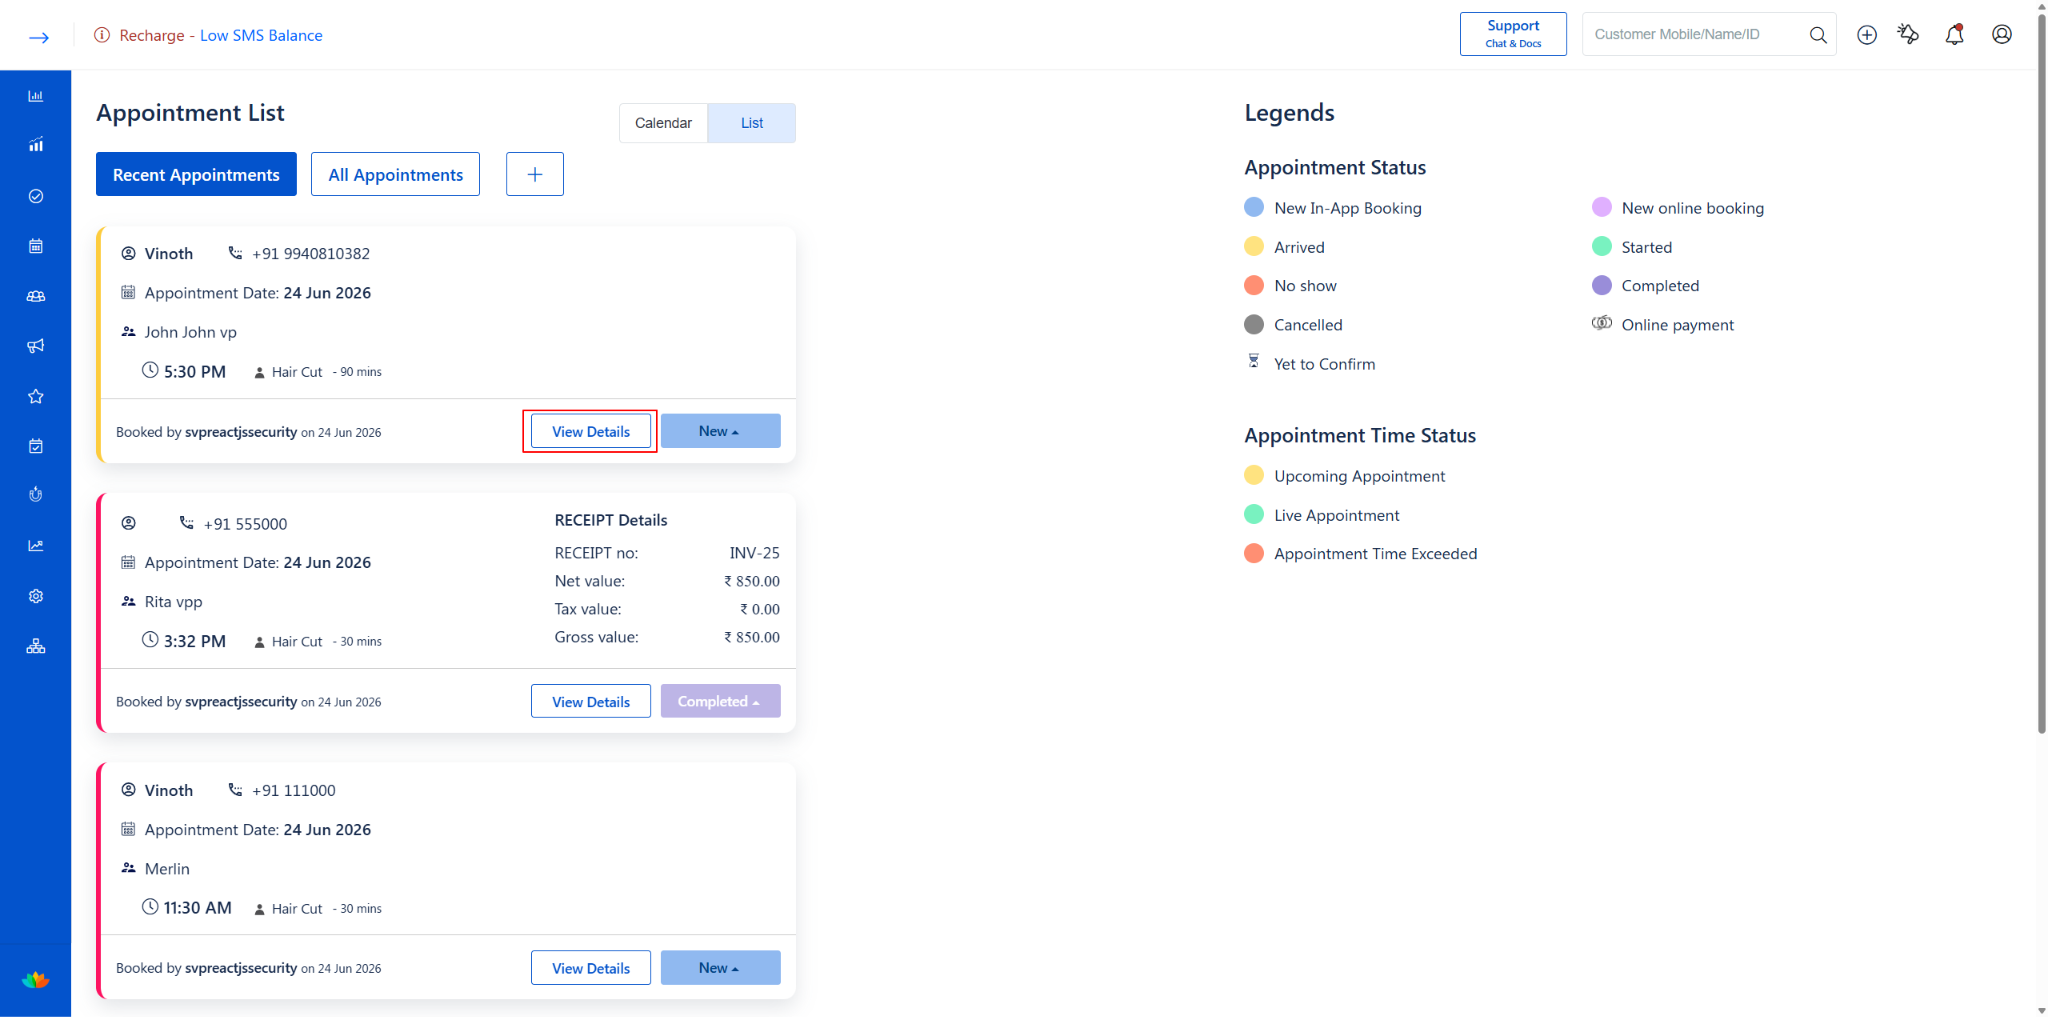
Each appointment card shows the client details, date, staff, time, and redeemed service.
At the bottom of each card, you’ll see two buttons: - “View Details” — Opens the appointment details popup - “New ▲” — Shows the current appointment status
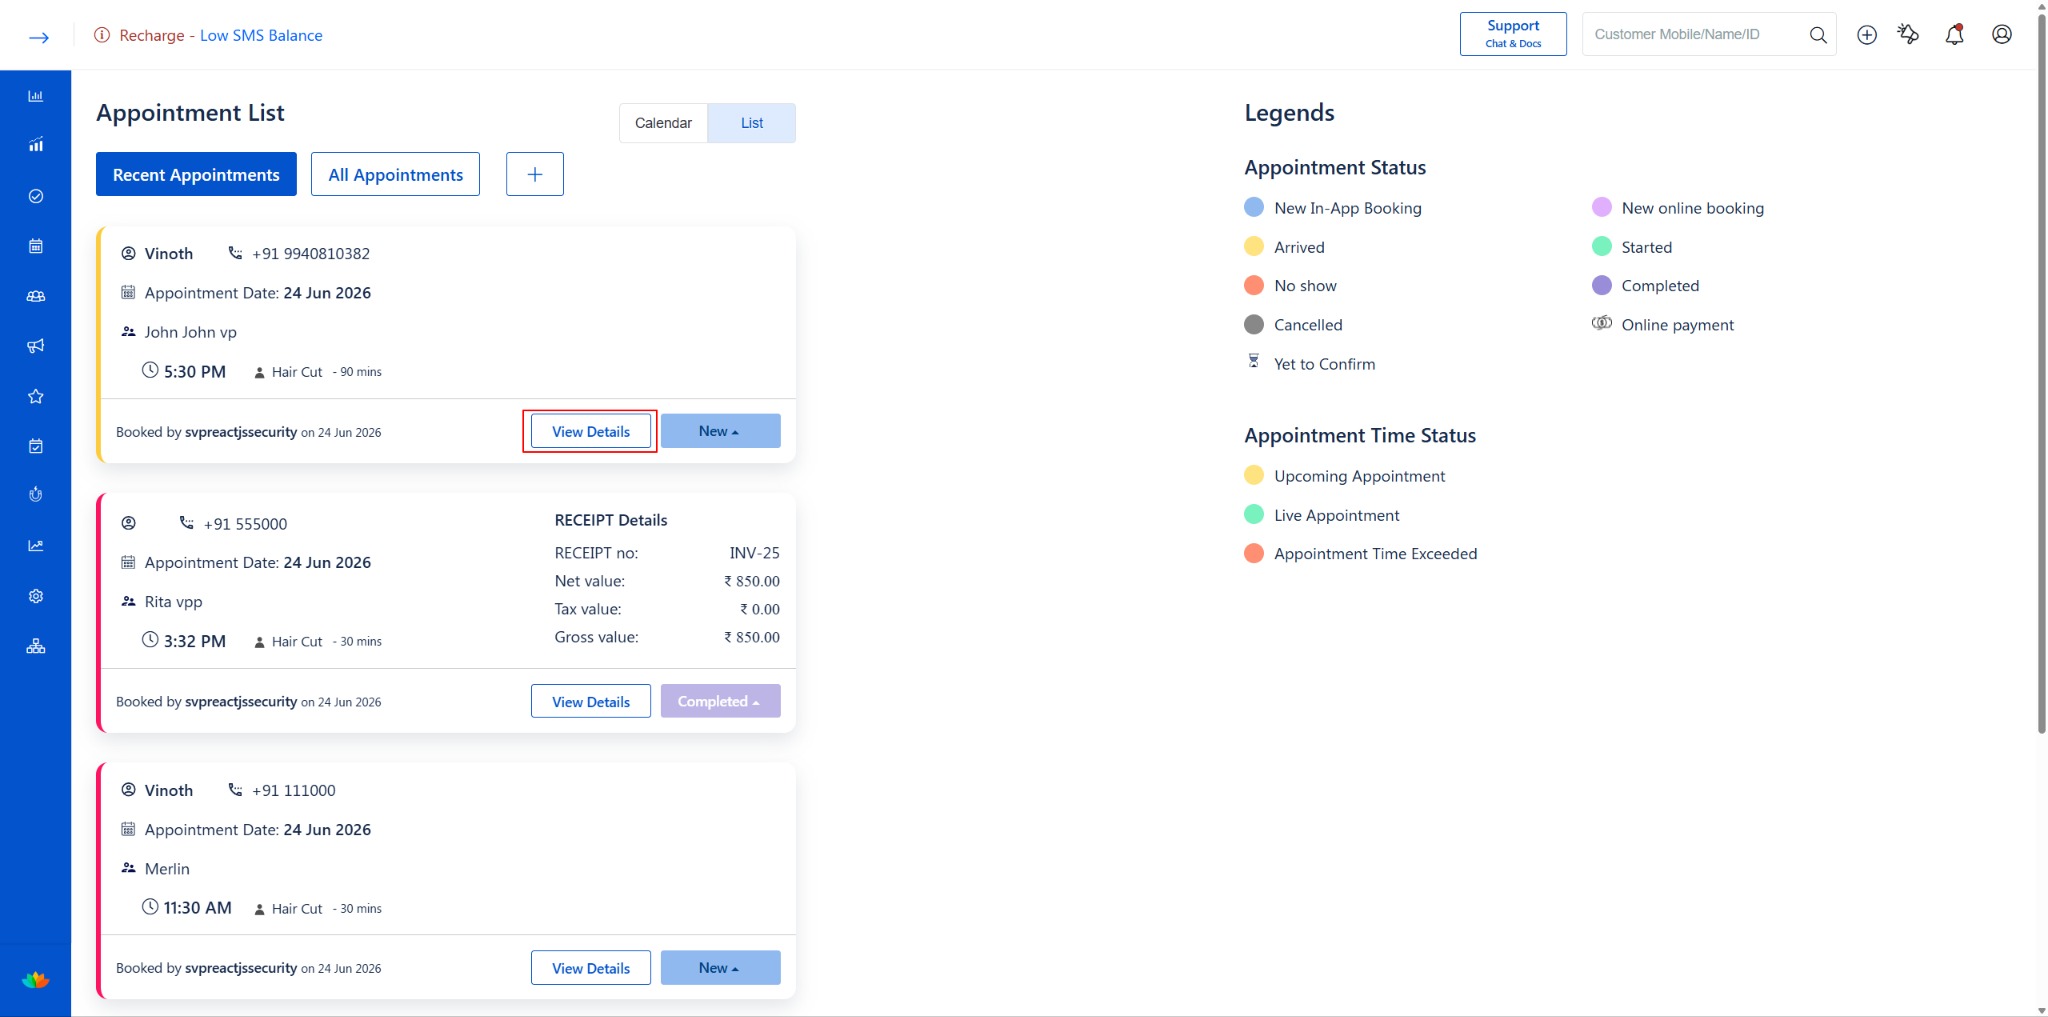
Appointment List card showing client details, redeemed service info, and View Details button
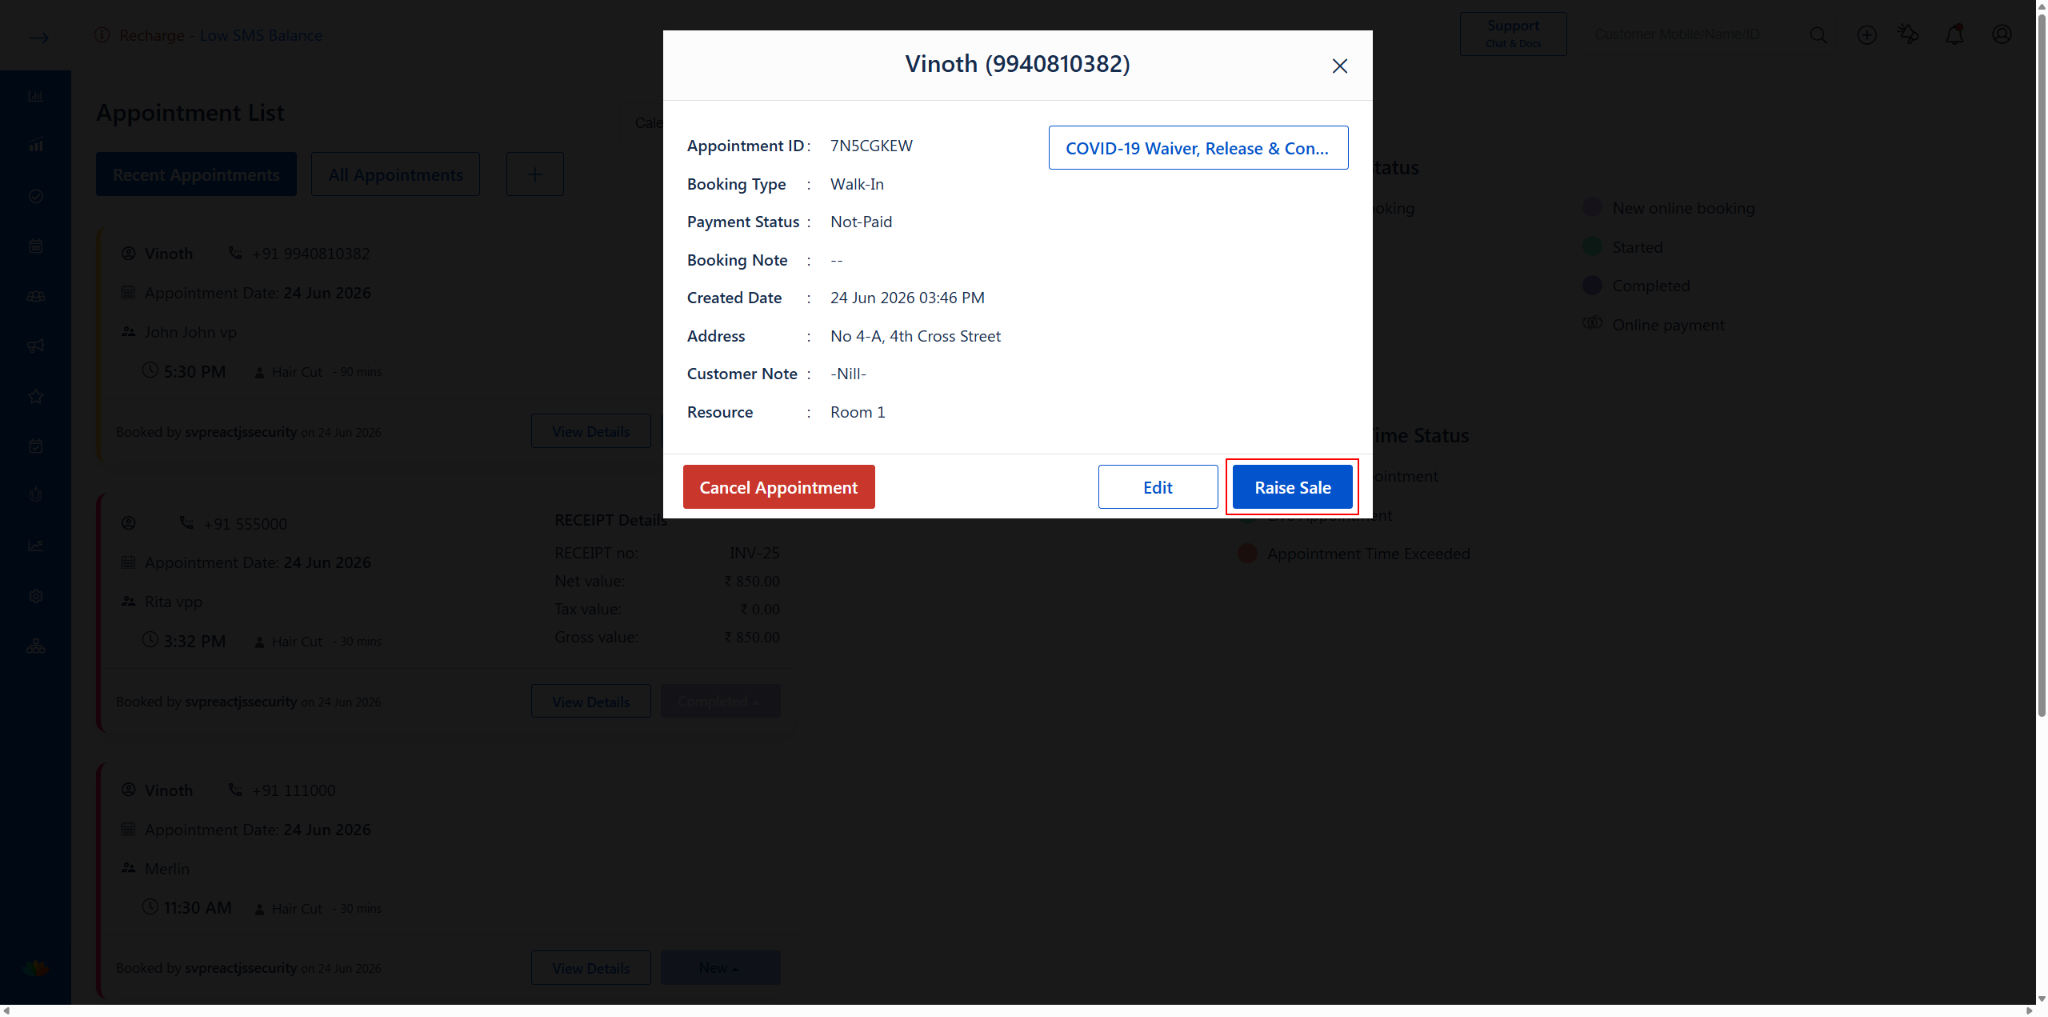
Click “View Details” to open the Appointment Details popup:
· At the bottom, you have three action buttons:
o Cancel Appointment (red) — Cancel this appointment
o Edit — Open the Edit Appointment screen
o Raise Sale — Raise a sale/bill for this appointment
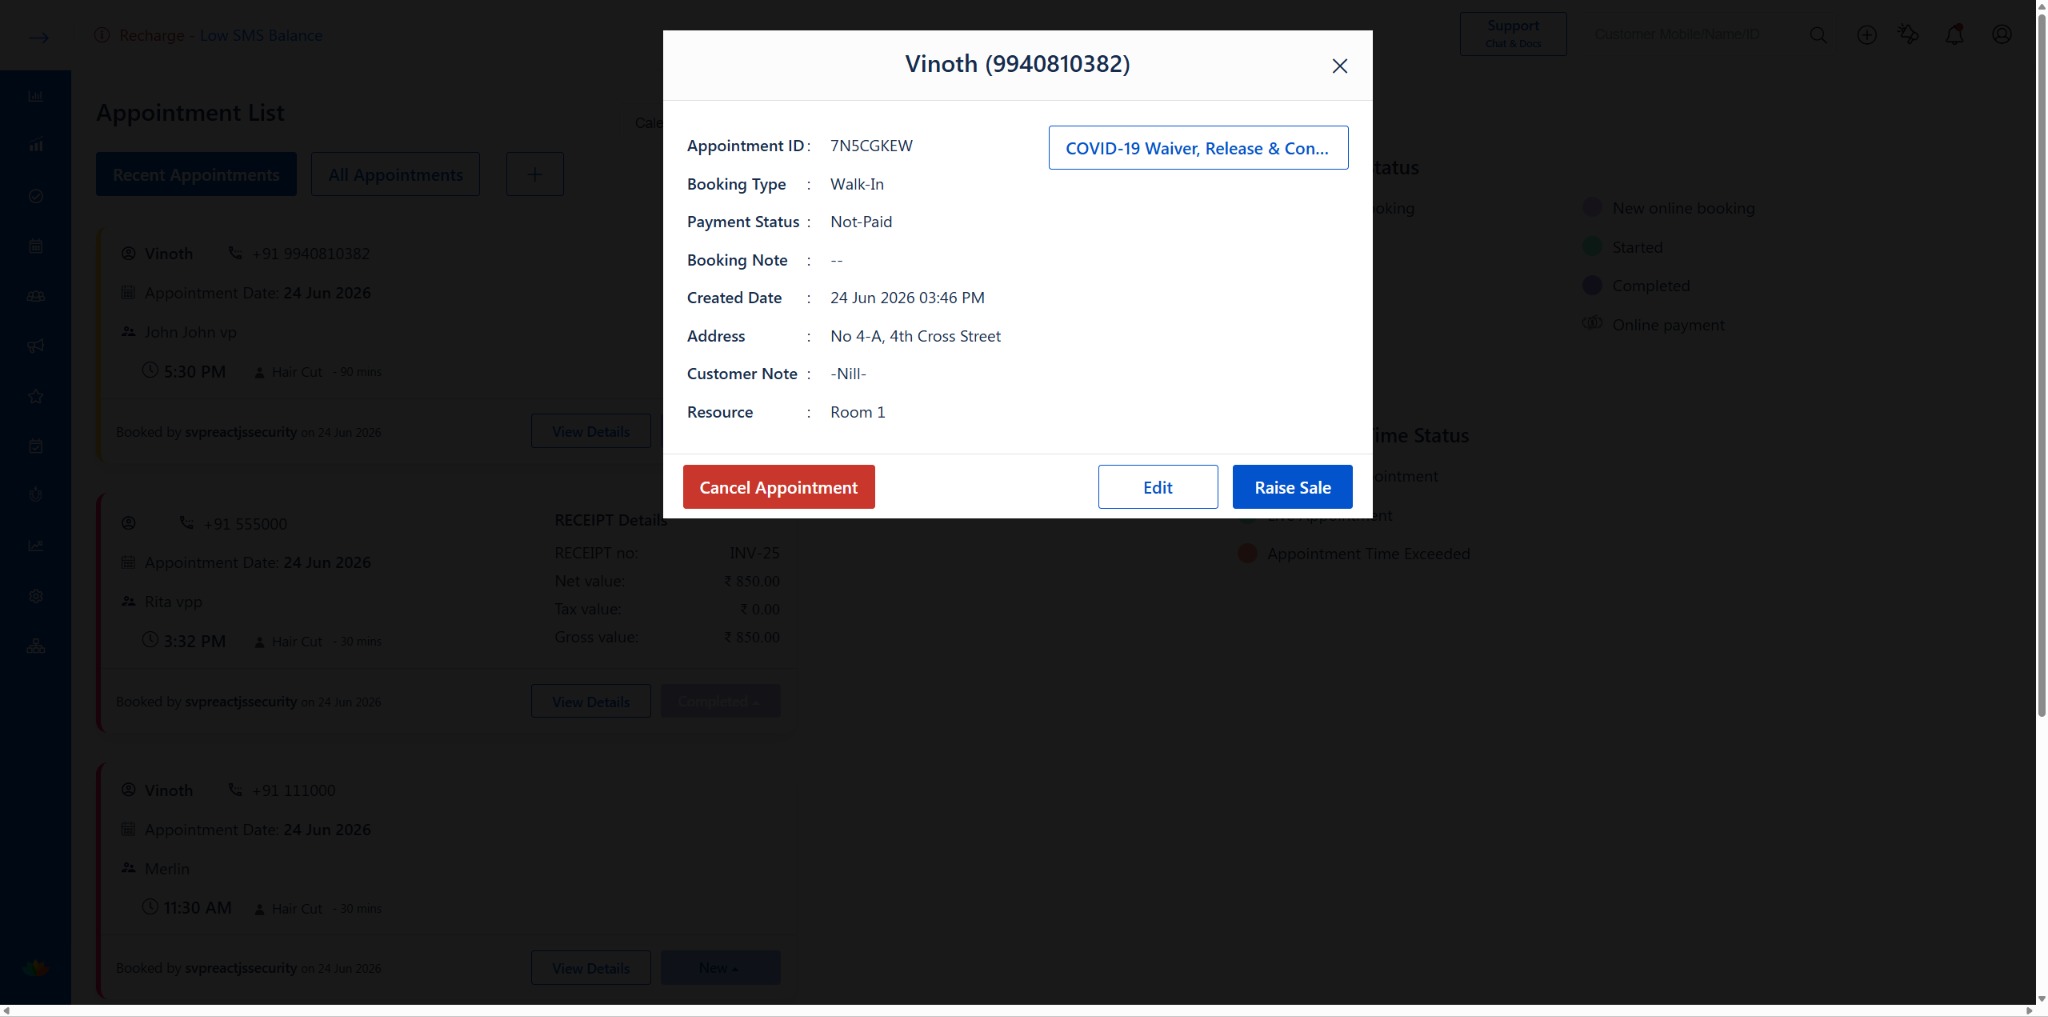
Appointment Details popup from List view with Cancel, Edit, and Raise Sale buttons
1. Raise Sale from a Purchased Package Redemption
Overview
Even though the package was already paid for in the past, you still need to “Raise Sale” to convert the appointment into a completed bill.
This zero-value bill serves as proof of redemption and ensures the staff member gets credit for completing the service. It also gives you a chance to add any extra products or services the client bought during their visit.
Navigation Path
· Via Calendar: Appointment → Calendar → Click appointment block → Raise Sale
· Via List: Appointment → List → View Details → Raise Sale
Step-by-Step Instructions
Step 1: Click “Raise Sale”
· Open the Appointment Details popup (from either the Calendar or the List view).
· Click the “Raise Sale” button (blue button at the bottom-right).
· This takes you directly to the Quick Sale page.
Step 2: Review and Complete the Bill
On the Quick Sale page, the following details are auto-filled from the appointment:
· Customer — Client’s mobile number
· Date — Appointment date
· Redeemed service line item — The redeemed service is automatically added to the cart. Since it’s a redemption, the price effectively reflects that it’s covered by the package.
From here, you can add extra items (e.g., a product they decided to buy), apply discounts on those extras, and proceed to checkout to finalize the redemption.
(See screenshot: Quick Sale page)
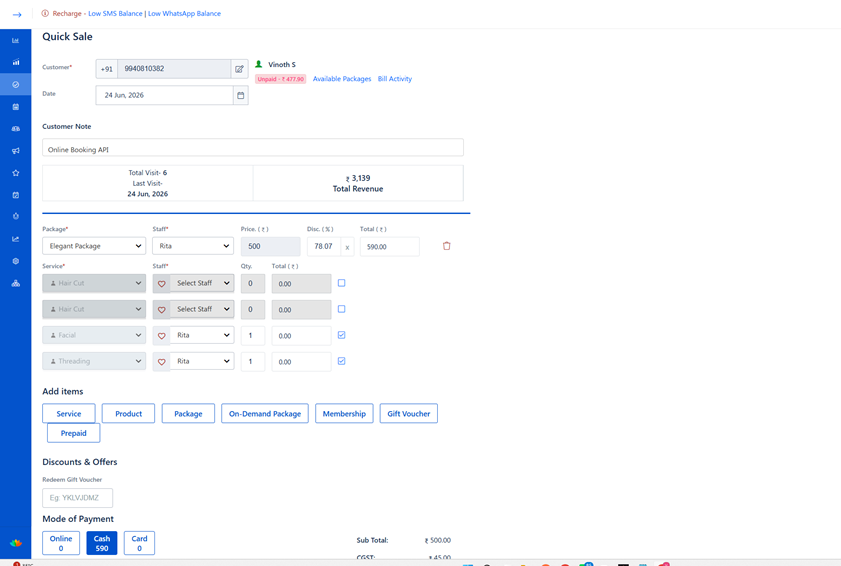
Quick Sale page with auto-filled appointment details and redeemed package line item
Was this article helpful?
That’s Great!
Thank you for your feedback
Sorry! We couldn't be helpful
Thank you for your feedback
Feedback sent
We appreciate your effort and will try to fix the article