Overview
Consent forms are essential for salons, spas, and wellness businesses to ensure clients fully understand the service, risks, expectations, contraindications, and aftercare instructions.
MioSalon allows you to create custom consent forms using various question formats, activate them for appointments, capture customer responses, and even make consent mandatory before starting a service.
This guide walks you through each step in detail—from creating a form to launching it, editing it, and using it during appointments and online bookings.
1. Understanding the Question Types
Before creating a consent form, it's important to understand the different types of questions you can include. Each question type serves a different purpose and allows you to gather detailed and accurate information from clients.
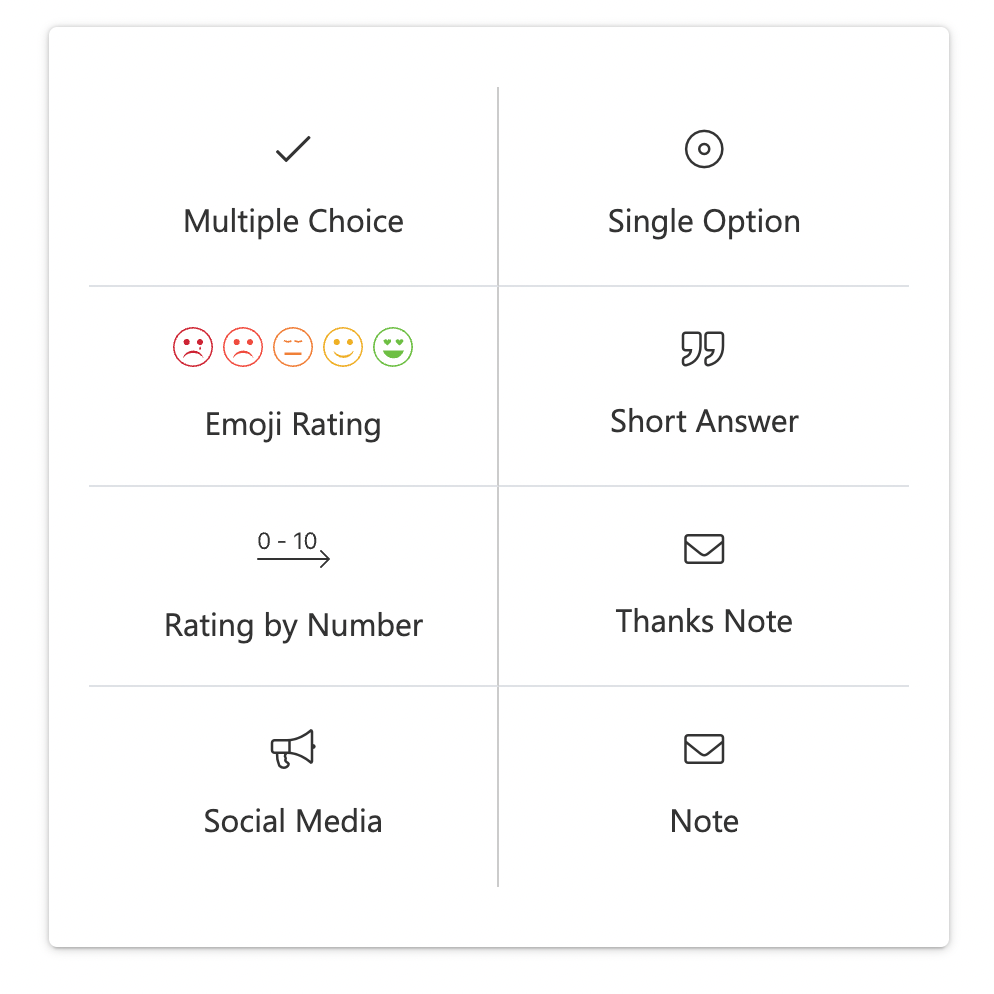
1. Multiple Choice
Allows clients to select one or more items from a list.
Useful for: allergies, medical conditions, past treatments, preferences.
2. Single Choice
Allows clients to select only one option.
Useful for: Yes/No questions, declarations, acknowledgments.
3. Short Answer
Allows clients to type a free-form response.
Useful for: medical notes, allergies, special instructions, contact details.
4. Emoji Rating
Allows clients to express how they feel using emojis.
Useful for: mood check, pain level, overall emotion before/after the service.
5. Scale Rating (1–10 scale)
Allows clients to select a value on a numeric scale.
Useful for: discomfort level, expected results, before/after comparison.
6. Thank You Note
Adds a closing message at the end of the form.
Useful for: aftercare reminders, gratitude message, final disclaimers.
7. Social Media
Adds a question that helps you collect the client’s preferred platform for leaving a review.
Useful for: gathering review preferences, directing clients to Google/Facebook/Instagram, improving online visibility, encouraging post-service ratings.
8. Note
Adds an informational text block that appears inside the form but does not require a client response.
Useful for: instructions, disclaimers, pre/post-care guidance, highlighting important details clients must read.
Sample Consent Form Questionnaire
2. How to Create a New Consent Form
Follow these steps to build a consent form from scratch:
Step-by-Step Instructions
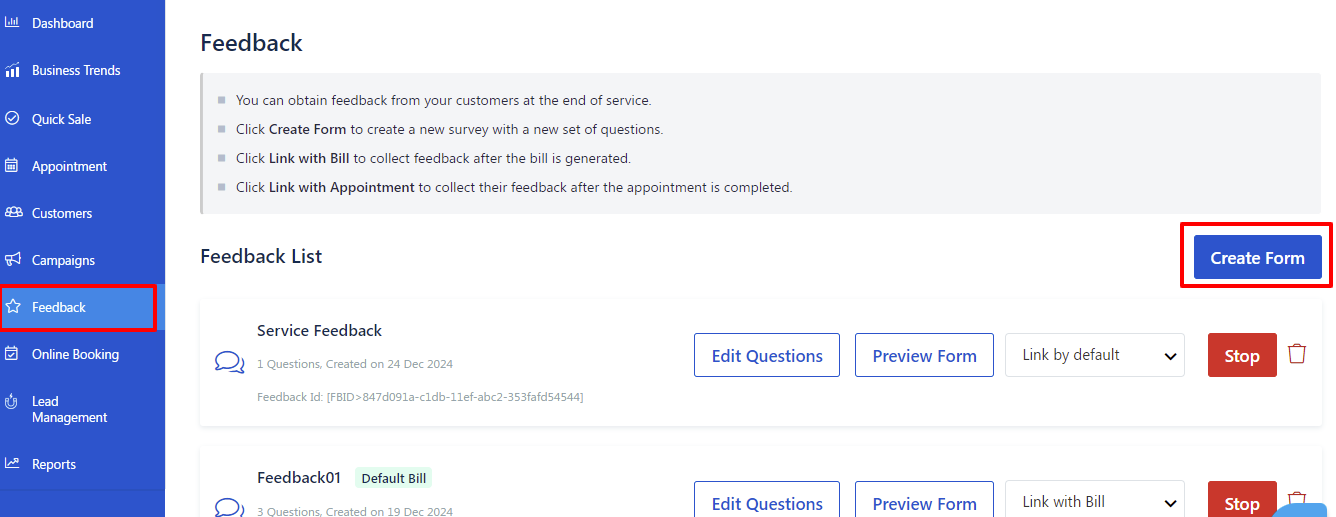
Log in to MioSalon.
Go to Feedback → Create Form.
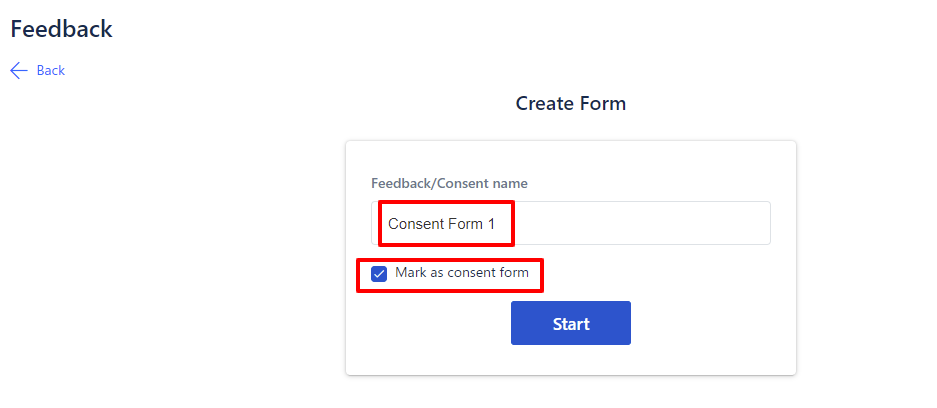
Enter a Form Name (Example: “Hair Smoothening Consent”).
Enable the option Mark as Consent Form.
Click Start to begin adding questions to the form.
You will now be prompted to add different question types.
3. How to Add Each Question Type
Below are detailed instructions for each type of question. These match the screenshot style and flow found in your document.
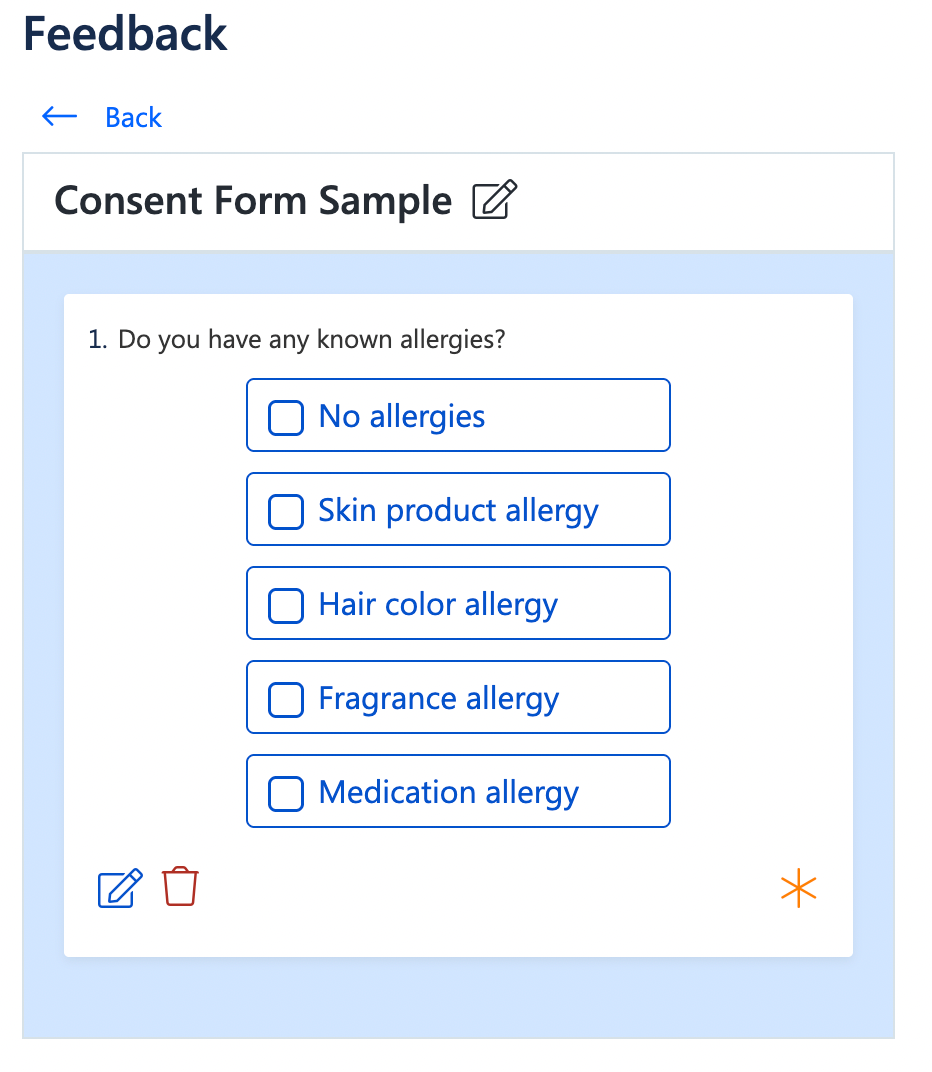
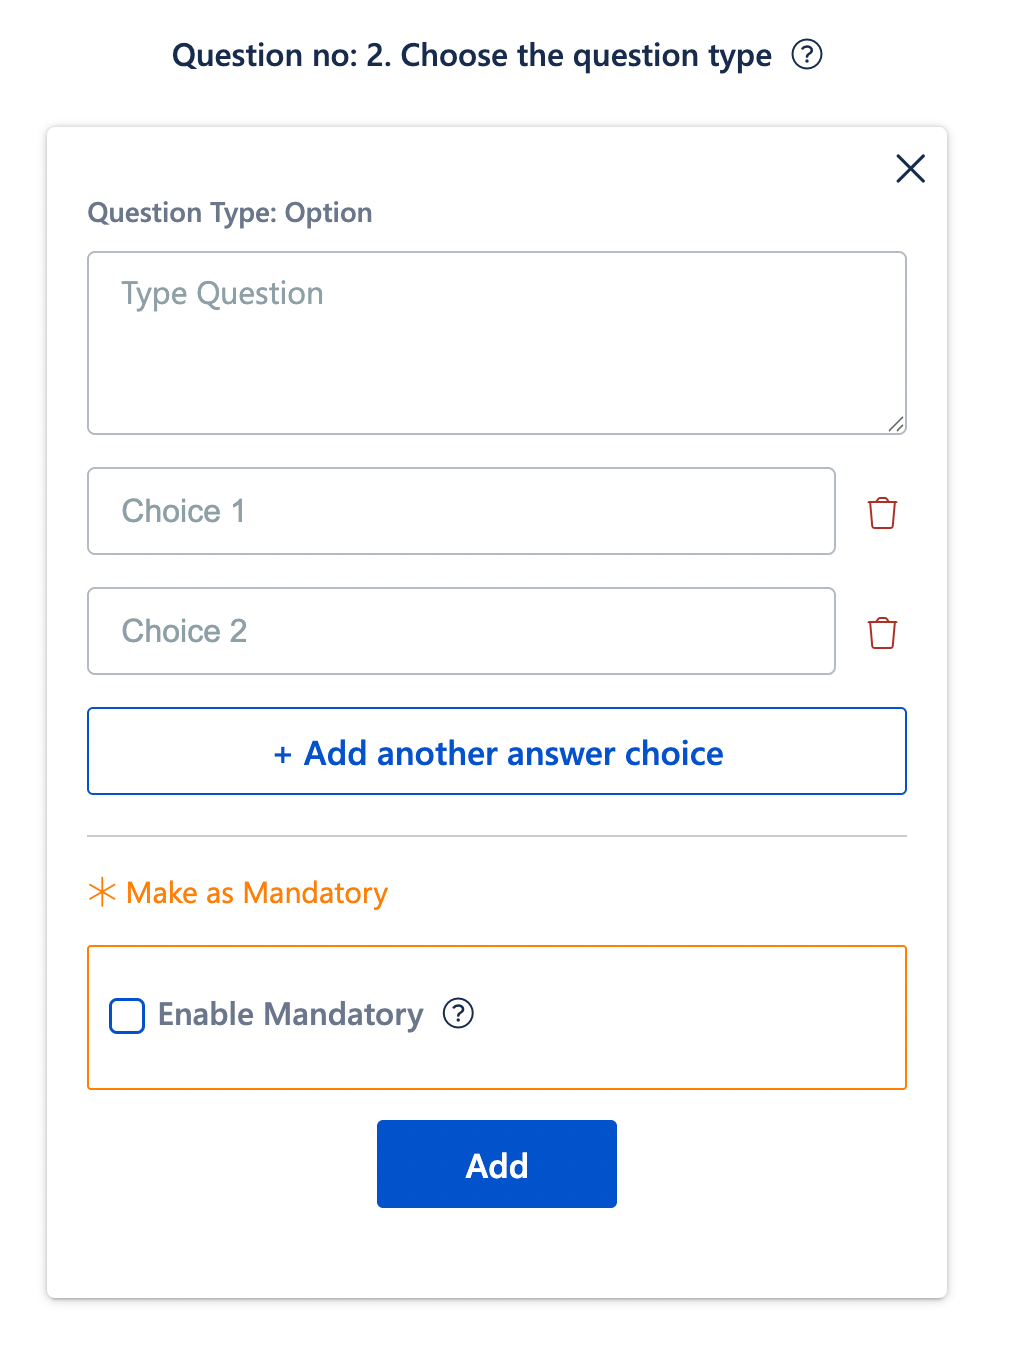
A. Adding a Multiple Choice Question
Select Multiple Choice.
Type your question in the text box.
Add options under "Choice 1", "Choice 2", etc.
Click + Add another answer choice to add more options.
Enable Mandatory/Required if clients must answer this question.
Click Add Answer choice to add more options.
Click the Delete icon to remove an option.
Click Add to insert it into your form.
Added questions and answers will be displayed in the left preview.

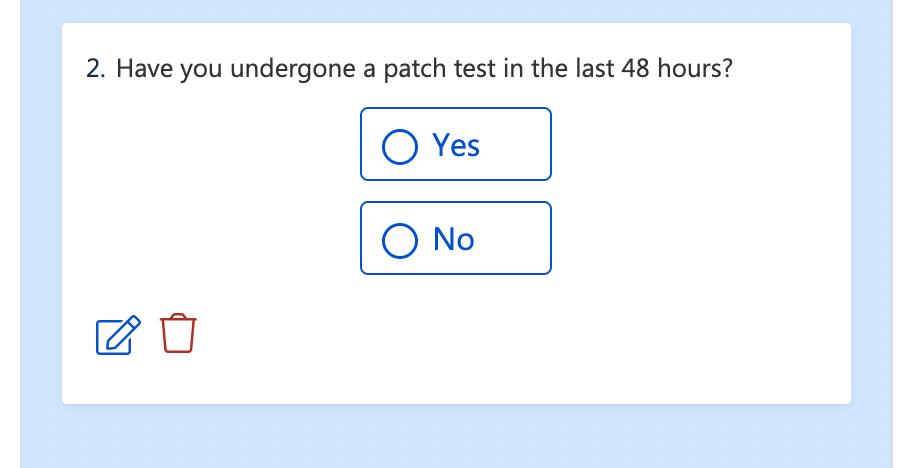
B. Adding a Single Choice Question
Select Single Choice.
Enter the question text.
Fill in the available answer options.
Enable Mandatory/Required if needed.
Click Add Answer choice to add more options.
Click the Delete icon to remove an option.
Click Add to insert it into your form.
Added questions and answers will be displayed in the left preview.
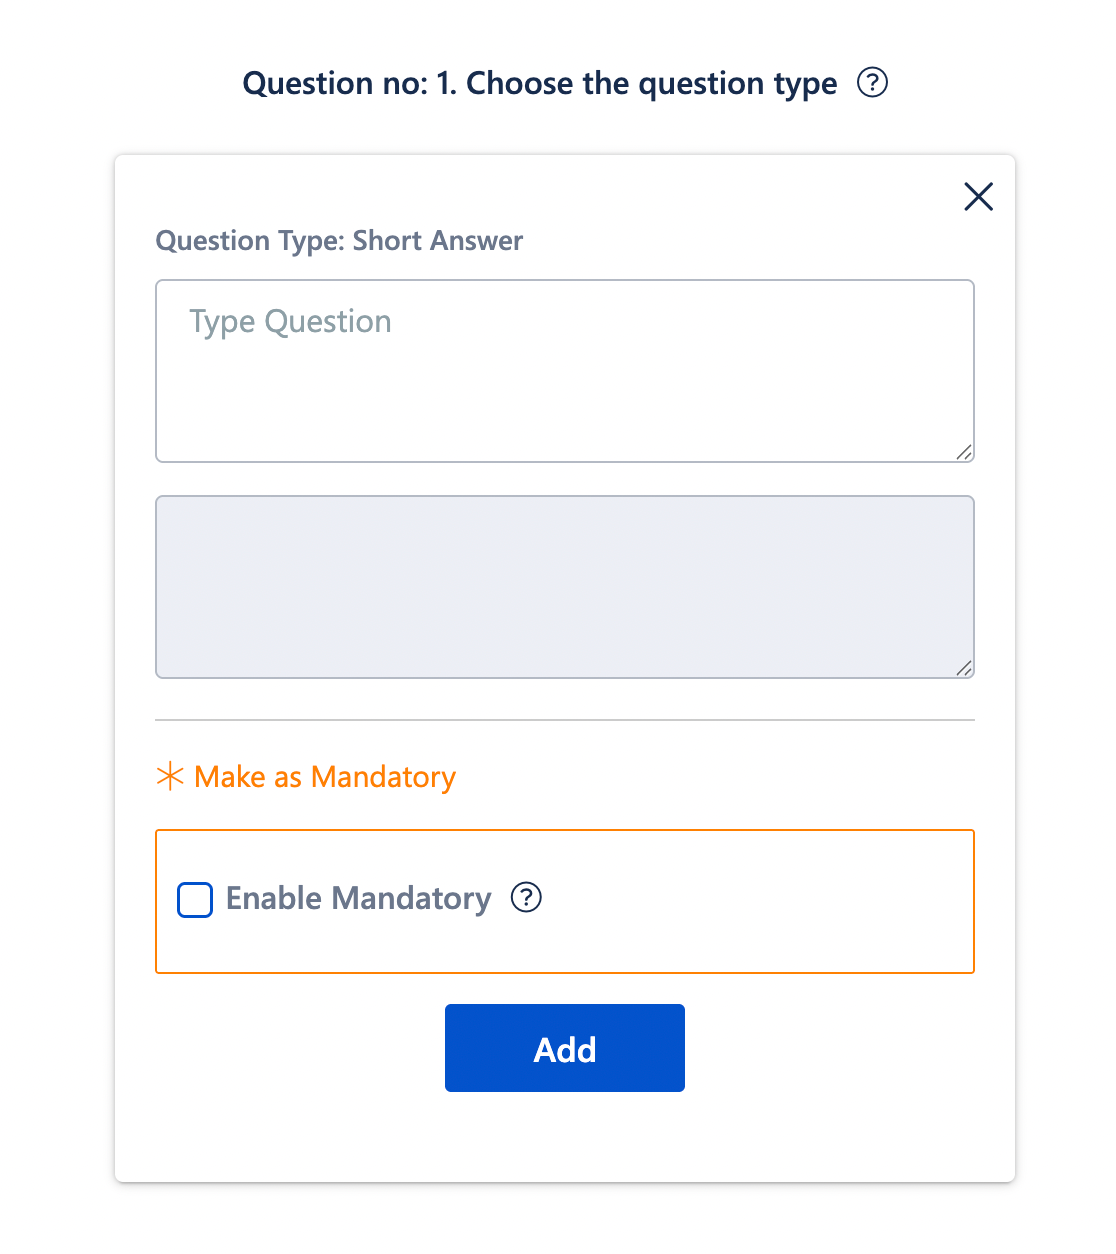
C. Adding a Short Answer Question
Select Short Answer.
Type your question in the text box shown in the screenshot.
Enable Mandatory/Required if the answer is mandatory.
Click Add to insert it into your form.
Added questions and answers will be displayed in the left preview.

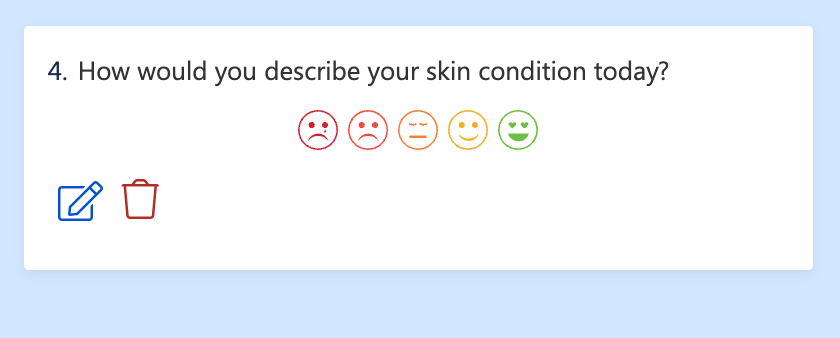
D. Adding an Emoji Rating Question
Select Emoji Rating.
Type the question for which the client will choose an emoji response.
Enable Mandatory/Required if the answer is mandatory.
Click Add to insert it into your form.
Added questions and answers will be displayed in the left preview.

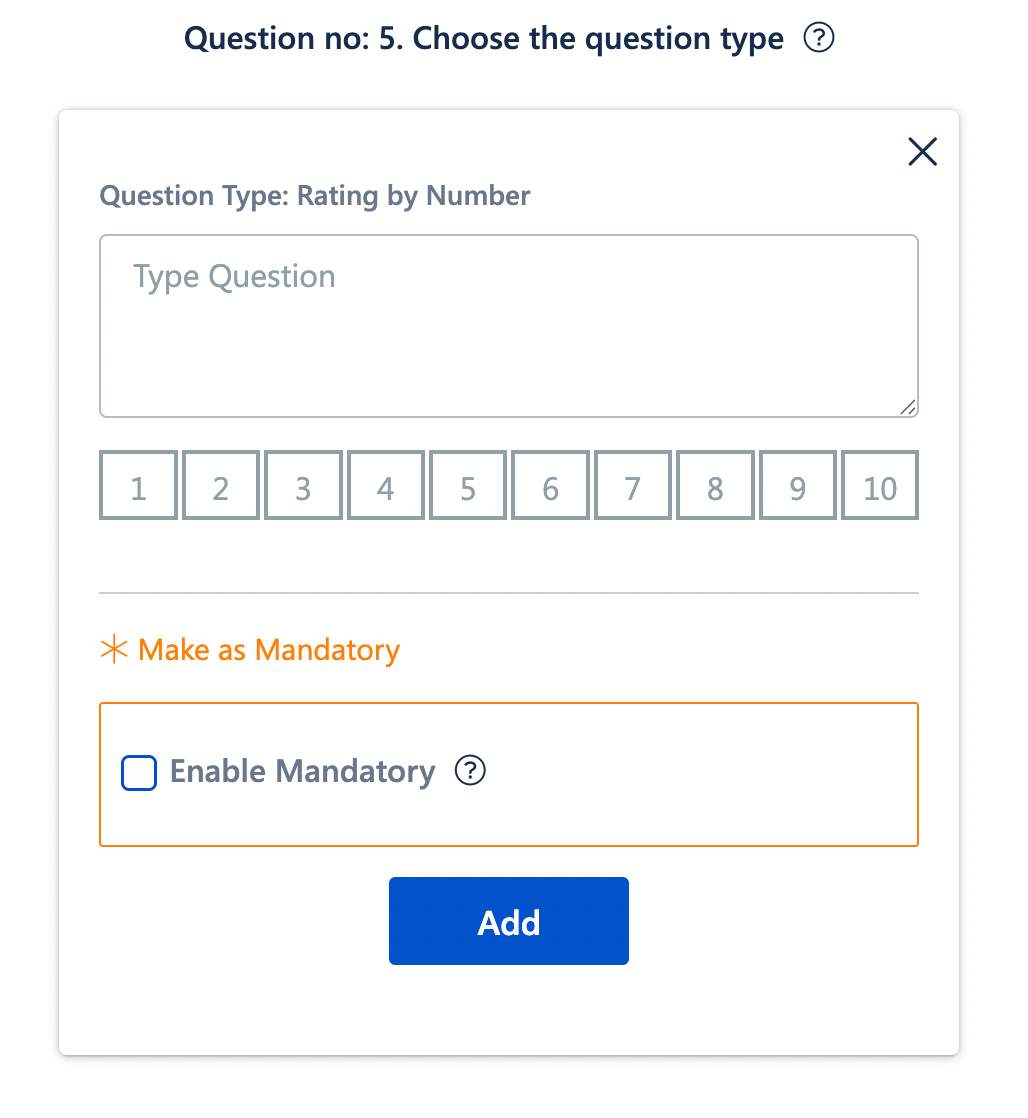
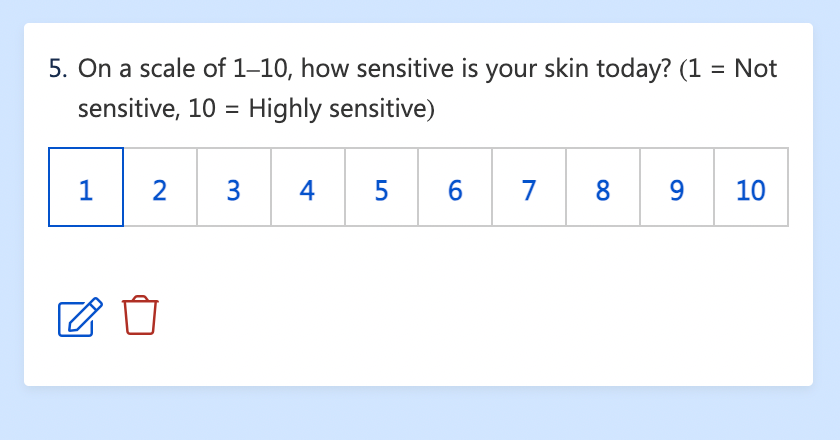
F. Adding a Scale Rating Question (1–10 scale)
Select Scale Rating.
Enter the question.
Example: “On a scale of 1–10, how sensitive is your skin today?”Enable Mandatory/Required if the answer is mandatory.
Click Add to insert it into your form.
Added questions and answers will be displayed in the left preview.
G. Adding a Thank You Note
Select Thank You Note.
Enter your final closing message.
Click Add to insert it into your form.
Added questions and answers will be displayed in the left preview.


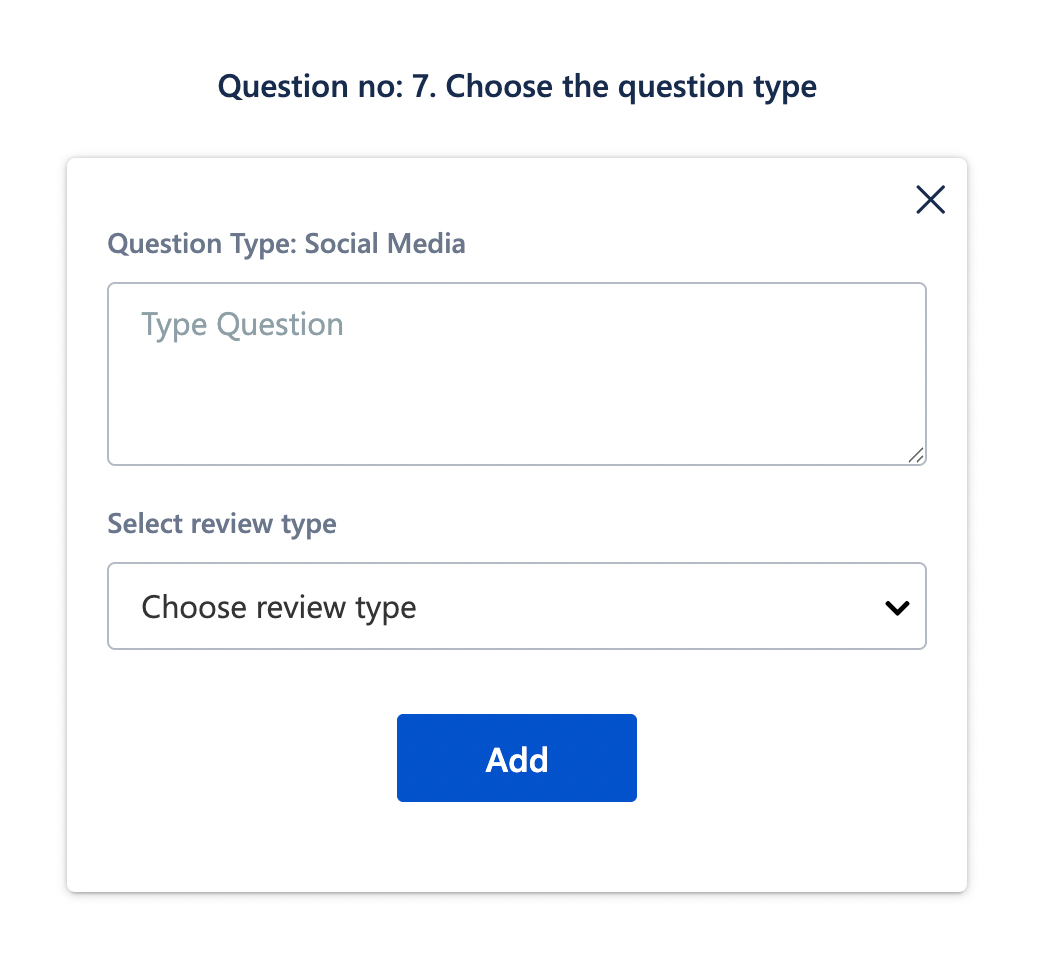
H. Add a Social Media Question
Follow these steps to include a Social Media question in your form:
Select Social Media from the question type list.
In the Type Question field (as shown in the screenshot), enter your prompt.
Example: “Where would you prefer to share your review after the service?”
Under Select Review Type, choose the preferred platform
(e.g., Google, Facebook, Instagram).Click Add to insert the question into your form.
Once added, the question and its selected platform will appear in the preview panel on the left.
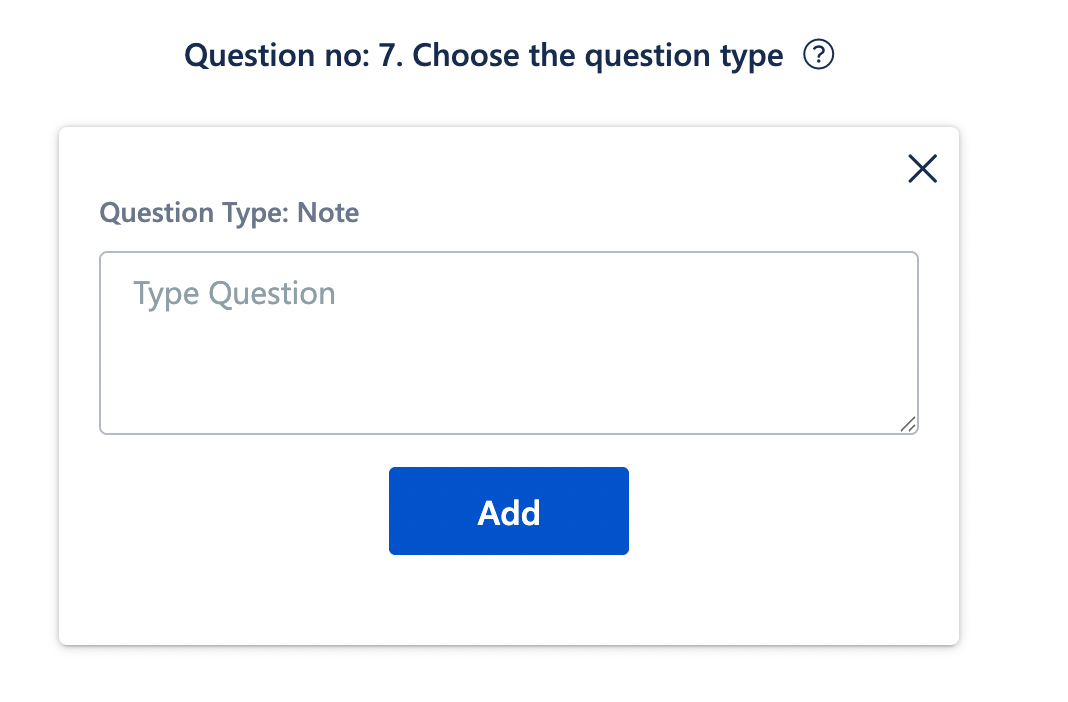
How to Add a Note to Your Form
Select Note from the question type list.
In the Type Question field, enter your message or instruction.
Example: “Please read the terms below before confirming your consent.”
Click Add to insert the note into the form.
You will see the note appear in the preview section on the left.

4. How to Edit an Existing Consent Form
Go to Feedback List by clicking the Back button.
Select the form you want to edit.
Click Edit Questions next to the form title or any question.
Make your changes → click Update.

5. How to Stop, Launch, or Delete a Consent Form
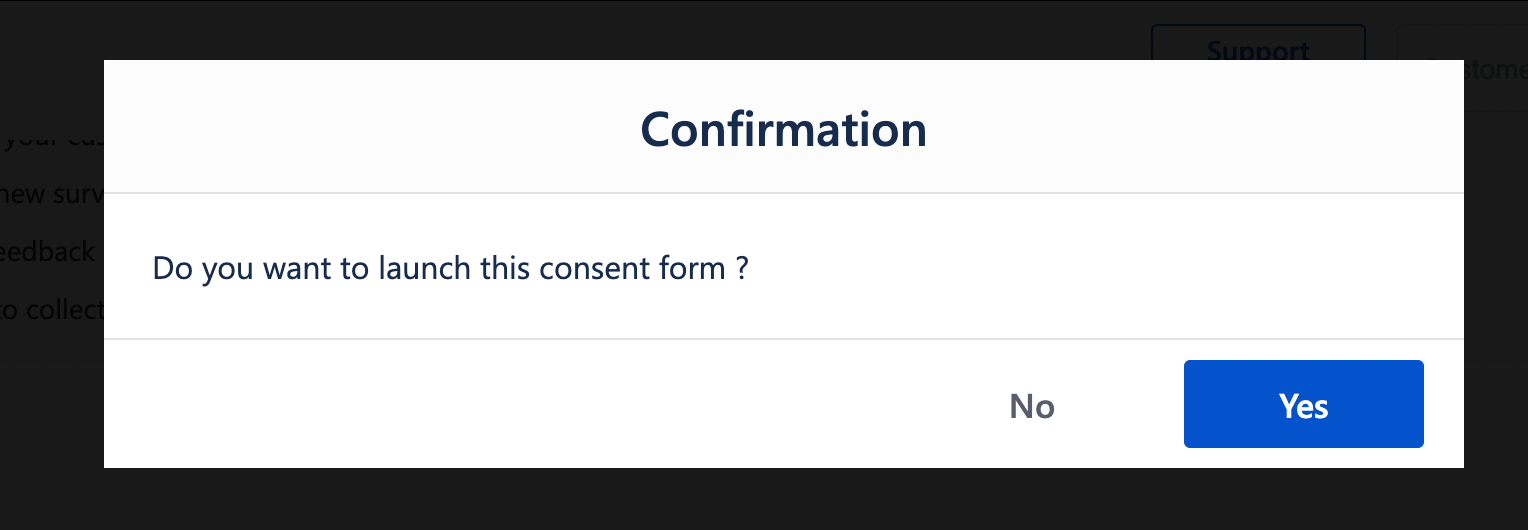
To Launch a Form
Go to Feedback → Consent List.
Click Launch next to the form.
To Stop a Form
Click Stop next to the active form.
To Delete a Form
From the same list, click Delete.
Confirm deletion.


6. How to Set a Default Consent Form
If you have more than one launched consent form:
Go to Feedback List.
Look for the form you want as default.
Click Make as Default.


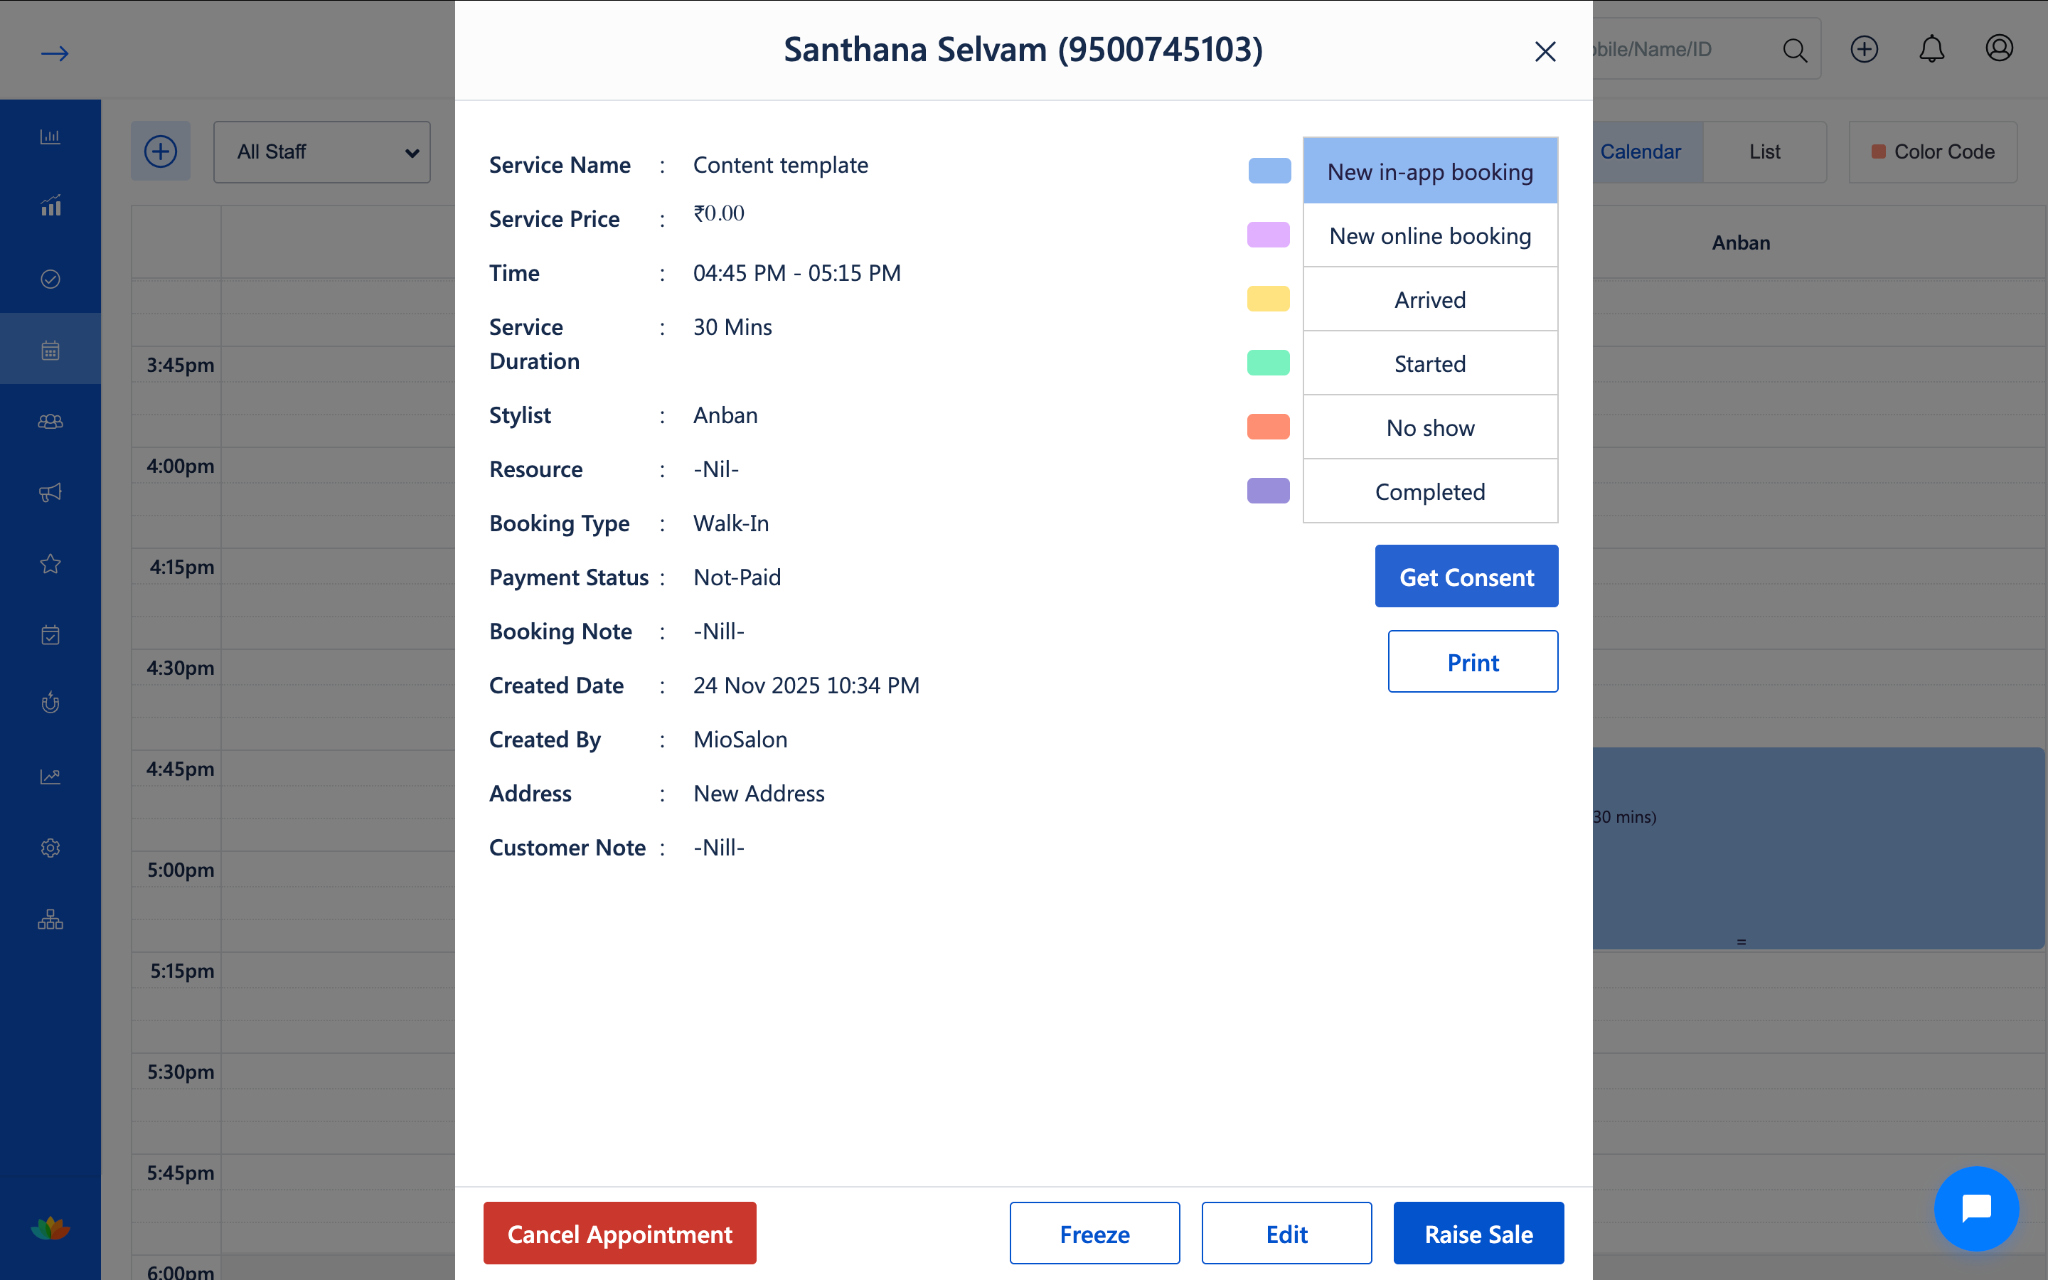
7. How Consent Shows in Appointments
When a consent form is launched and set as default:
It appears inside Appointment Details.
Staff can open and fill the form anytime before the service begins.
Each response is stored under the client’s profile.
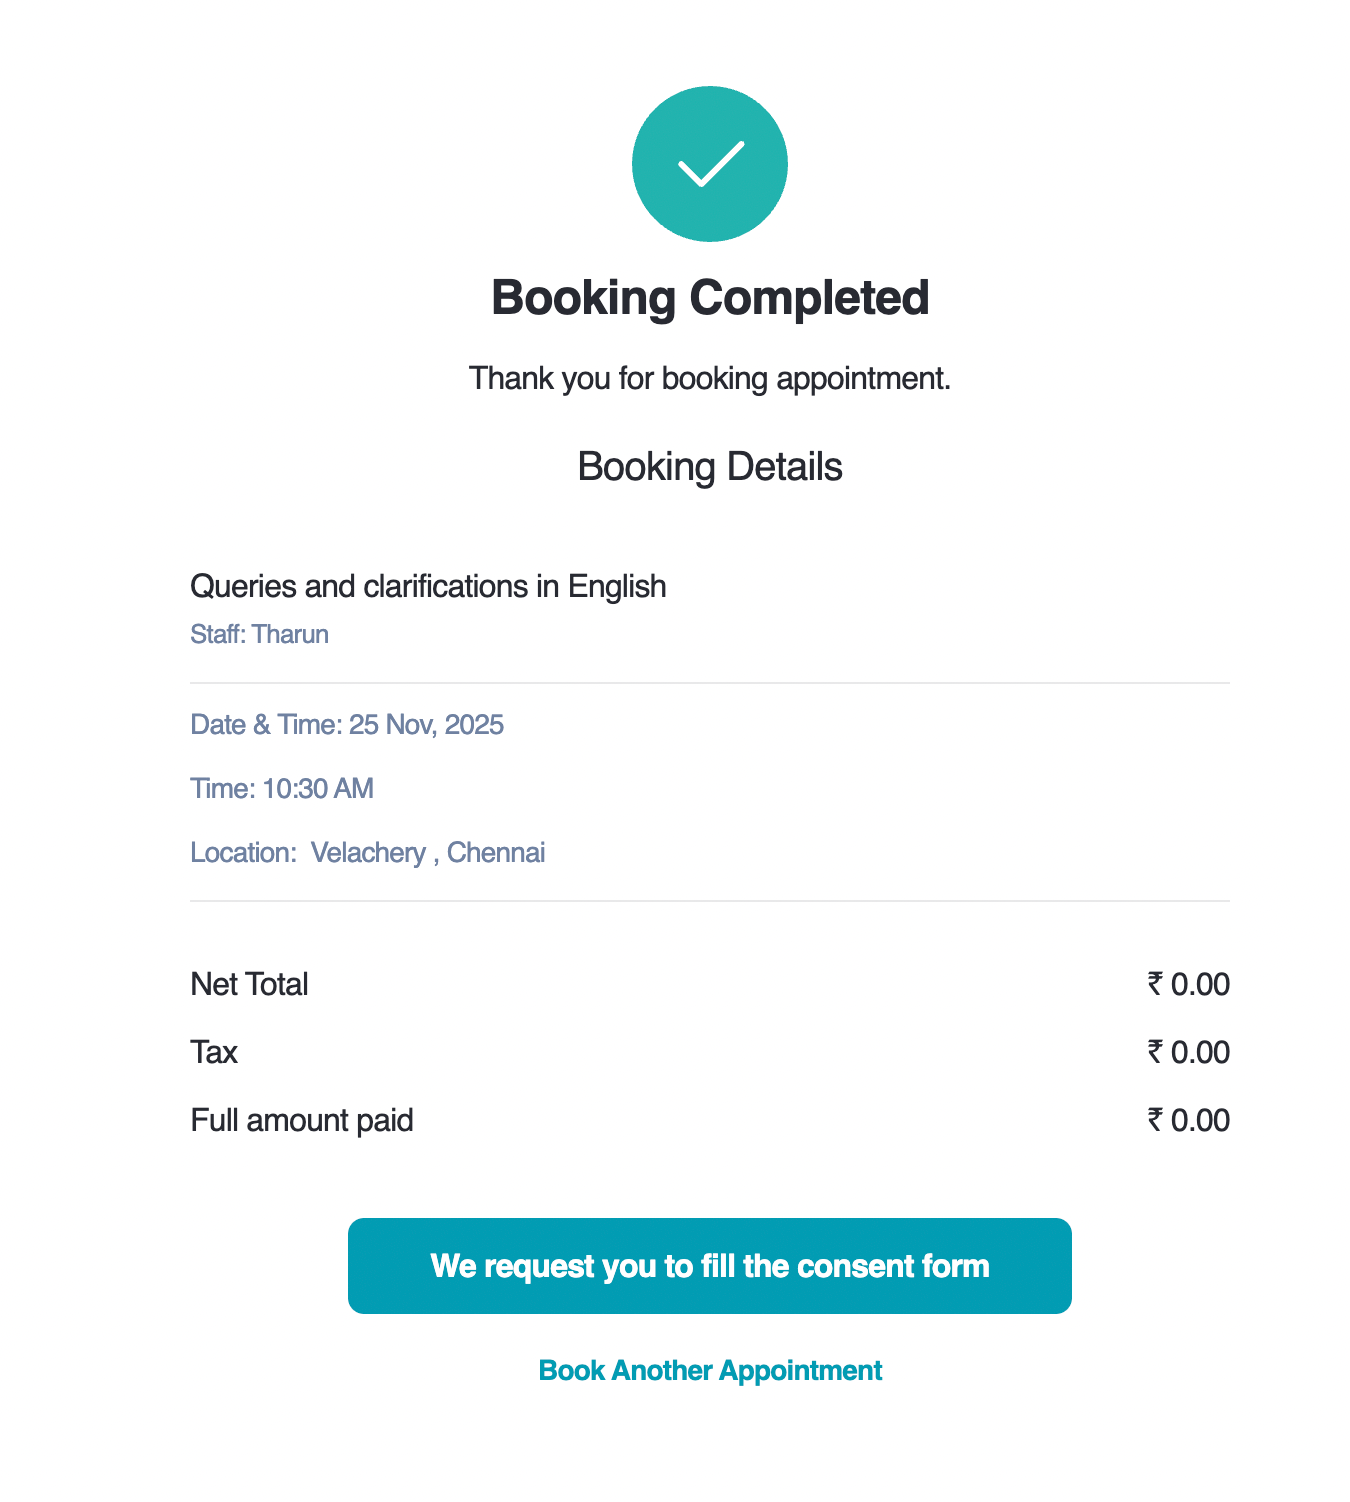
8. How Consent Appears in Online Booking
If you have online booking enabled:
The consent form appears during the final step of booking.
Clients must submit the form to confirm the appointment.
The submitted form is automatically attached to their appointment.
9. Make Consent Mandatory Before Starting an Appointment
MioSalon now allows you to block the Start/Complete buttons until the consent form is filled.
How to Enable This Setting
Go to Settings → Appointment Settings.
Scroll to the toggle:
“Require client consent before starting a service”Turn the toggle ON.
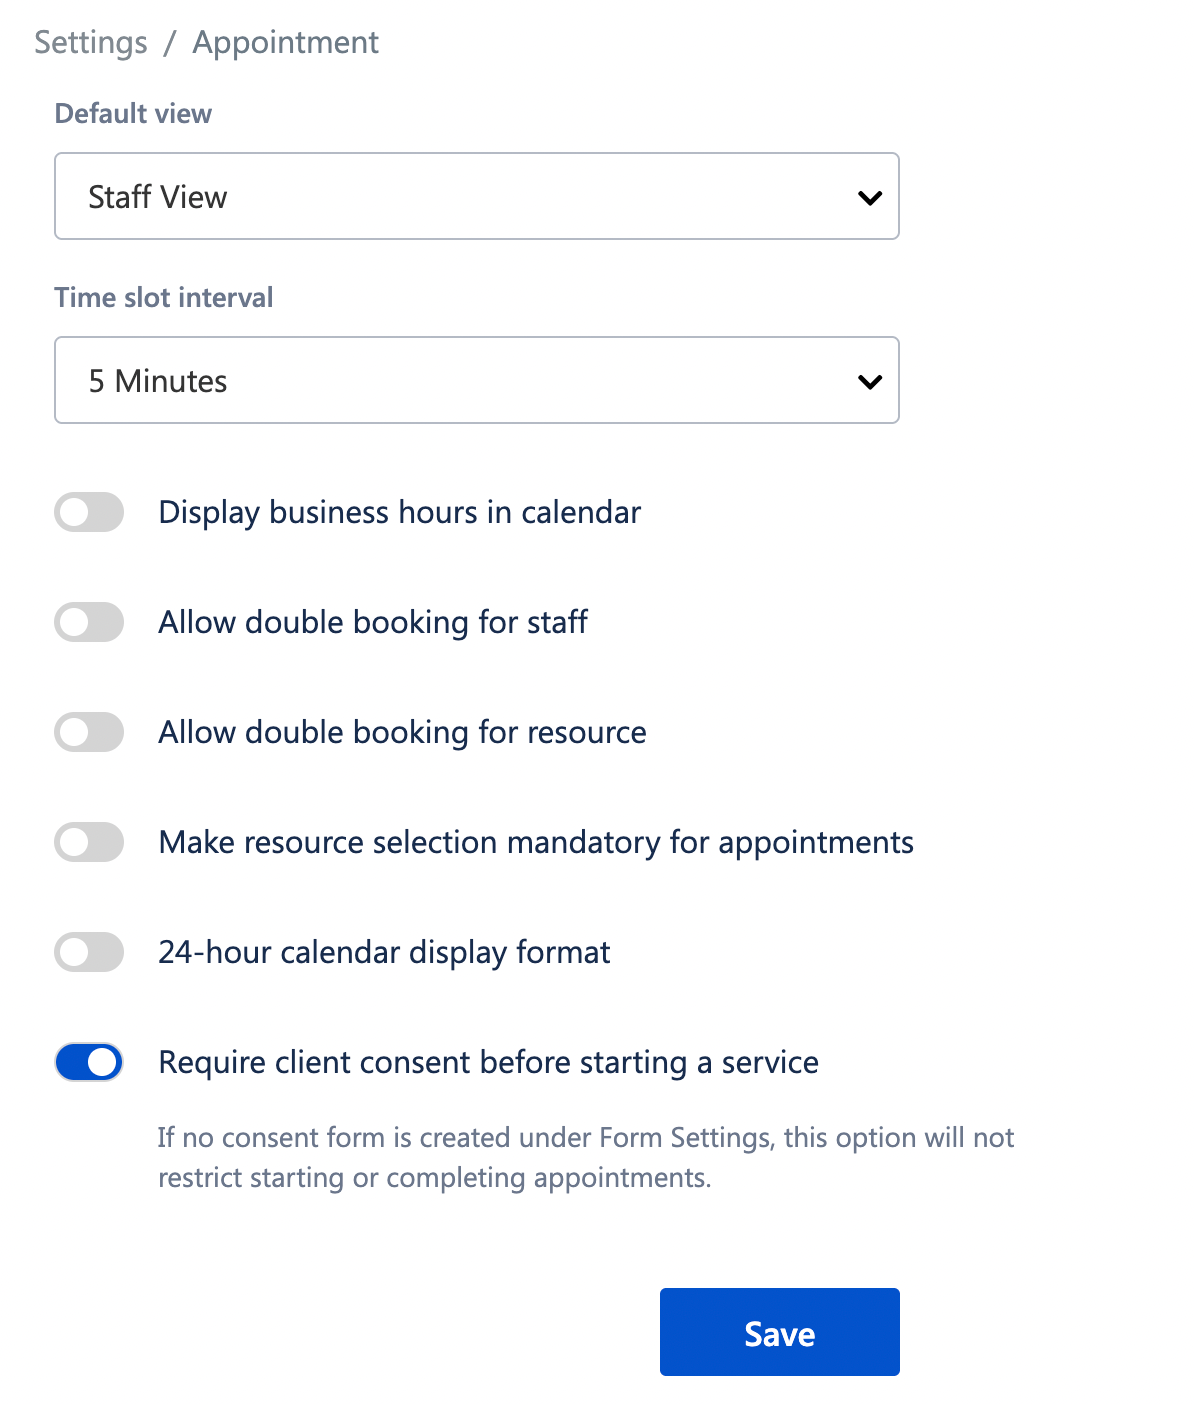
Important Note
If there is no active consent form, this restriction will not apply.
You must have at least one launched form.
What Staff Will See
The Start, In Progress, and Complete buttons will be disabled.
Hover message:
“Fill the client consent form to proceed.”
10. Use Cases
✔ Hair Treatments
Keratin, colouring, bleaching, smoothening.
✔ Skin & Aesthetic Services
Peels, laser, dermabrasion, facials.
✔ Medical/Welfare Services
Pregnancy disclaimers, wellness assessments.
✔ Safety & Liability
Patch tests, allergy confirmation.
11. Benefits
Ensures client awareness & safety
Protects the business legally
Ensures standardized compliance
Prevents services from starting without consent
Improves professionalism & trust
Organizes all consent records digitally
Was this article helpful?
That’s Great!
Thank you for your feedback
Sorry! We couldn't be helpful
Thank you for your feedback
Feedback sent
We appreciate your effort and will try to fix the article