How to Set Up Recurring Appointments in MioSalon
Overview
Recurring appointments are essential for clients who visit on a regular schedule—whether daily, weekly, or monthly. Instead of manually creating each appointment, the Set Recurring feature allows front-desk staff to schedule repeating visits in a single action, saving time and ensuring a consistent calendar.
Navigation Path
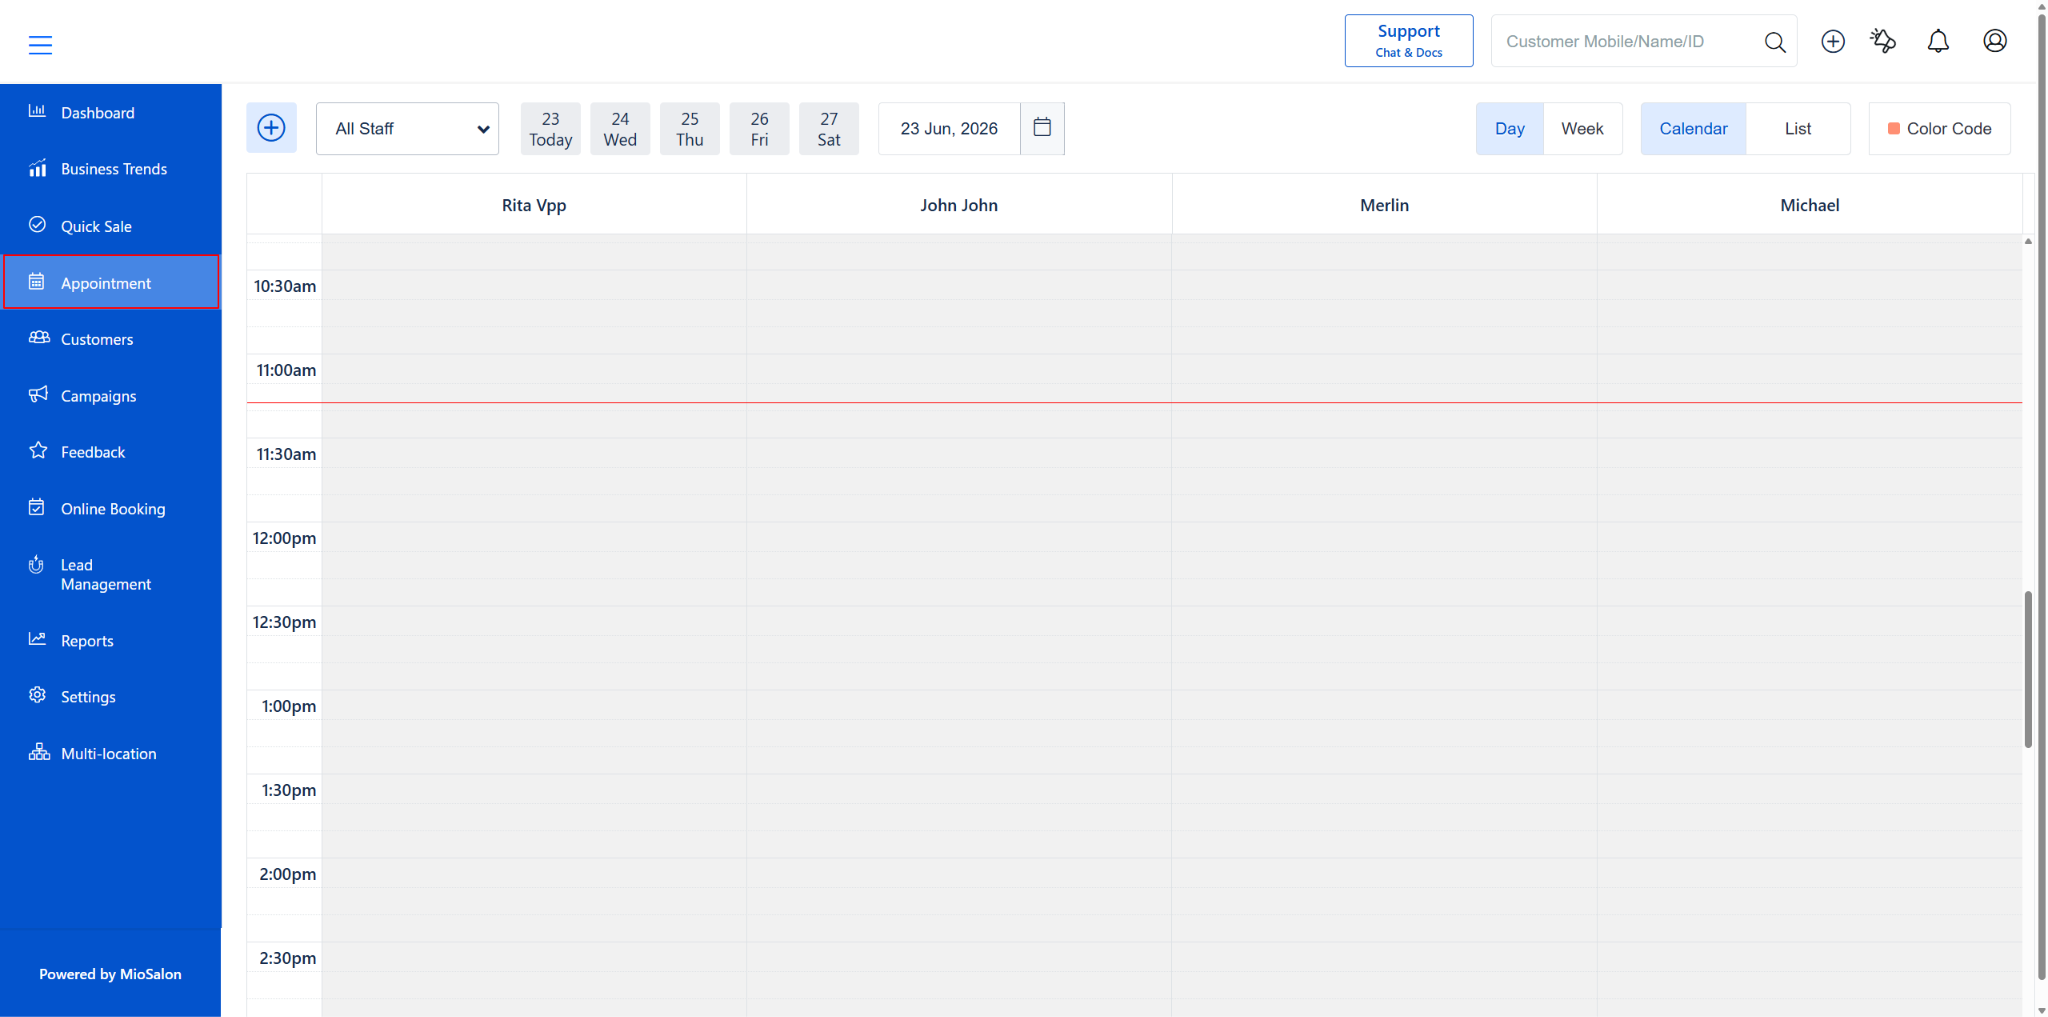
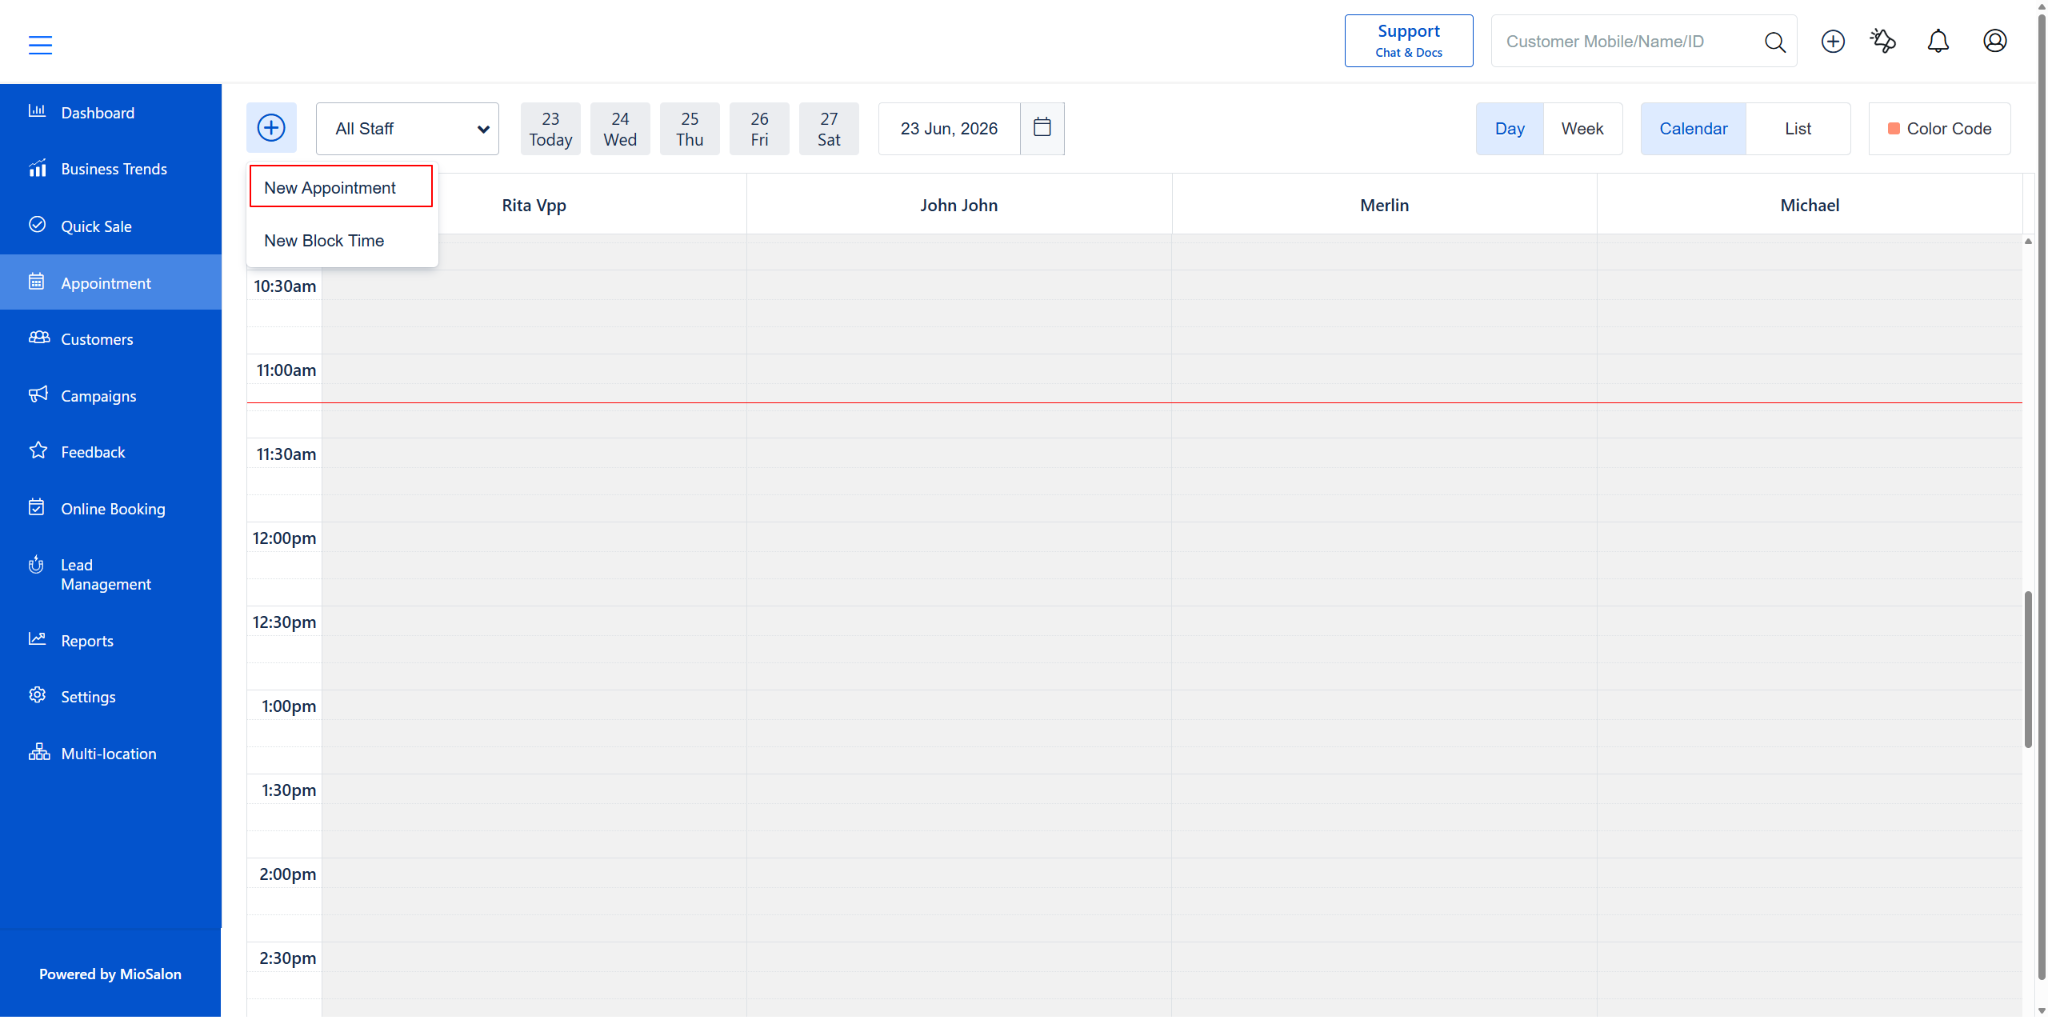
Appointment (left menu) → Plus (+) icon (top-left) → New Booking → Add Service → Click “Set Recurring”
Important Notes on Recurring Appointments:
1. Package Restrictions: Recurring appointments are not allowed when booking Package Services or processing Package Service Redemptions.
2. Staff Restrictions: Recurring appointments are not allowed for services that require multiple staff members (Multi-staff Services).
Step-by-Step Instructions
Step 1: Open the Appointment Popup and Add a Service
1. Log in to MioSalon and go to Appointment from the left menu.
2. Click the Plus (+) icon → “New Booking”.
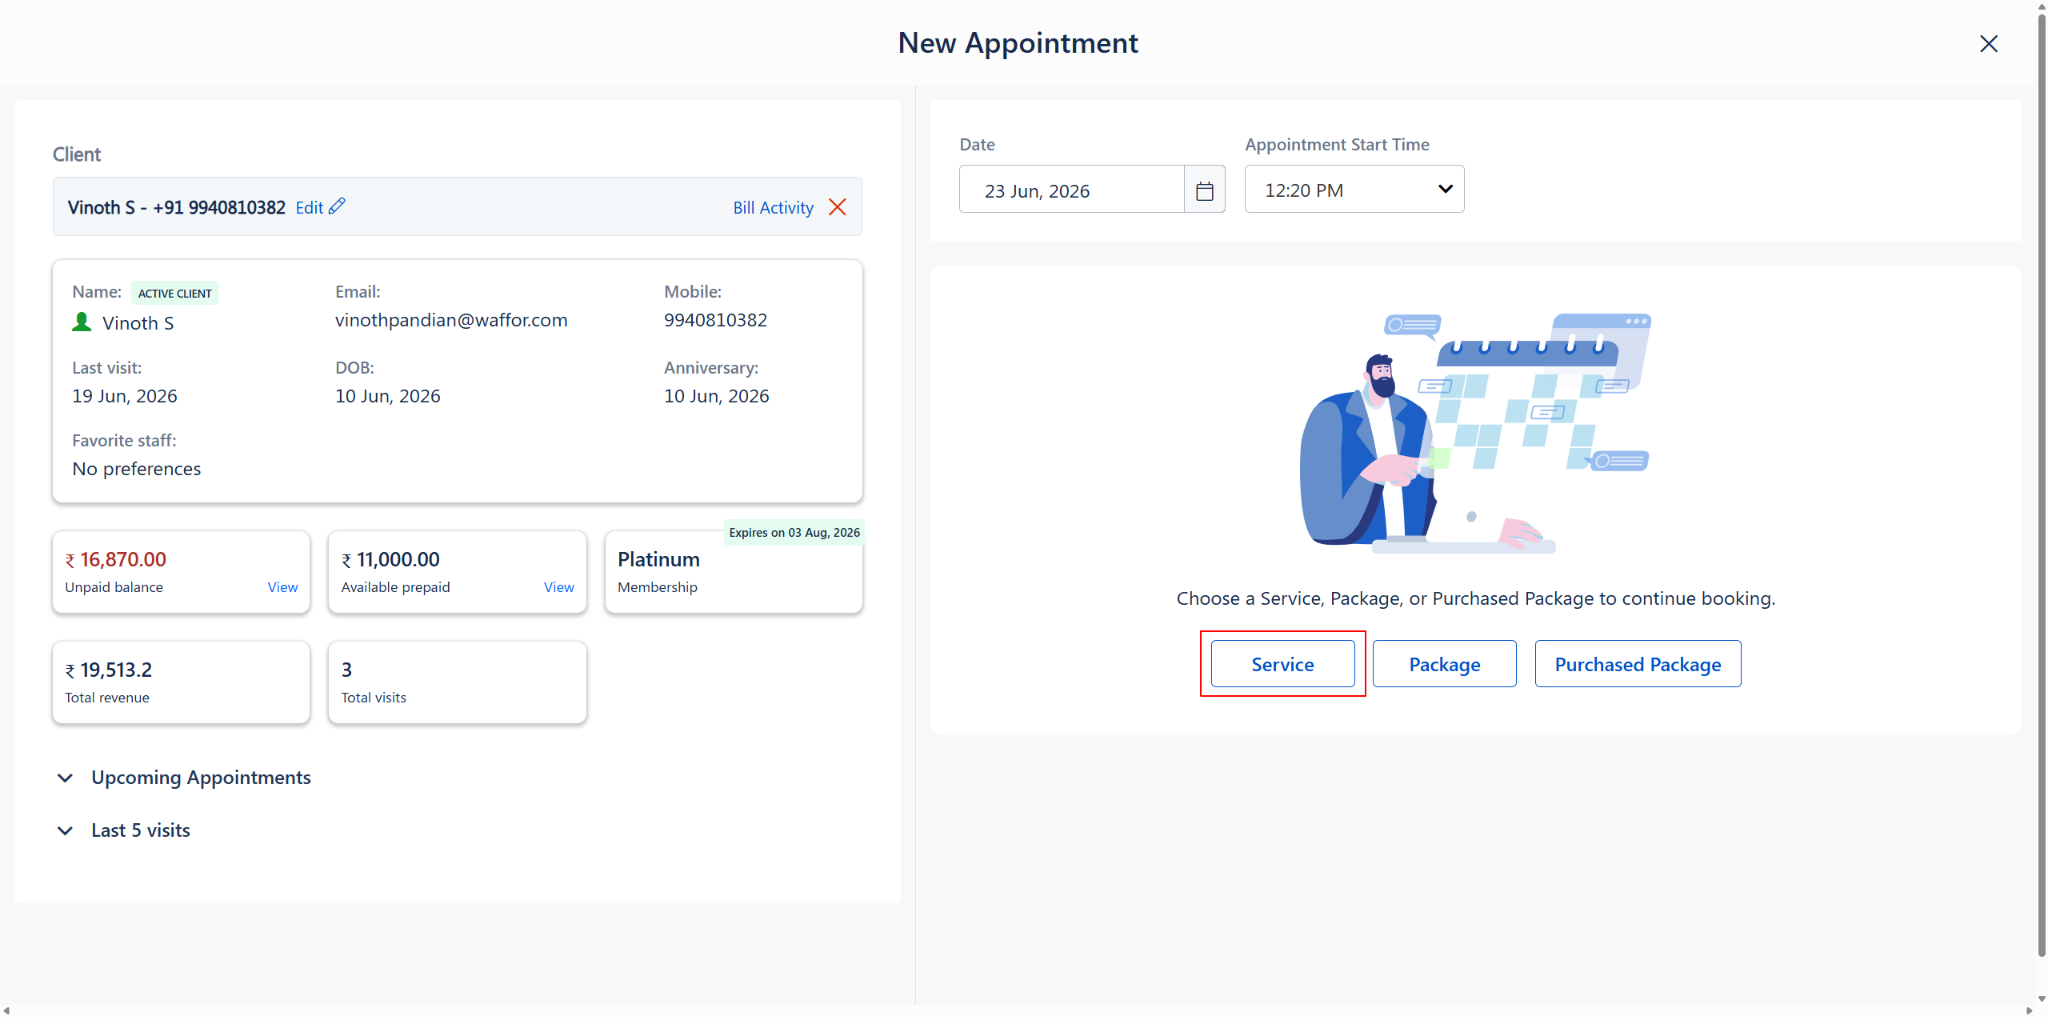
3. Search and select the client from the left panel.
4. On the right panel, select “Service”.
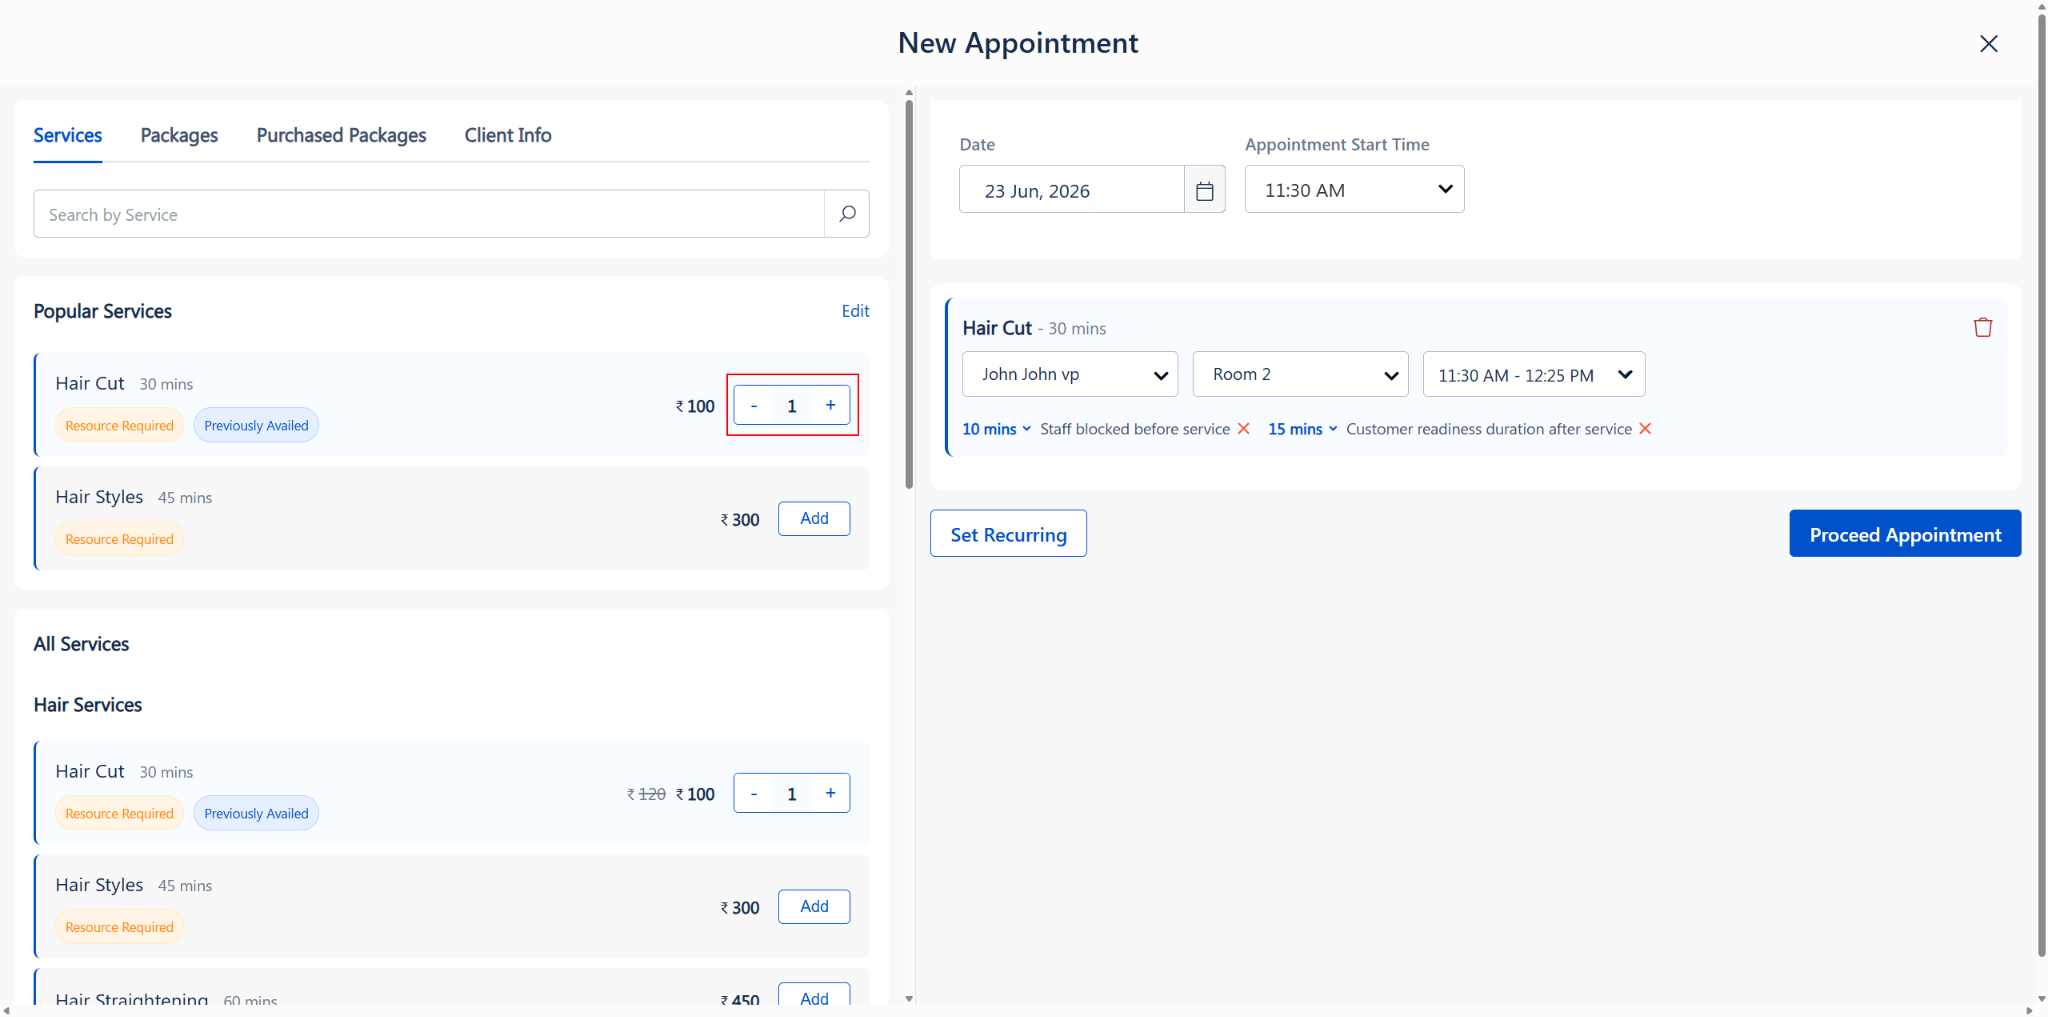
5. Browse and Add the desired service.
6. Assign the Staff, Resource, and select the Time Slot.
Step 2: Click the “Set Recurring” Button
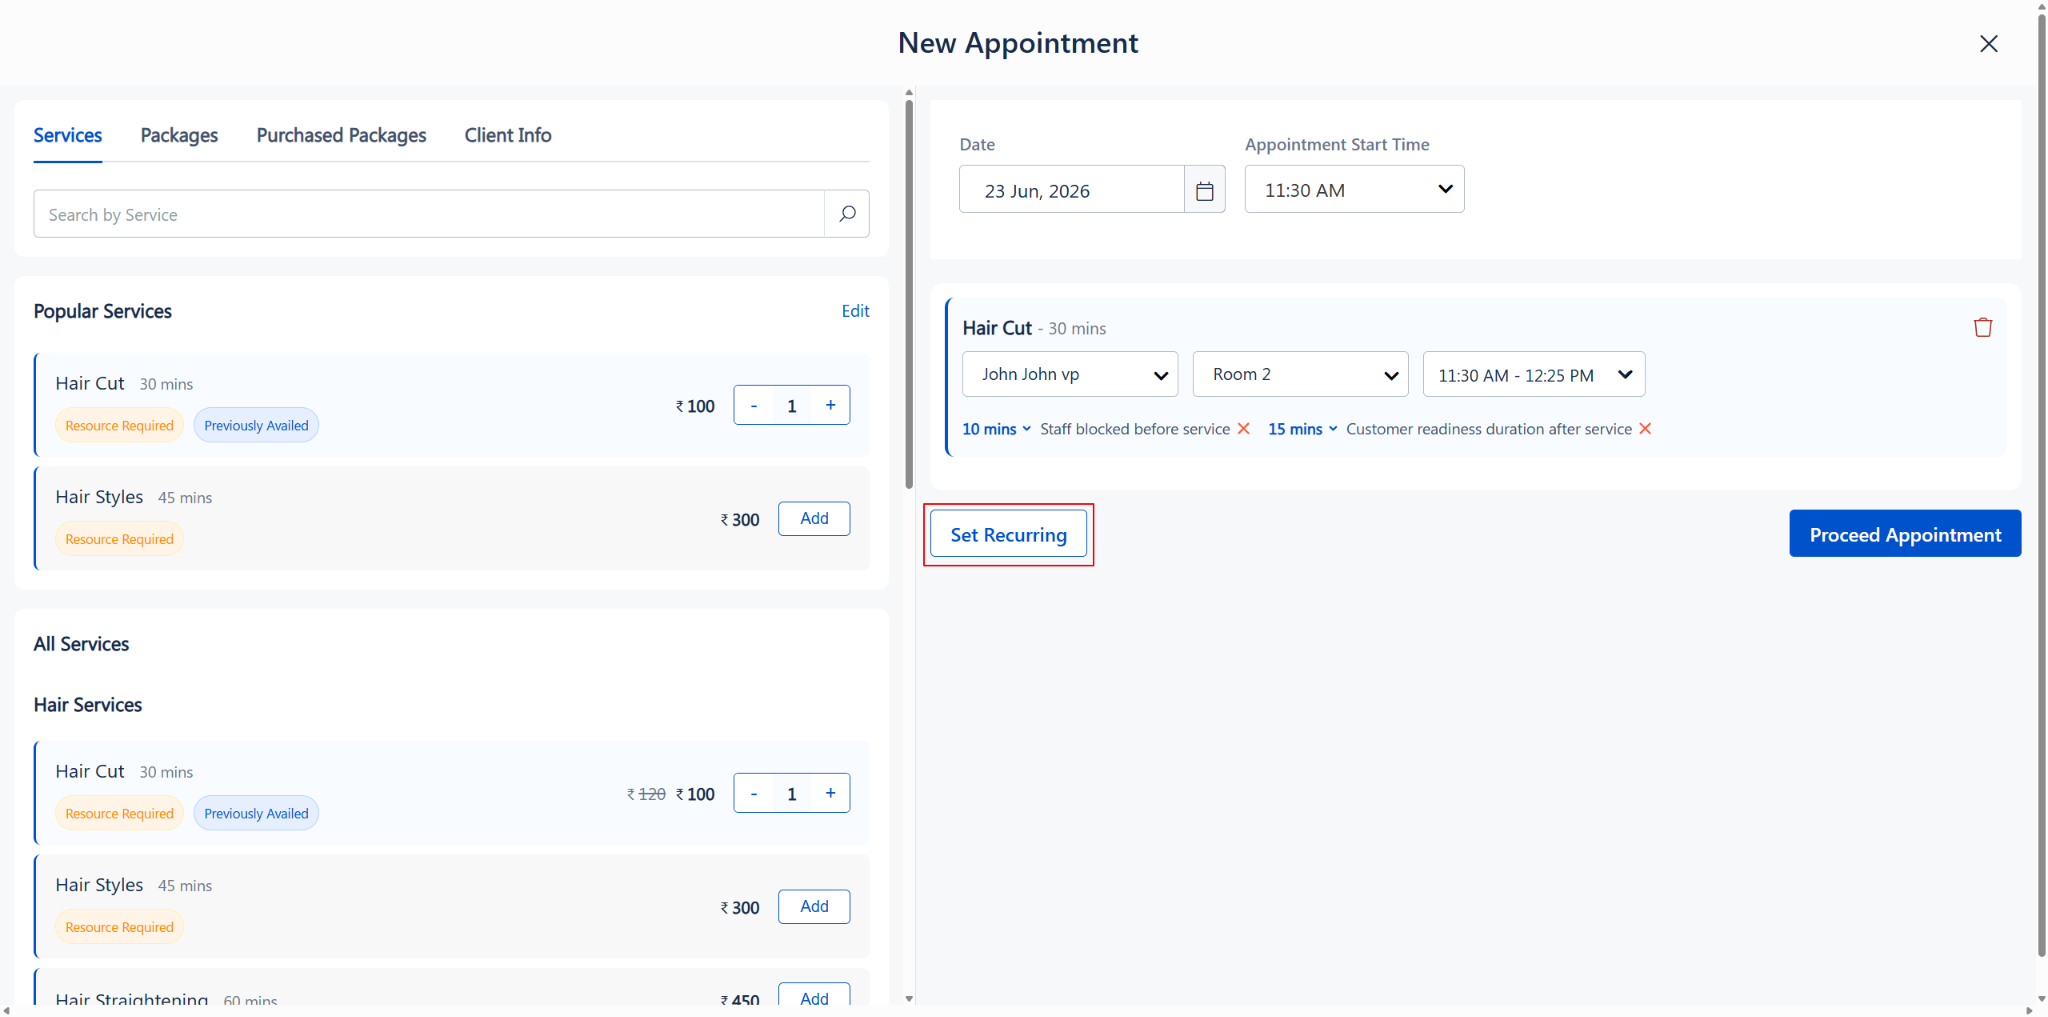
Once the service is added and configured, the “Set Recurring” button becomes visible at the bottom-left of the right panel.
1. Click the “Set Recurring” button.
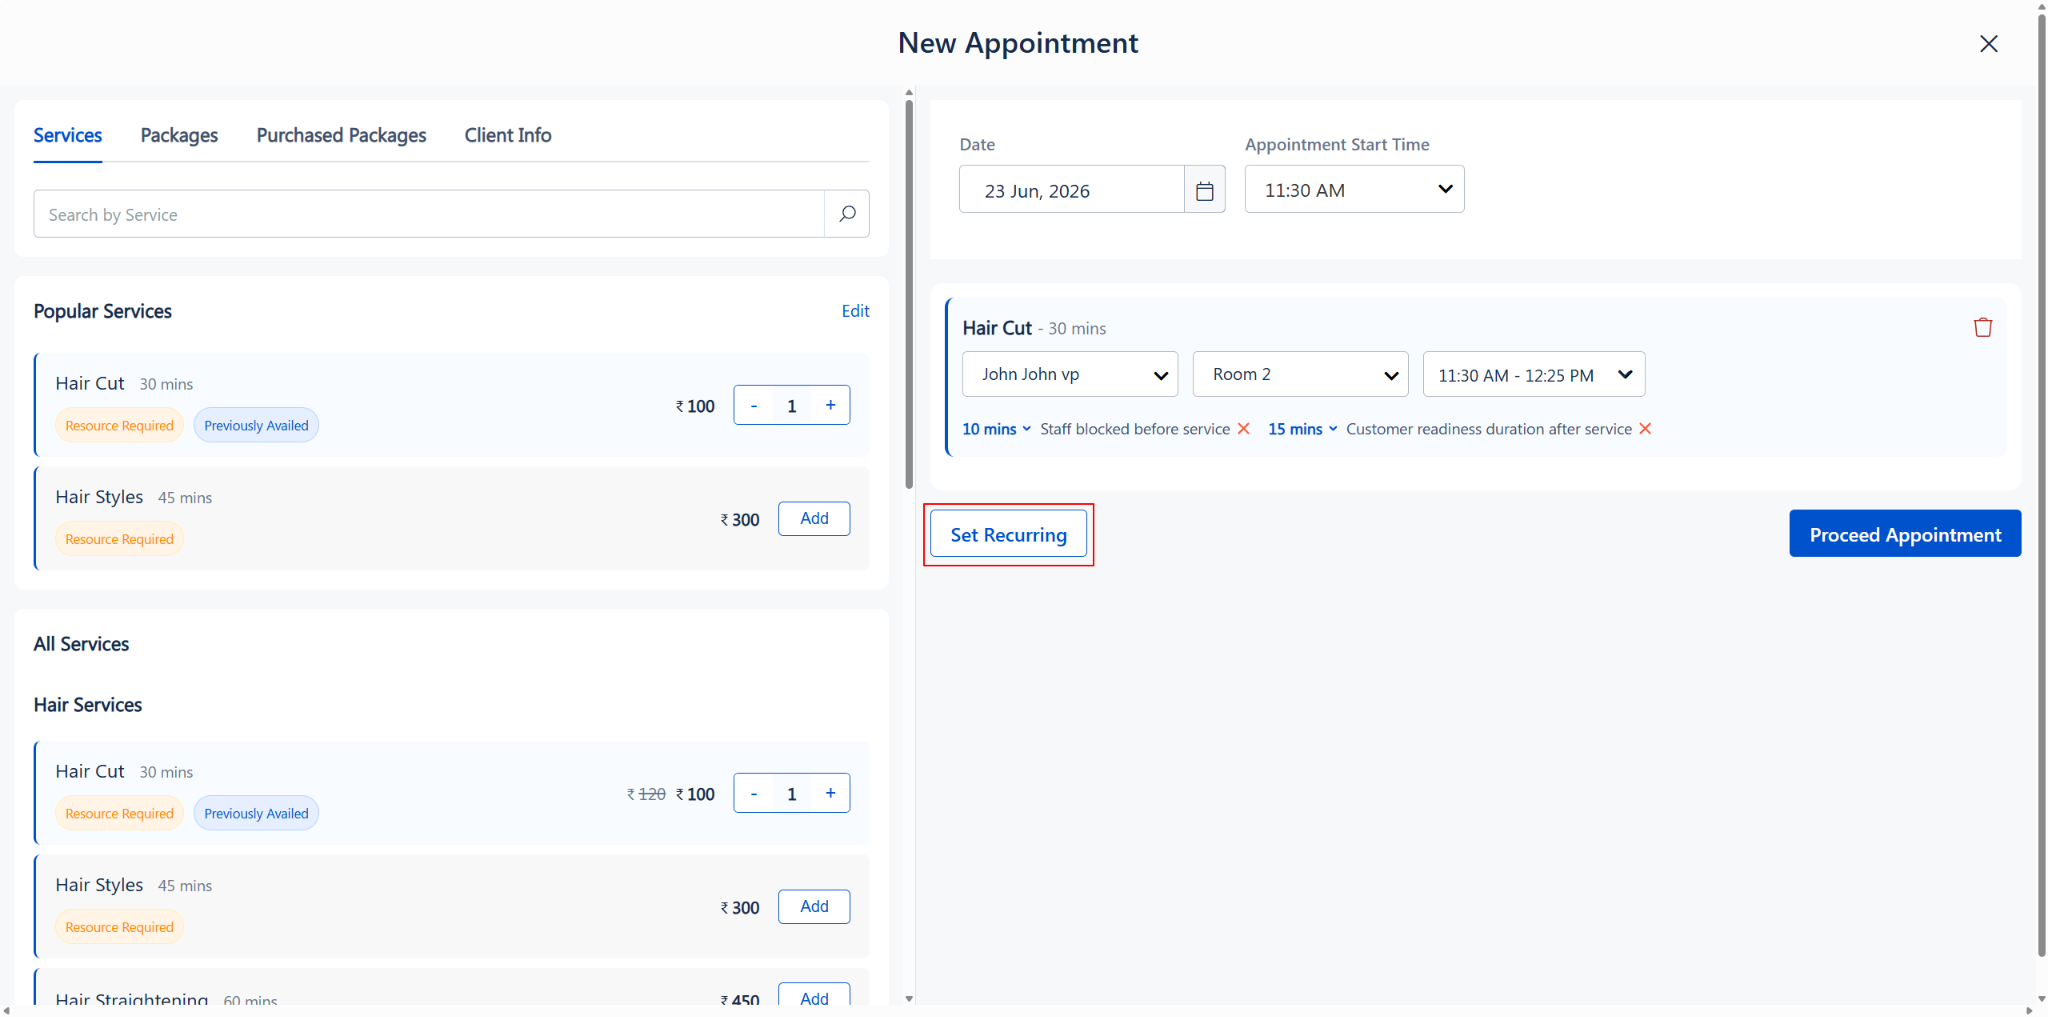
2. The Recurring Appointment popup will appear, displaying various repetition filters.
Set Recurring button located below the added service
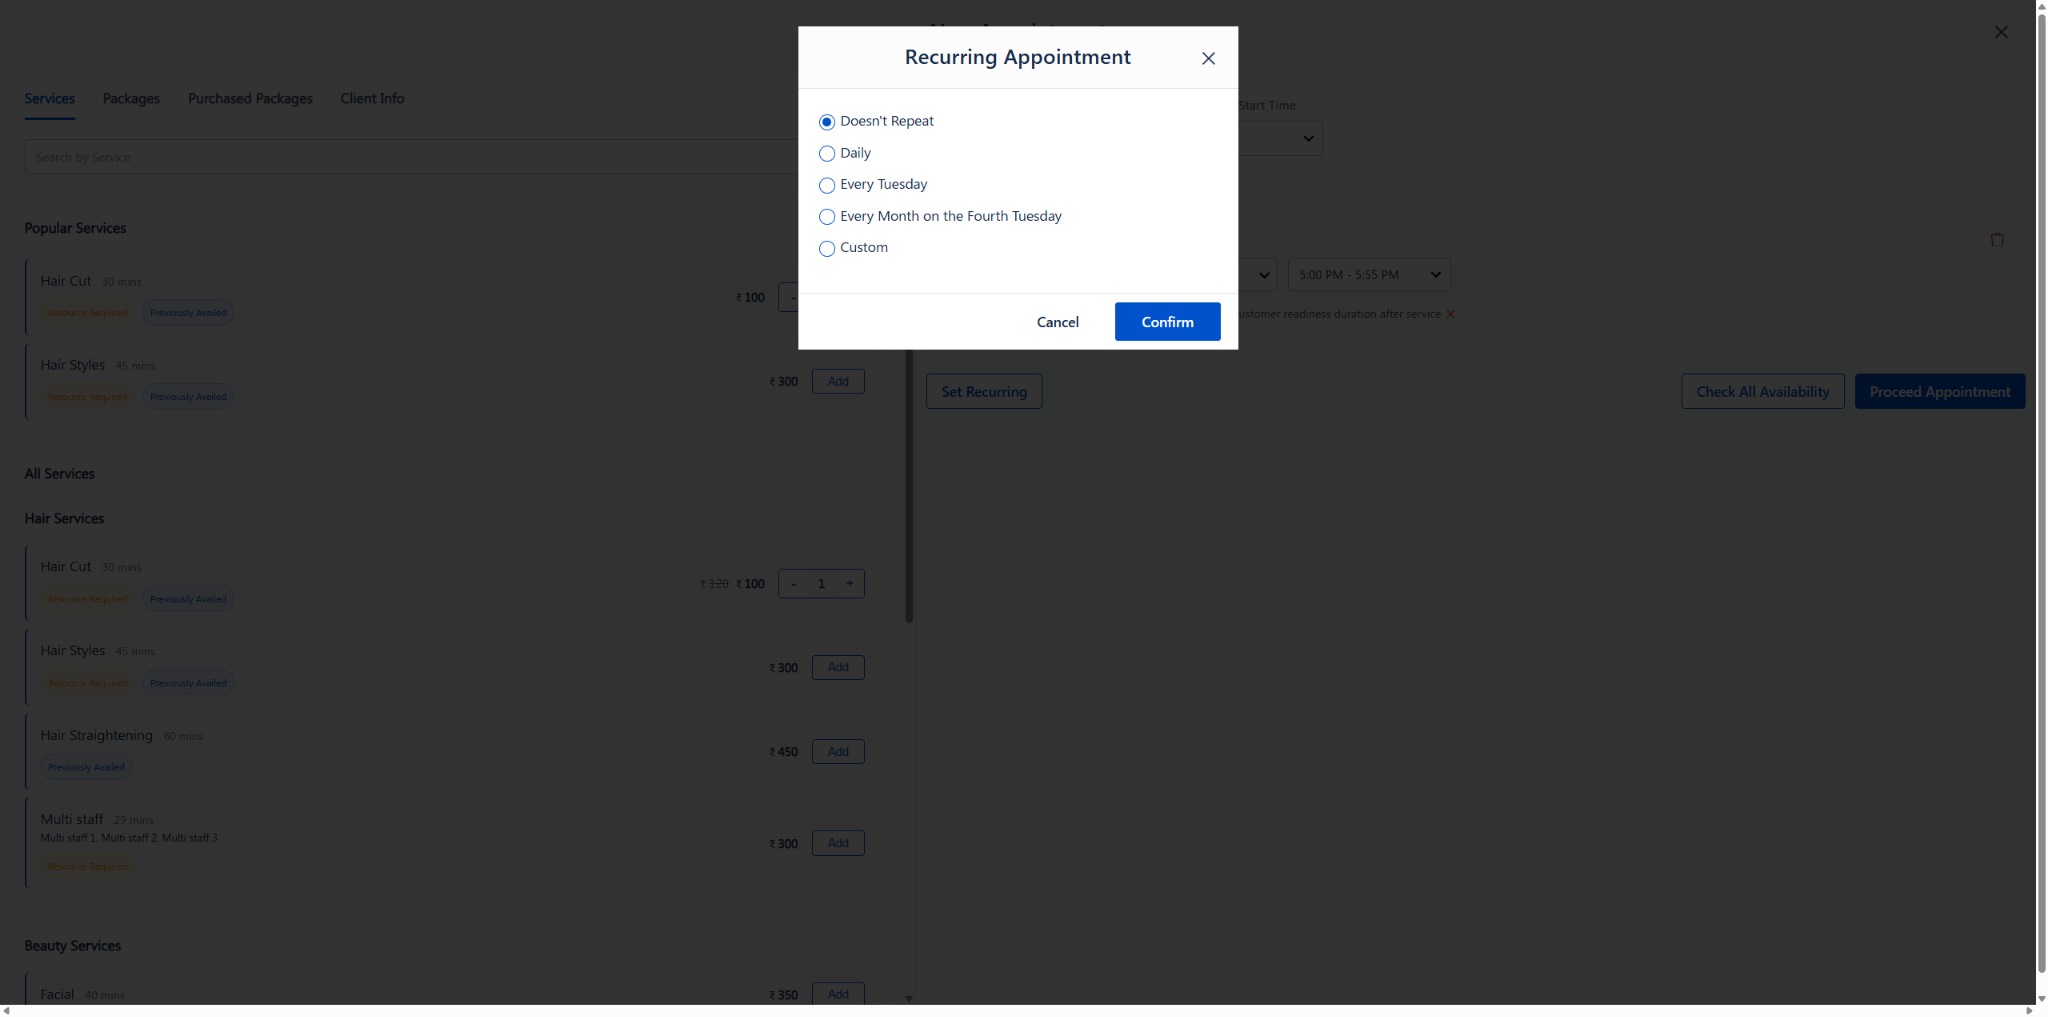
Recurring Appointment popup with all repetition filter options
Step 3: Choose a Recurring Filter
Select the frequency that matches the client’s preferred schedule. The available options are:
Option A: Daily
Use this option for appointments that repeat every single day.
1. Select the “Daily” radio button.
2. In the “Ends” dropdown, choose how the recurrence should stop:
- After — Specify a number of visits (e.g., Ends after 2 visits).
- On Specific Date — Choose an exact end date from the calendar.
3. The Recurring Summary box on the left will update to show:
- Recurs on: Daily - Duration: Start date and End date
- Total Visit: Total number of times the appointment will occur
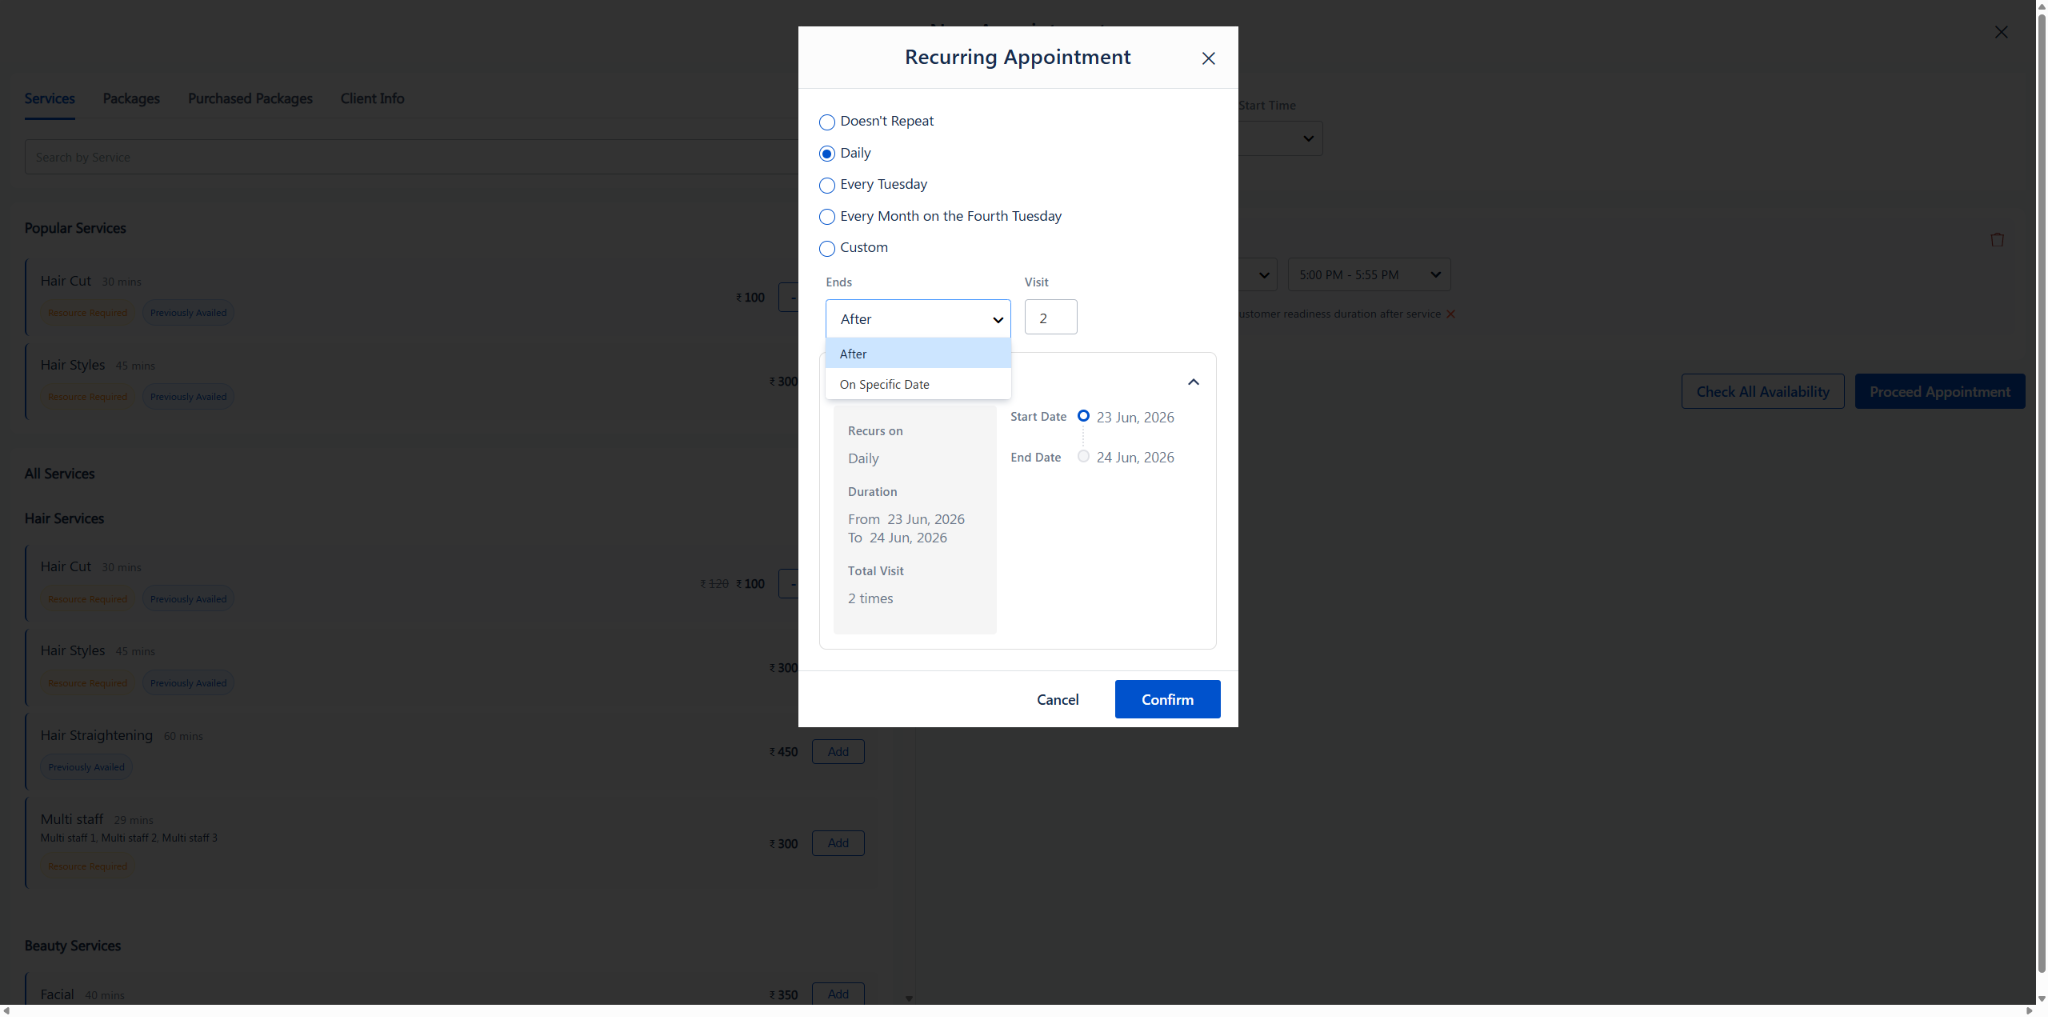
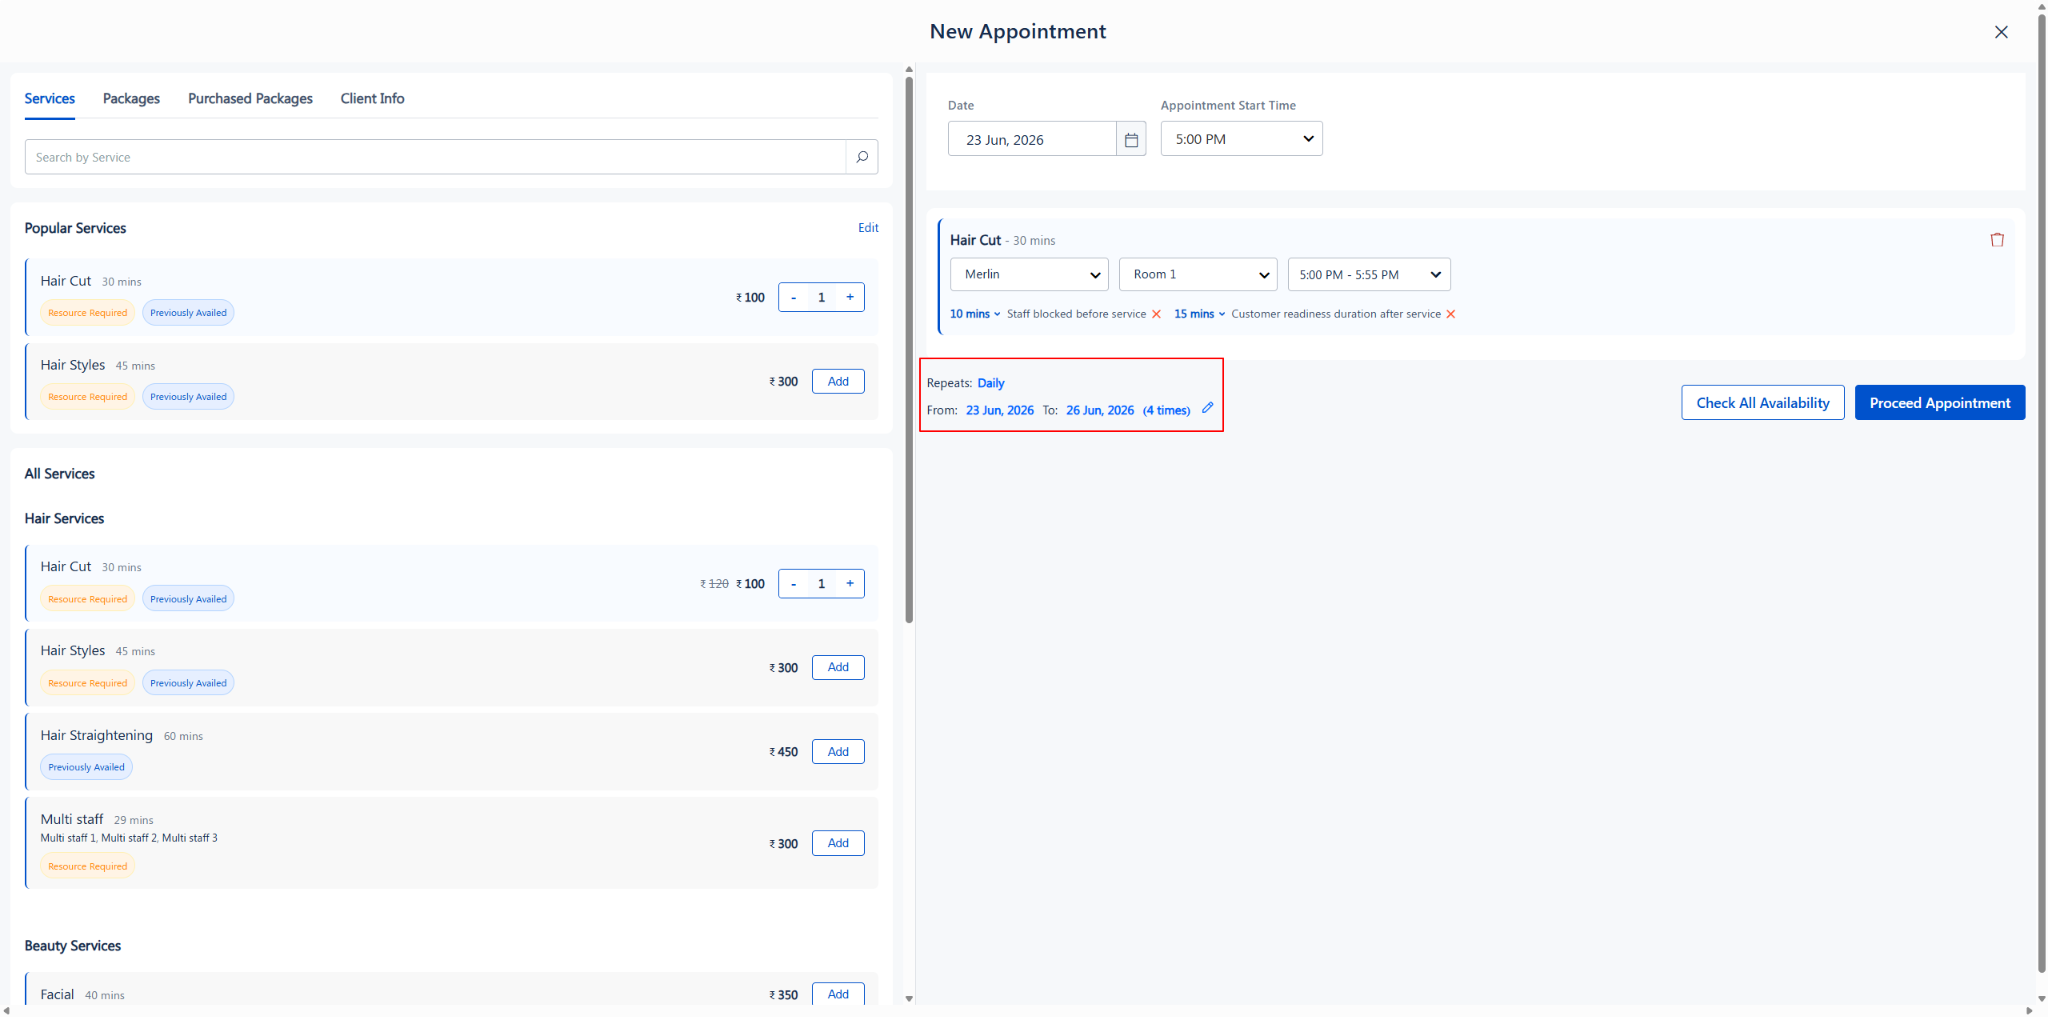
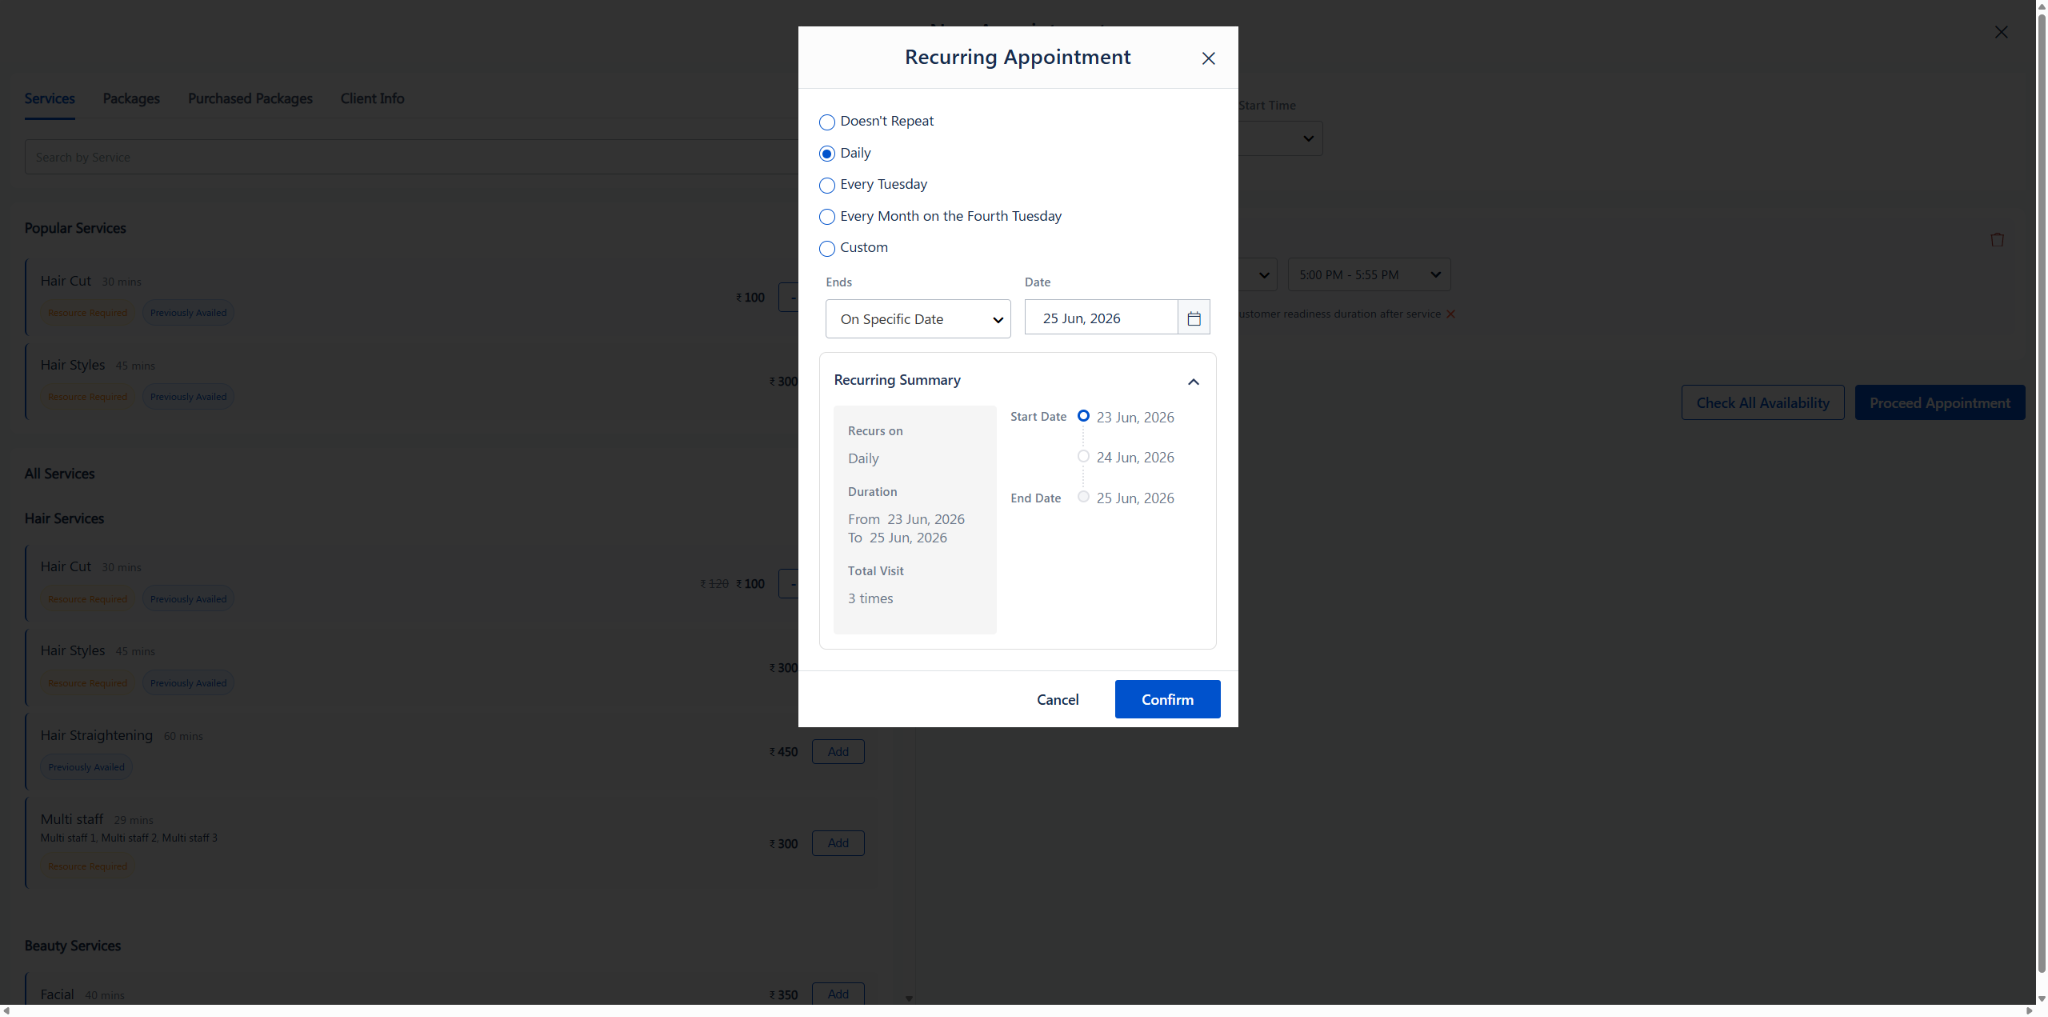
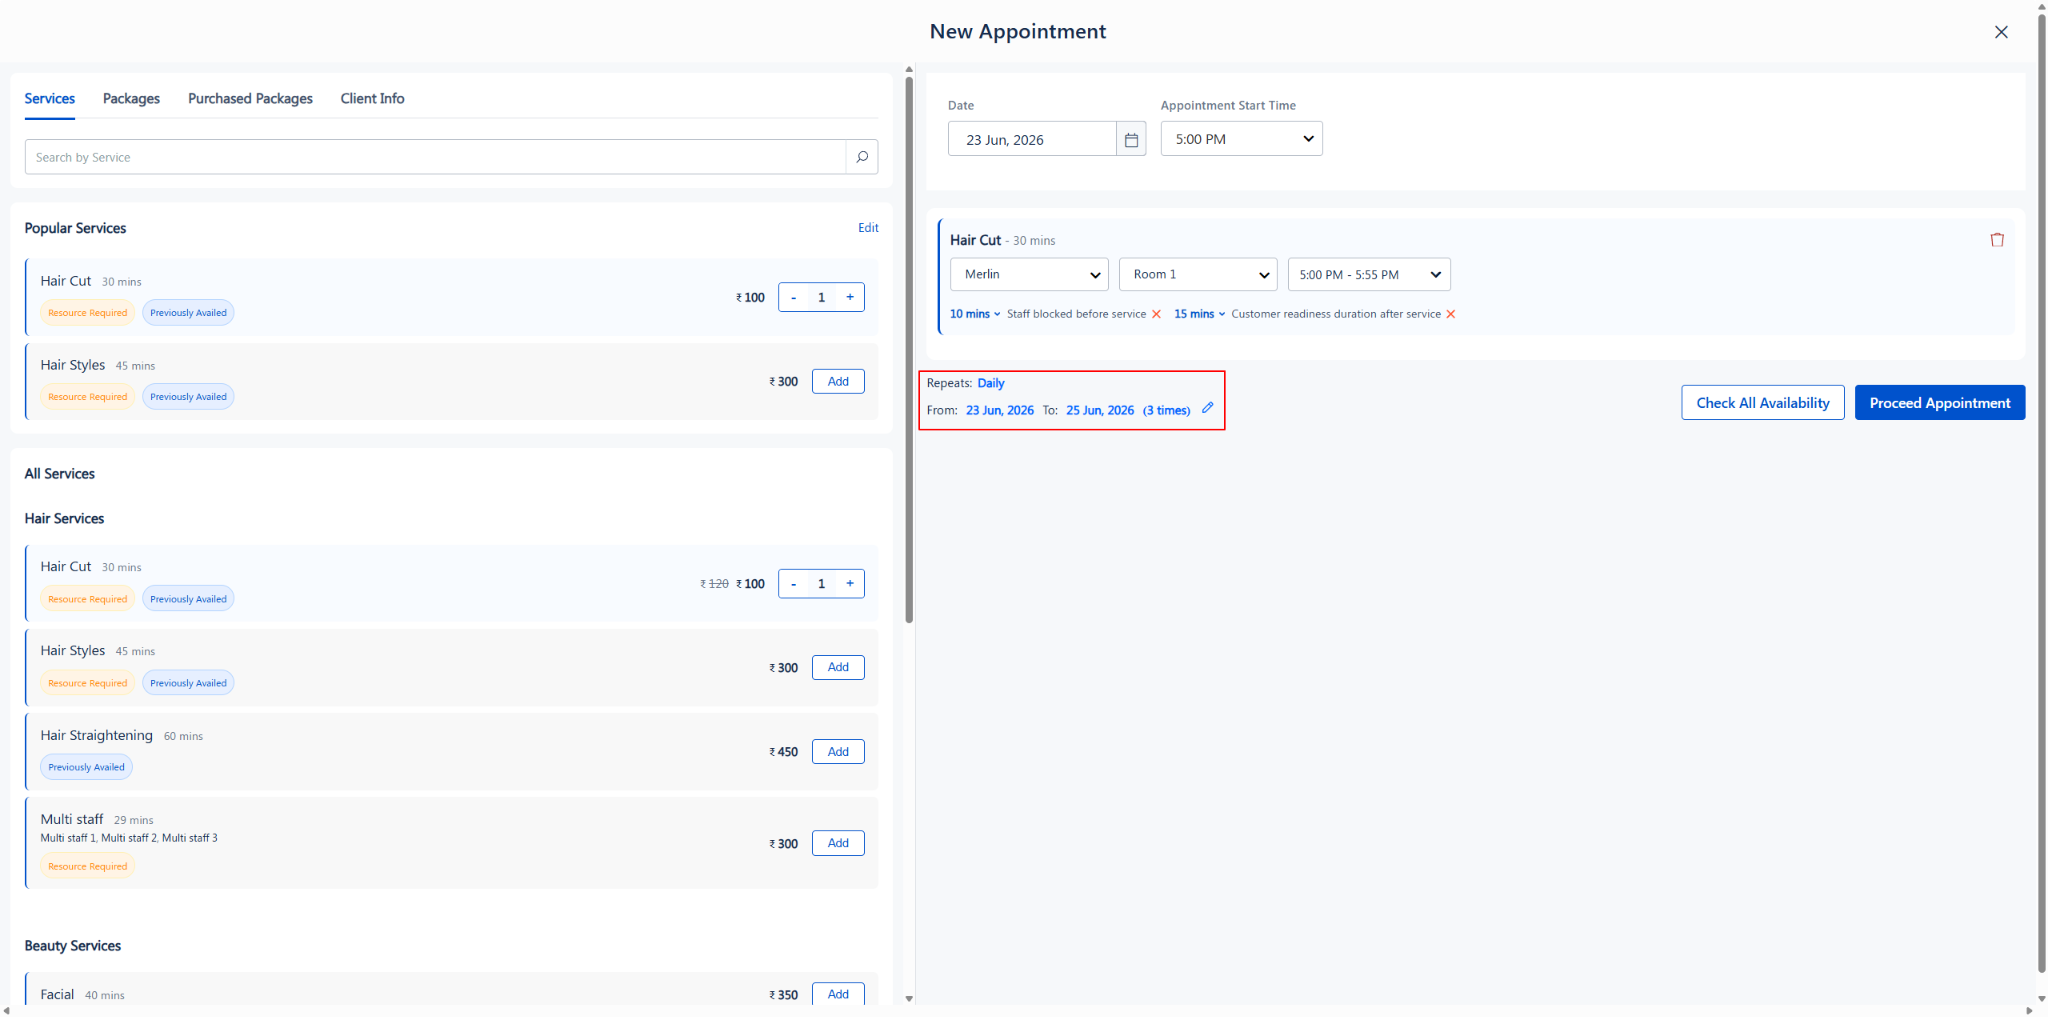
Daily recurring filter with Ends After/On Specific Date options and summary
Option B: Every [Day of the Week] (e.g., Every Friday)
Use this option for weekly appointments on the same day.
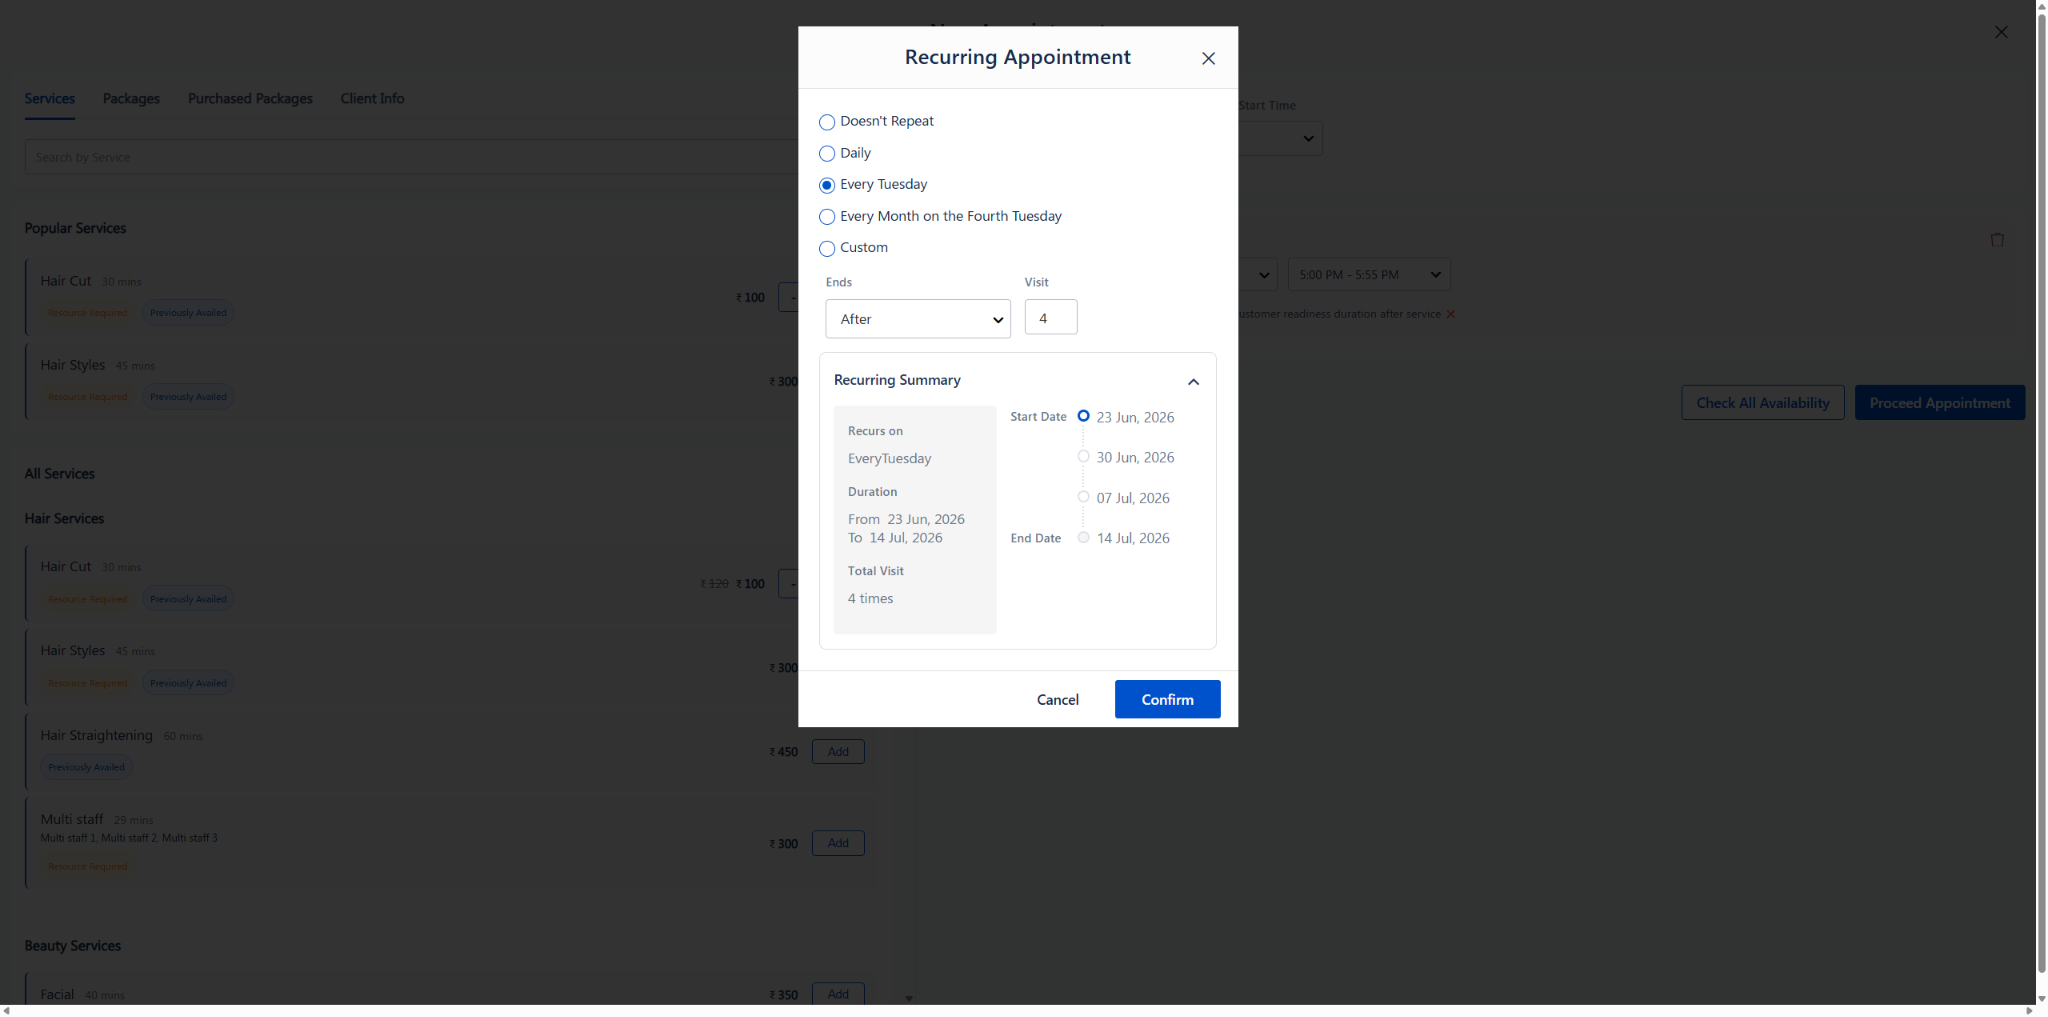
1. Select the “Every [Day]” radio button (the day depends on the date you originally selected for the appointment).
2. Choose your “Ends” criteria (After a set number of visits, or On a Specific Date).
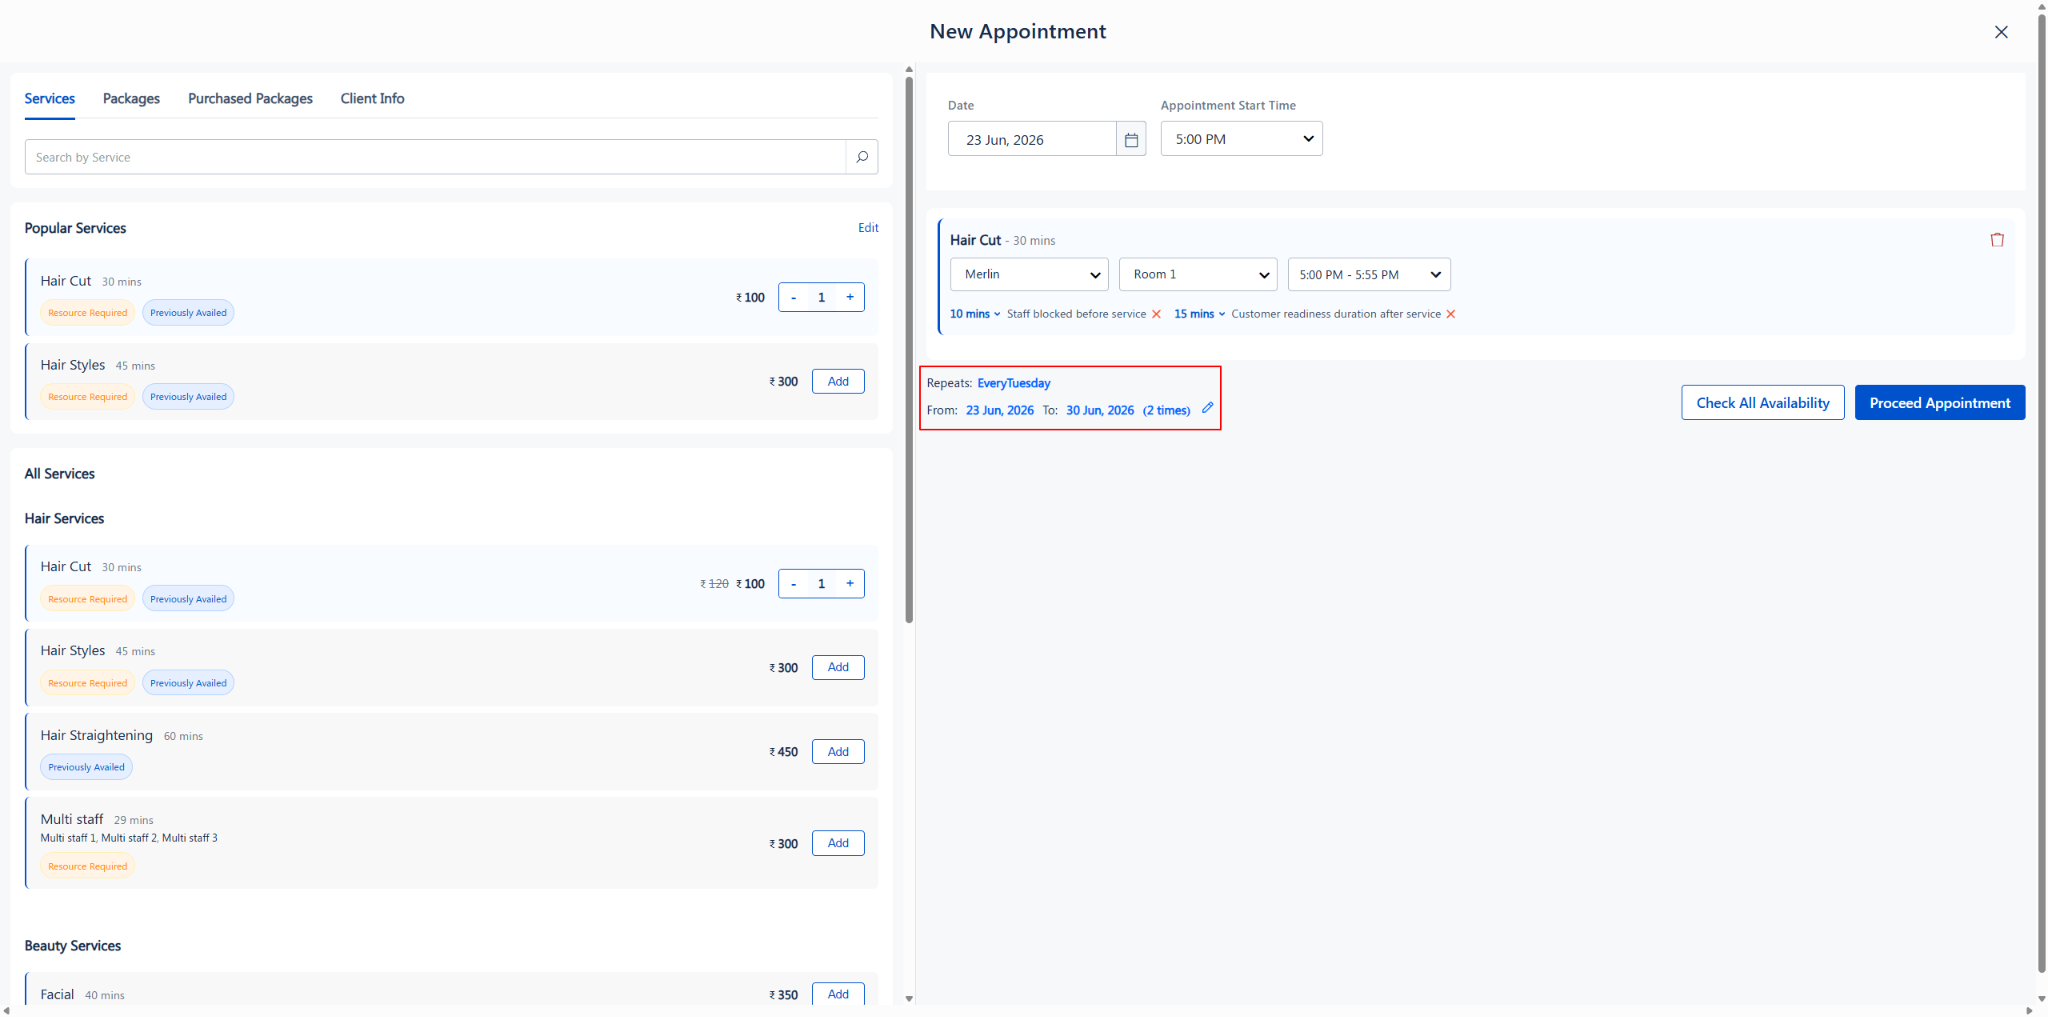
3. Review the Recurring Summary and click “Confirm”.
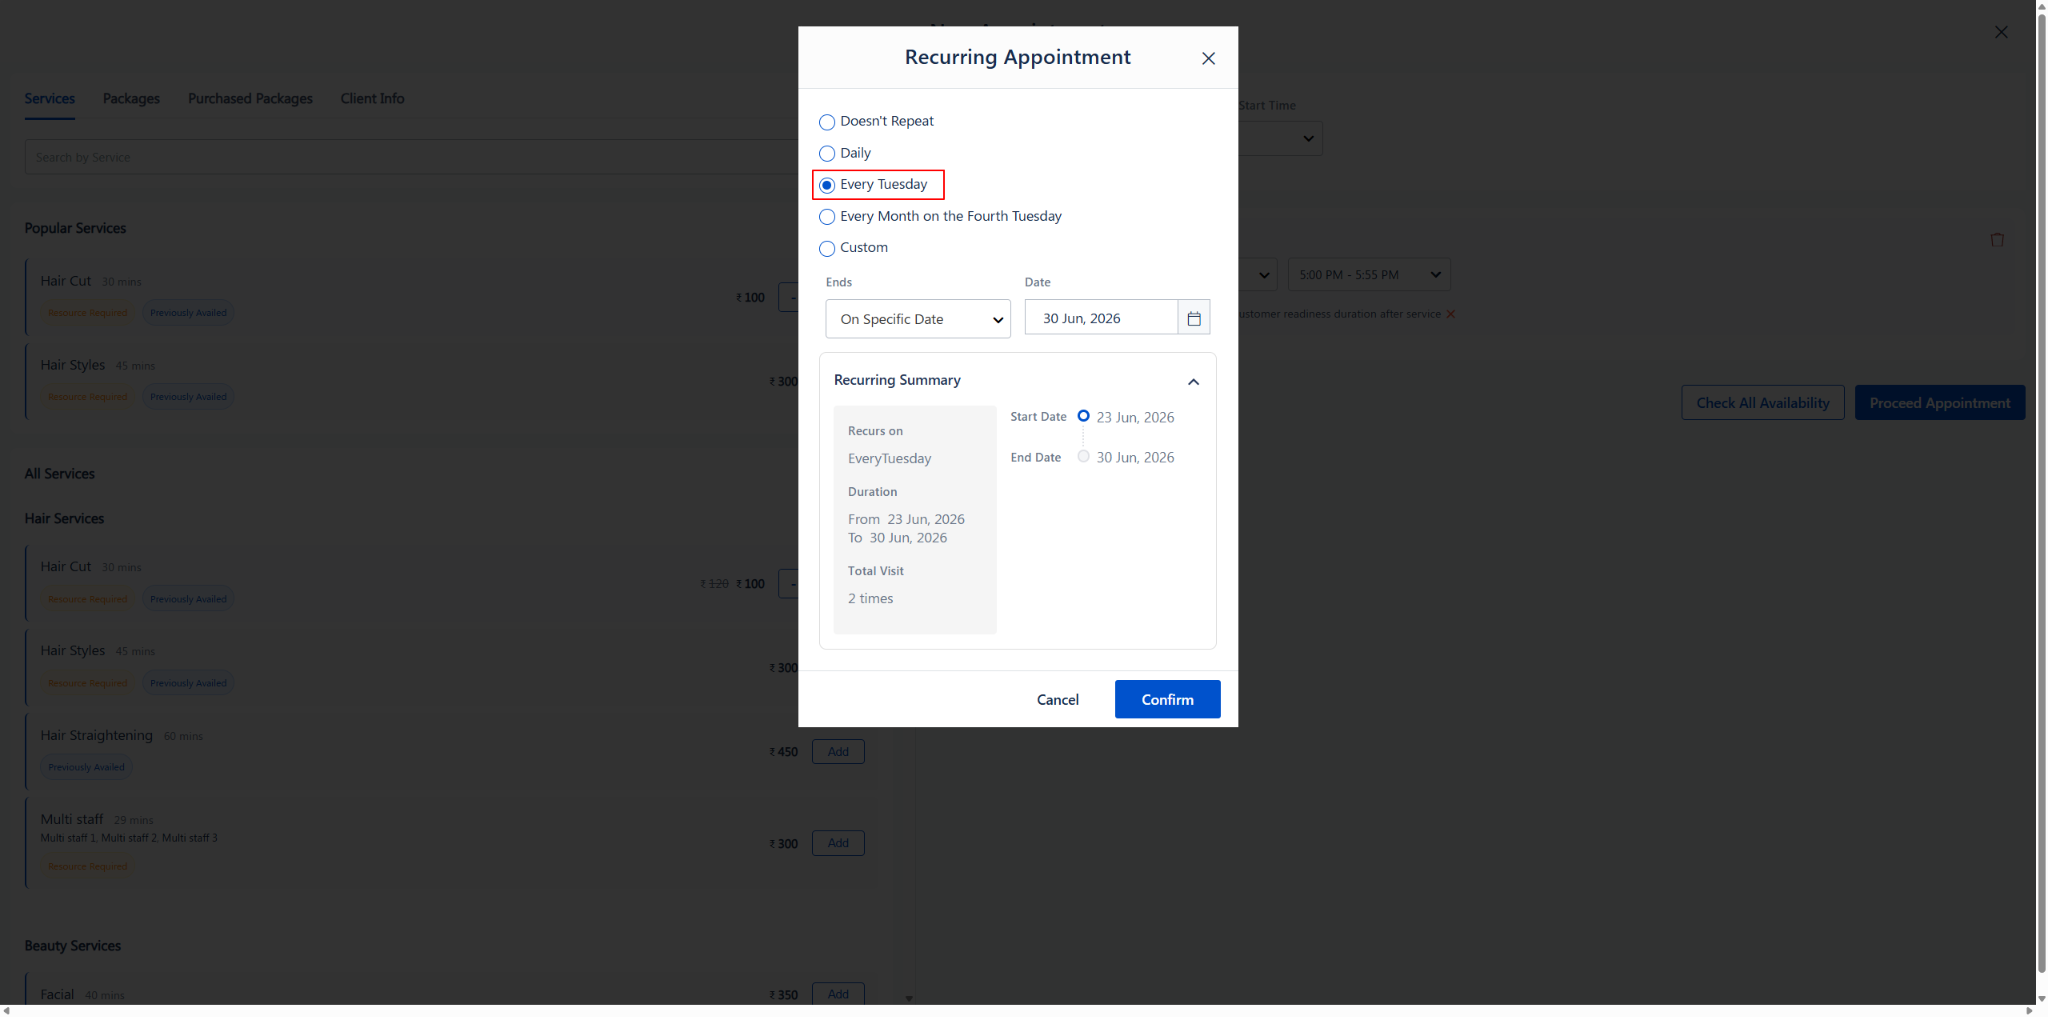
Option C: Every Month on the [Nth Day] (e.g., Every Month on the Third Friday)
Use this option for monthly recurring visits that fall on a specific sequence day.
1. Select the “Every Month on the [Nth Day]” radio button.
2. Select the “Ends” criteria (After X visits, or On Specific Date).
3. If using “On Specific Date”, pick the cut-off date using the calendar picker.
4. Review the Recurring Summary and click “Confirm”.
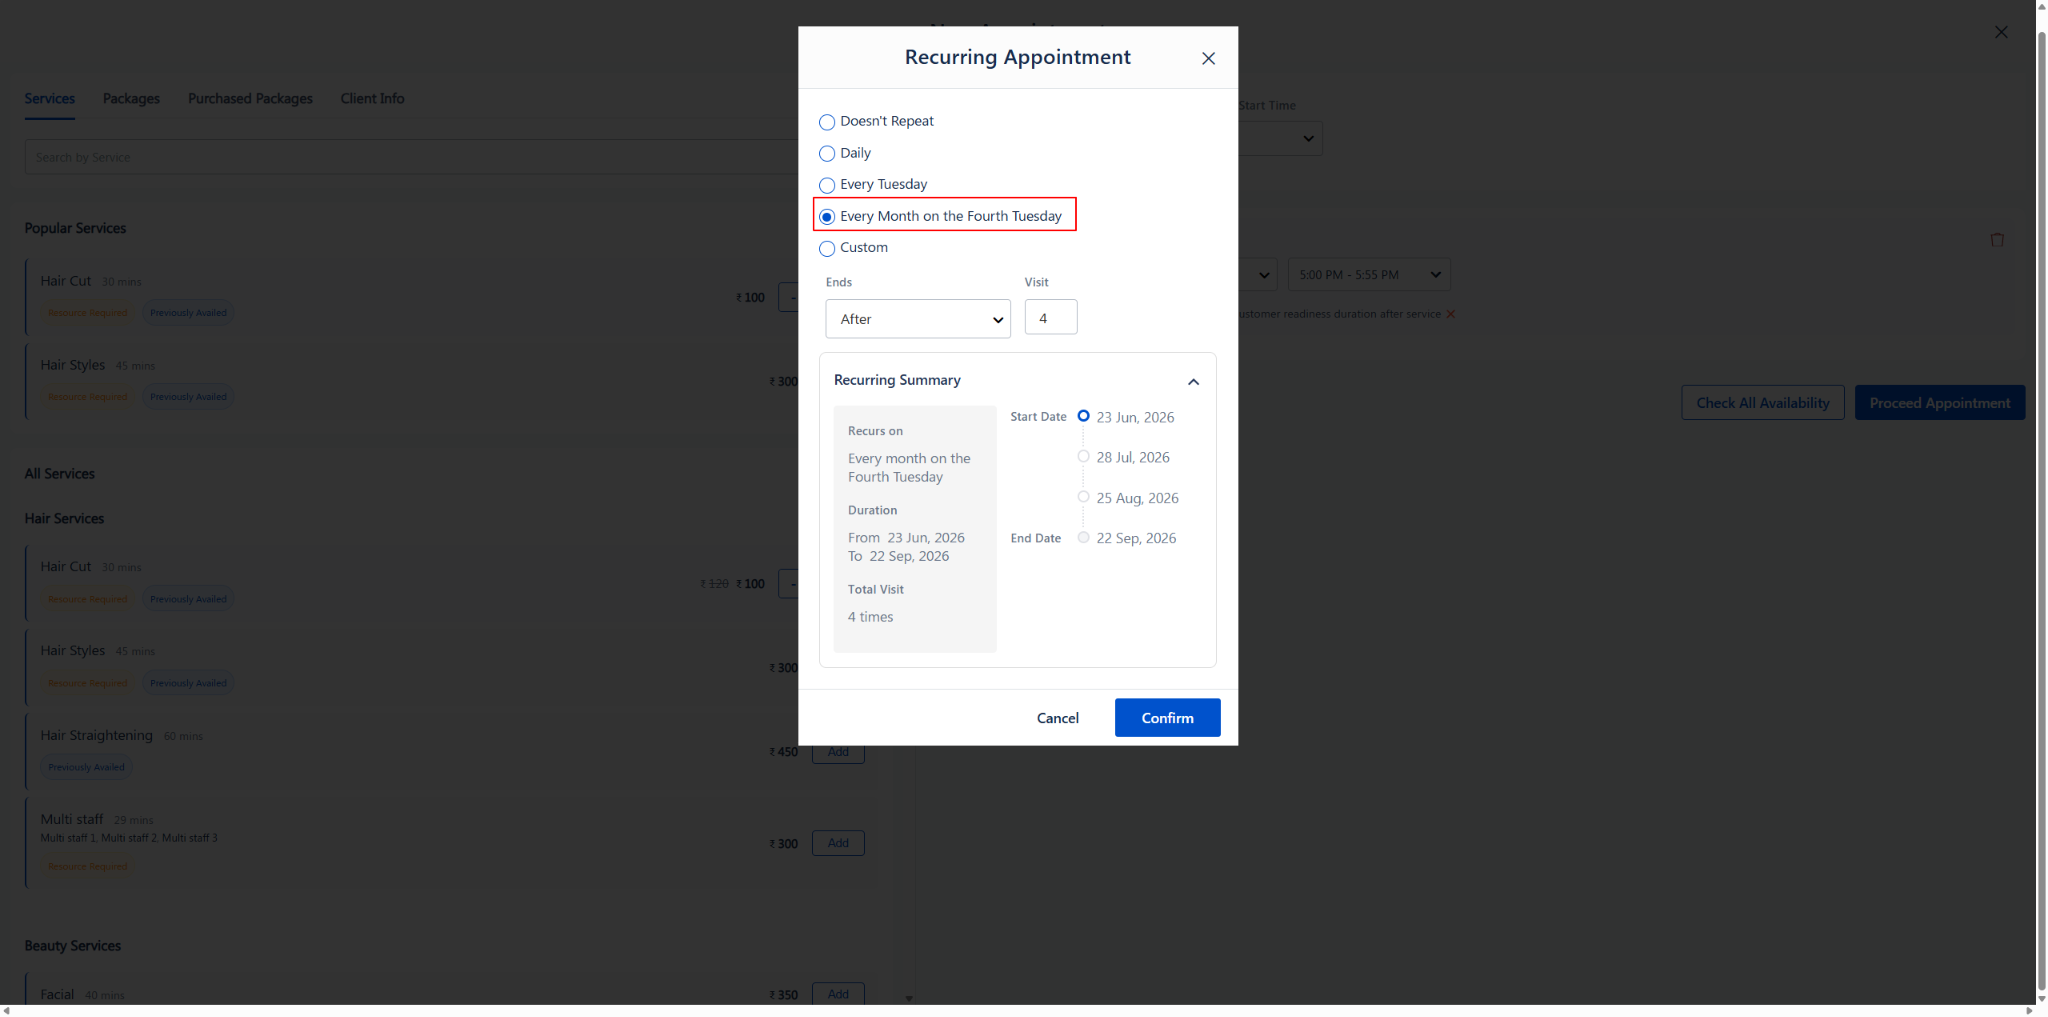
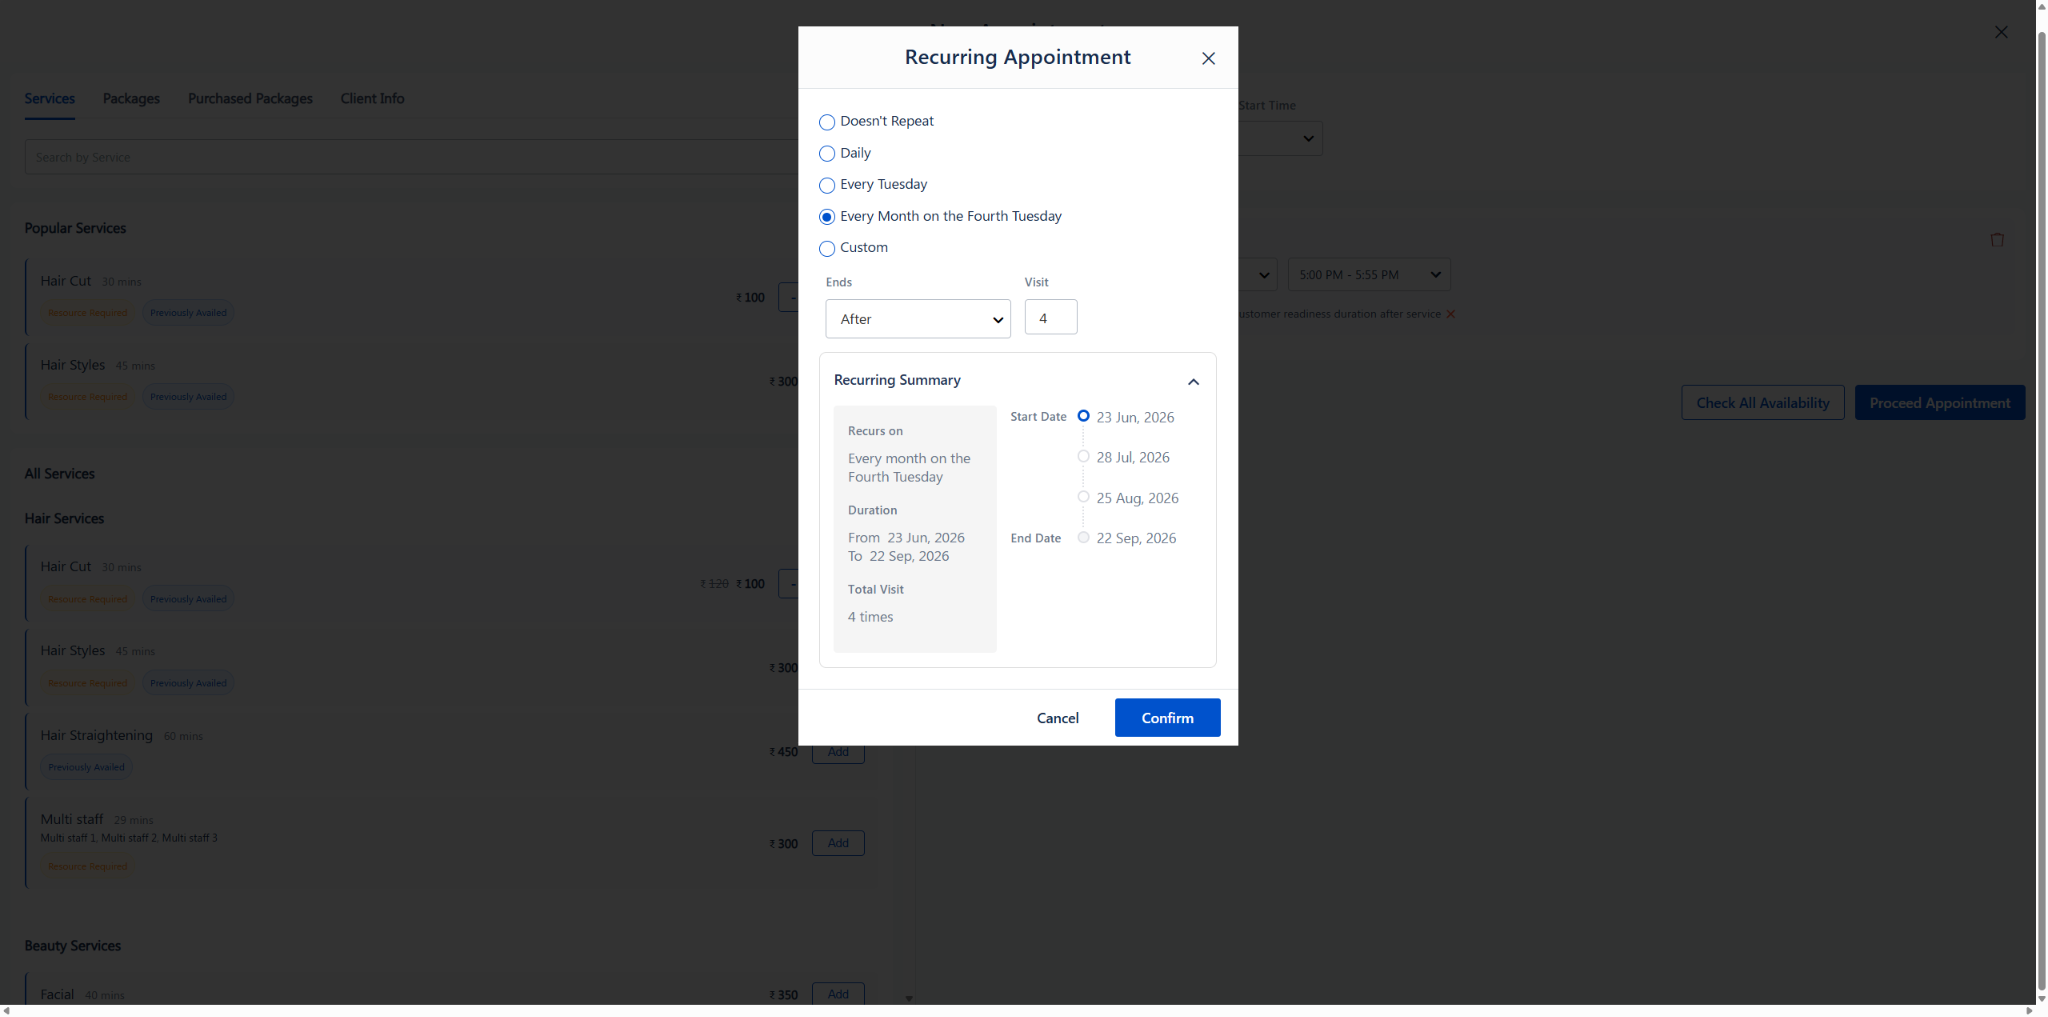
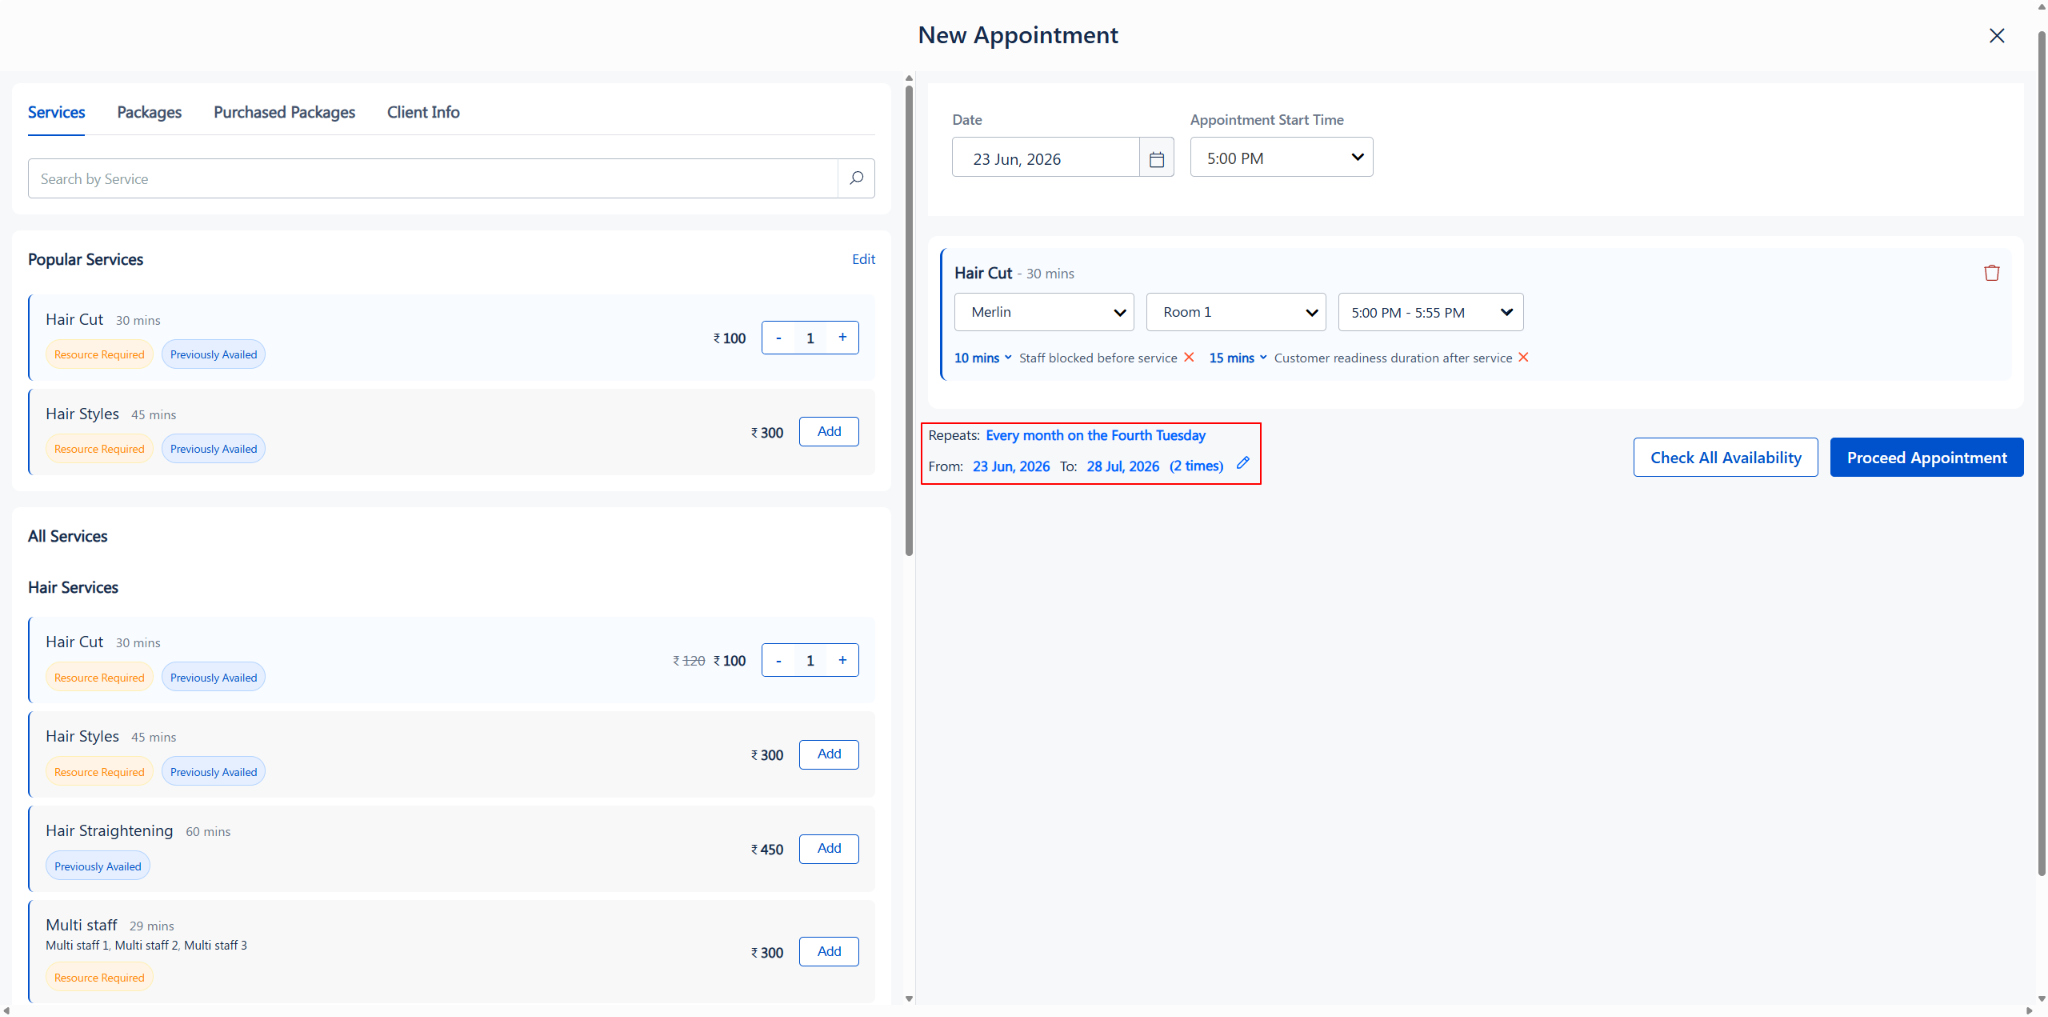
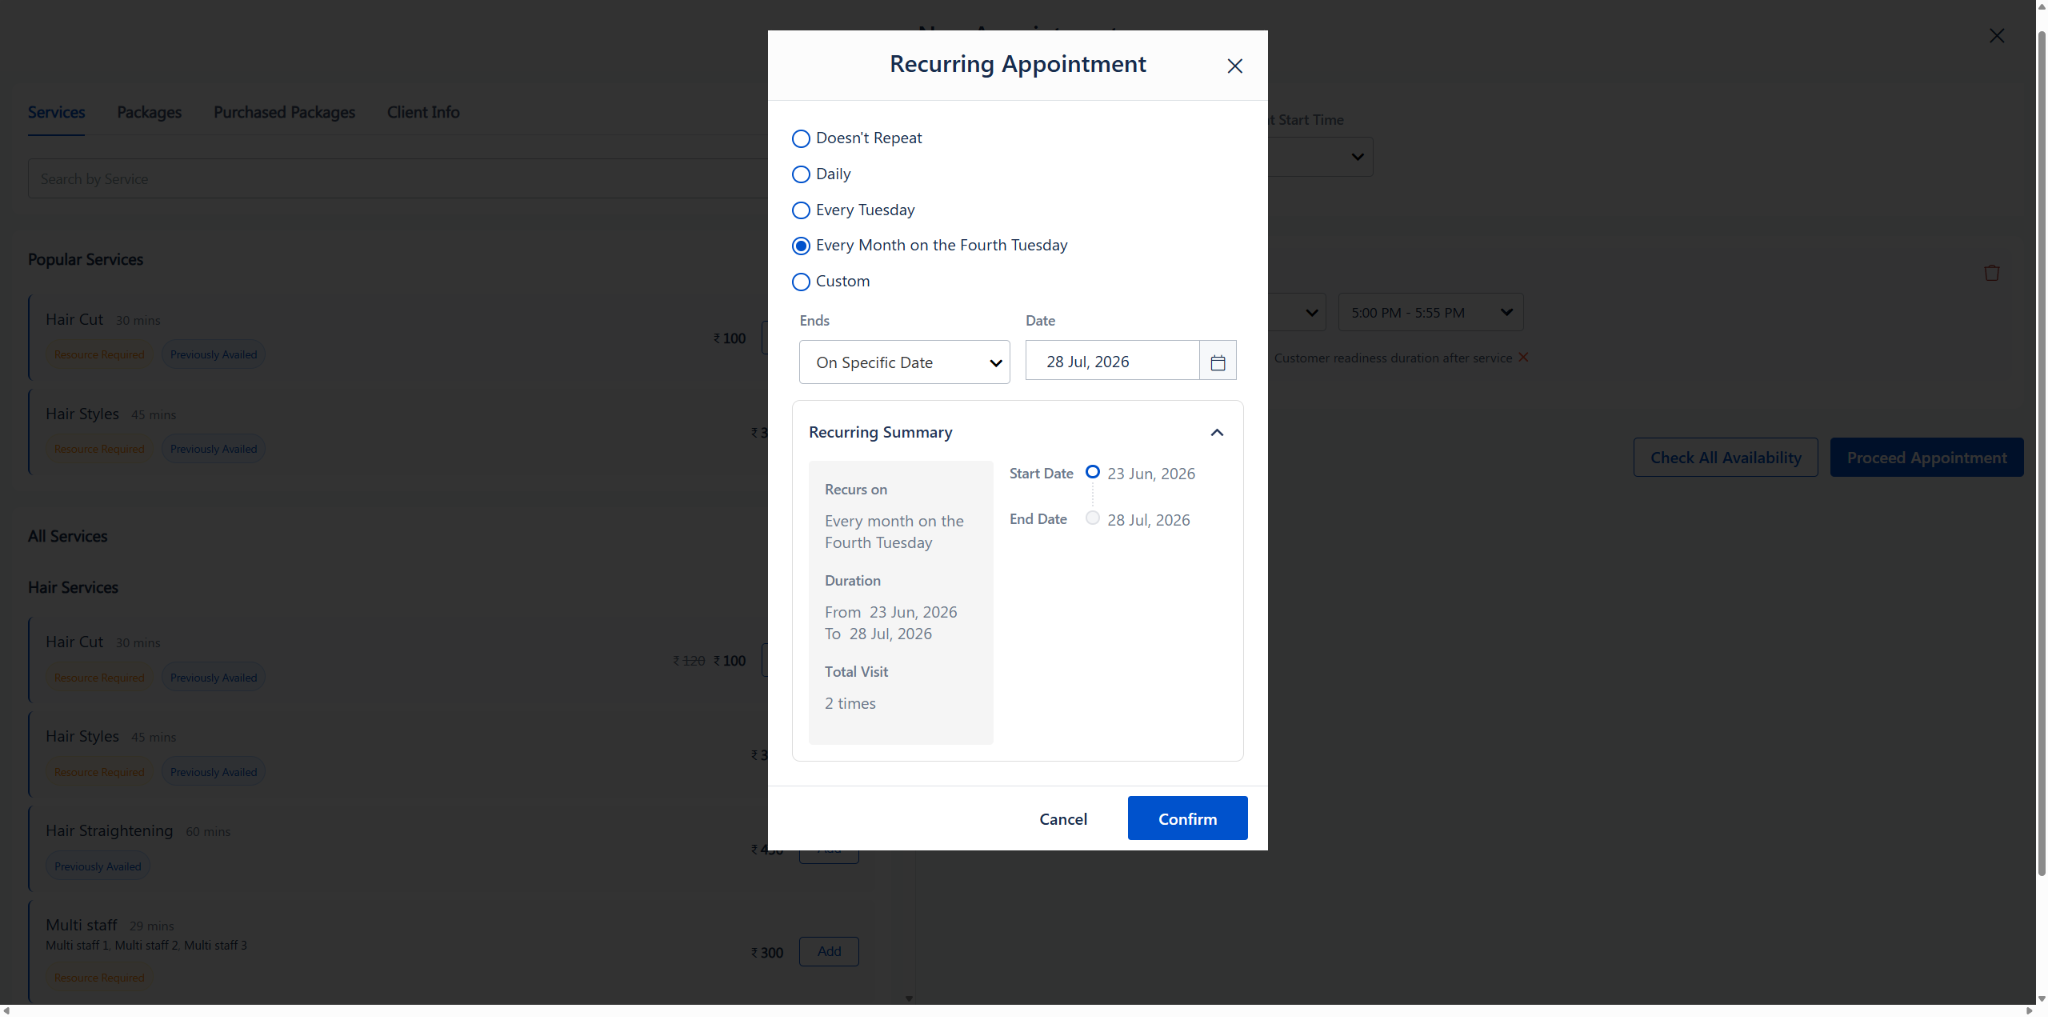
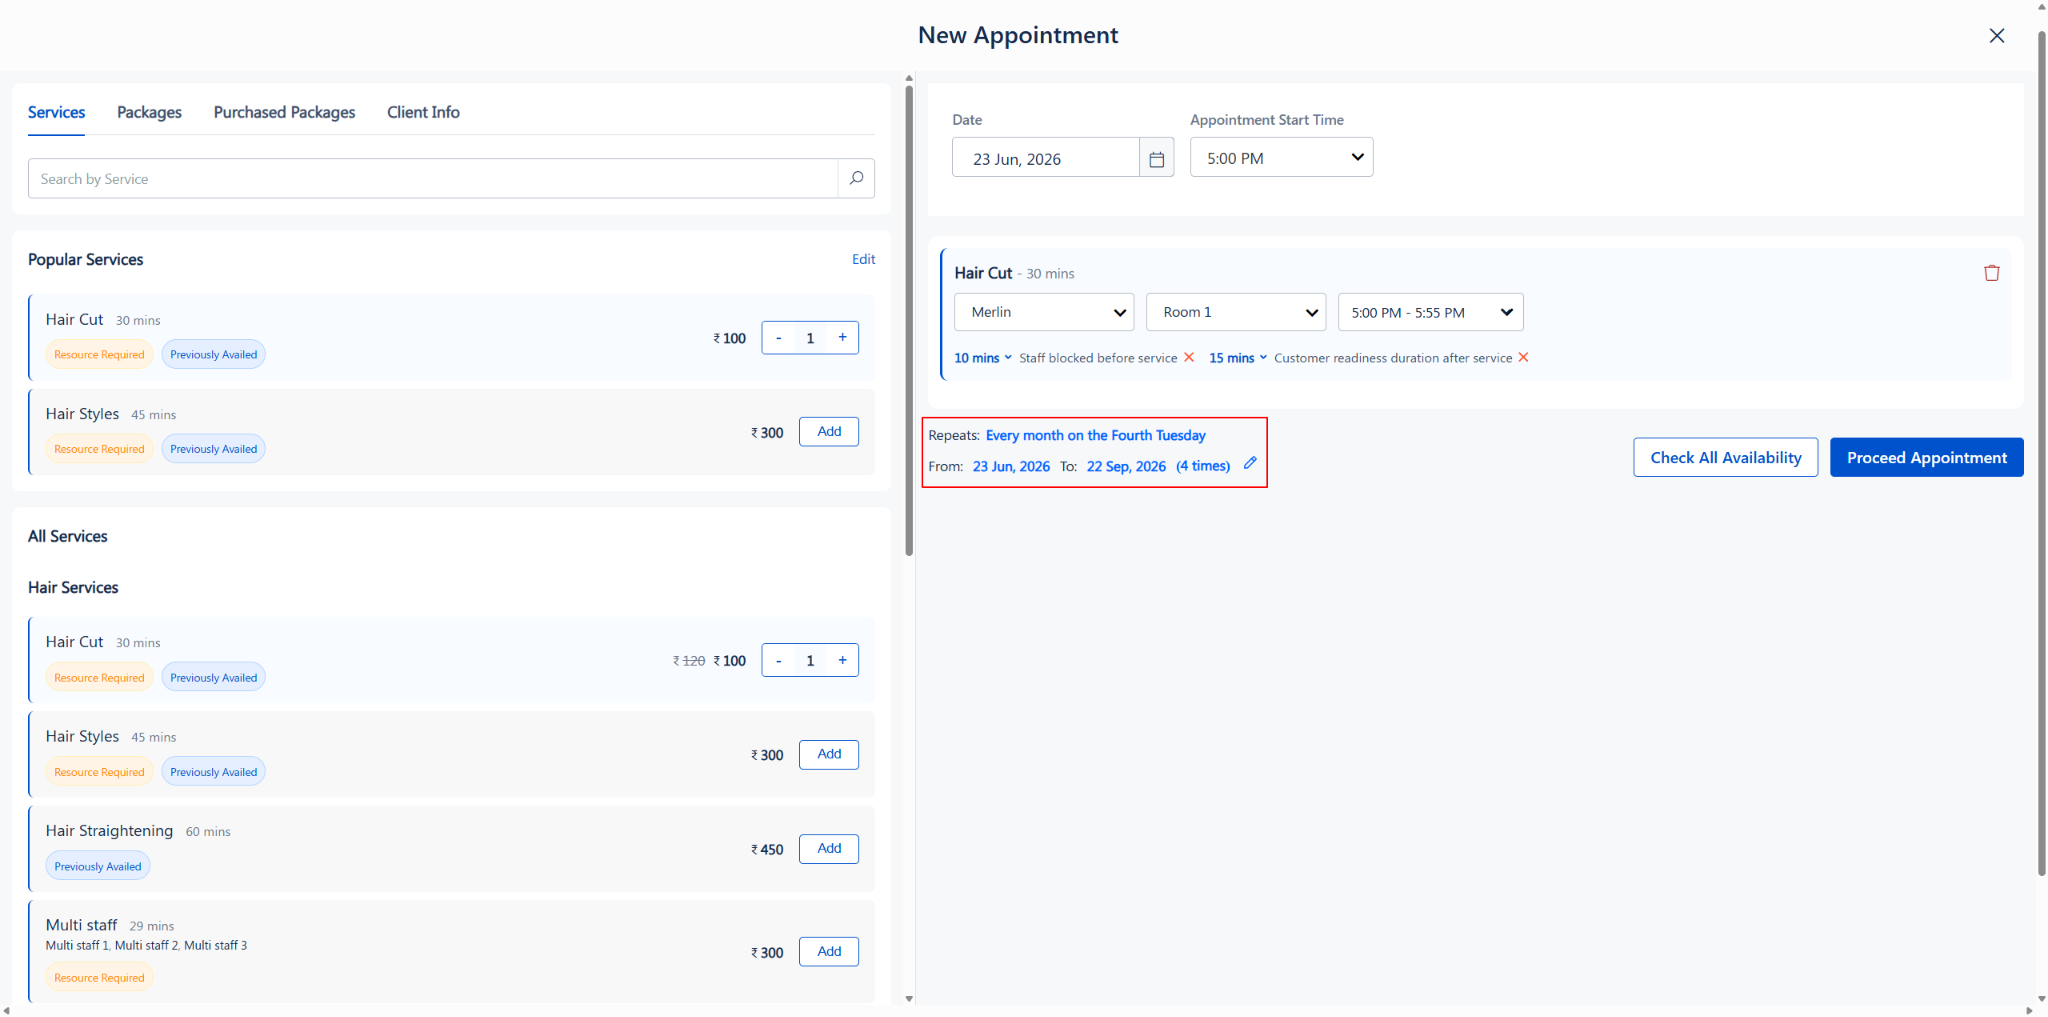
Monthly recurring filter showing the end date calendar picker
Option D: Custom
Use this option when you need a custom schedule — for example, if a client visits twice a week or every 2 weeks.
1. Select the "Custom" radio button.
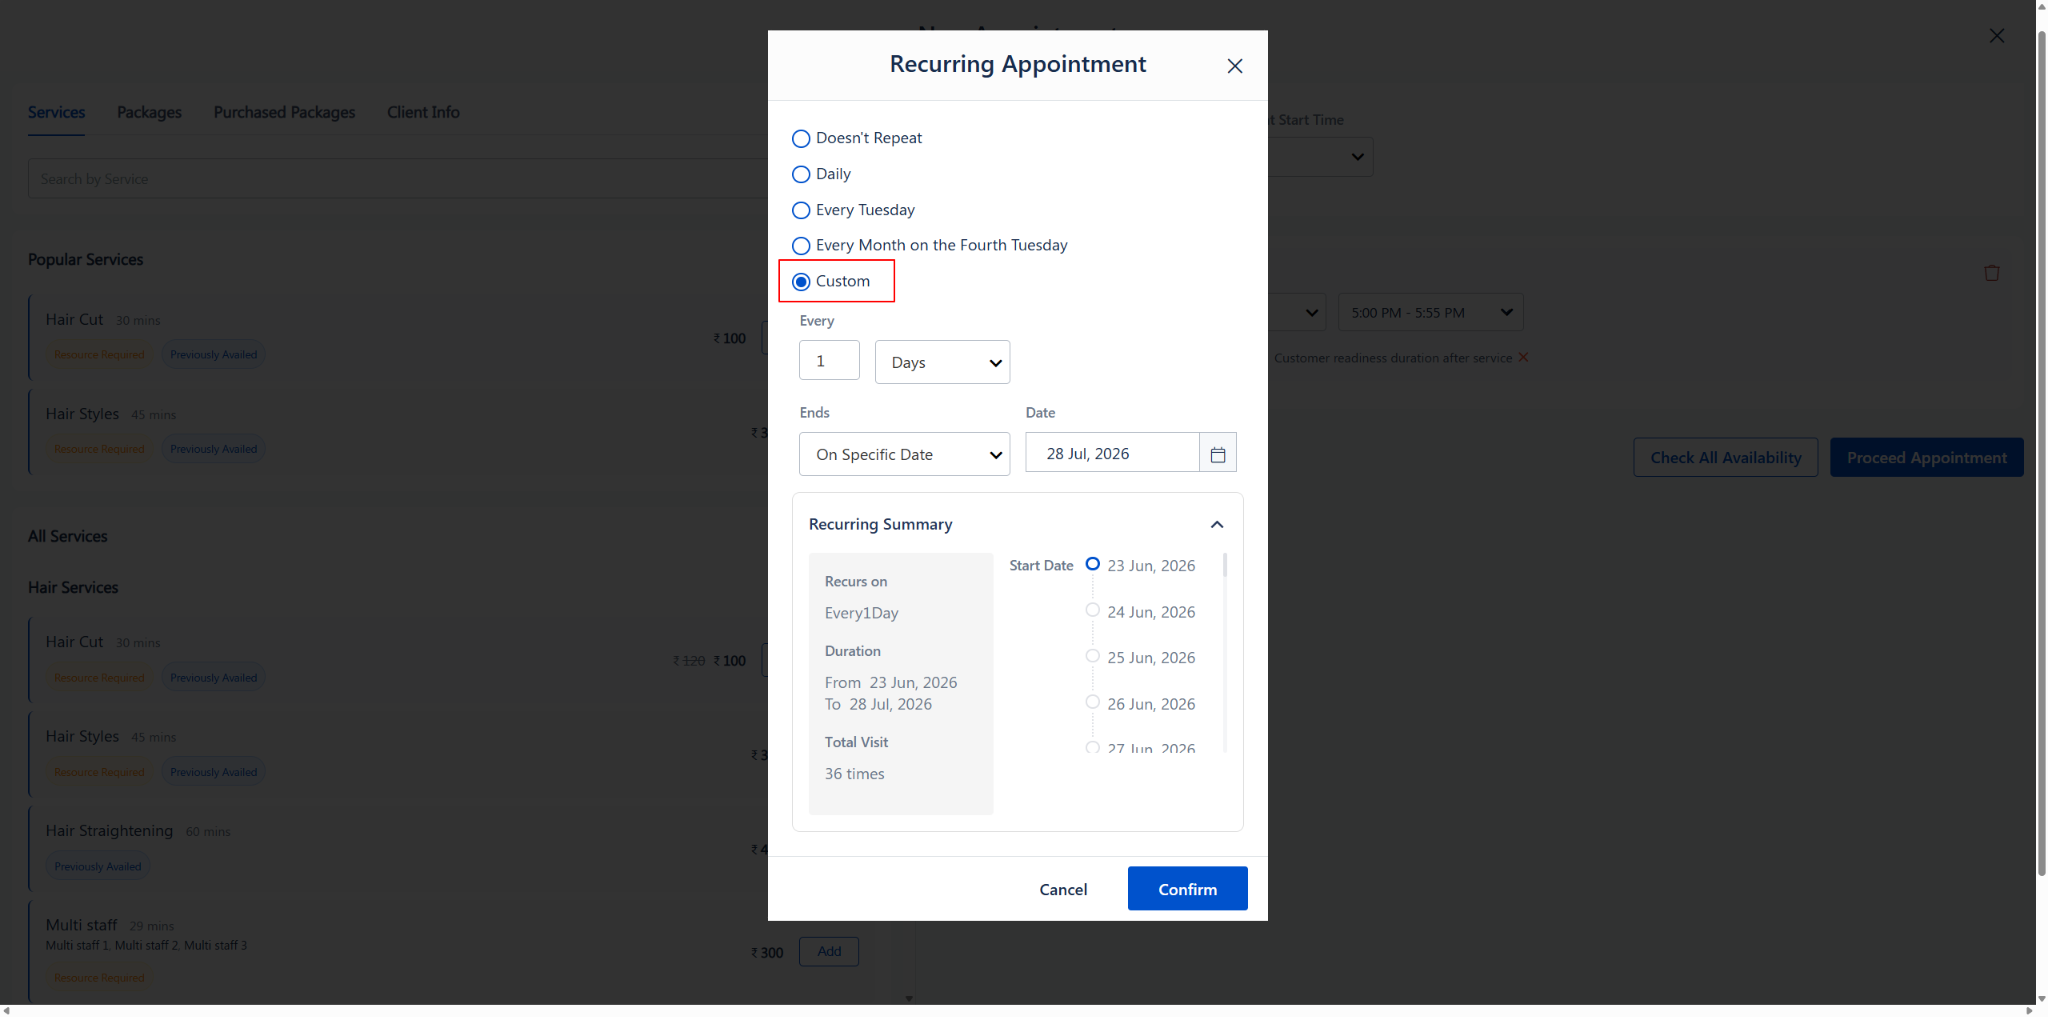
2. Set how often the appointment should repeat using the "Every" fields. For example, choose Every 1 Week or Every 2 Months depending on the client's preference.
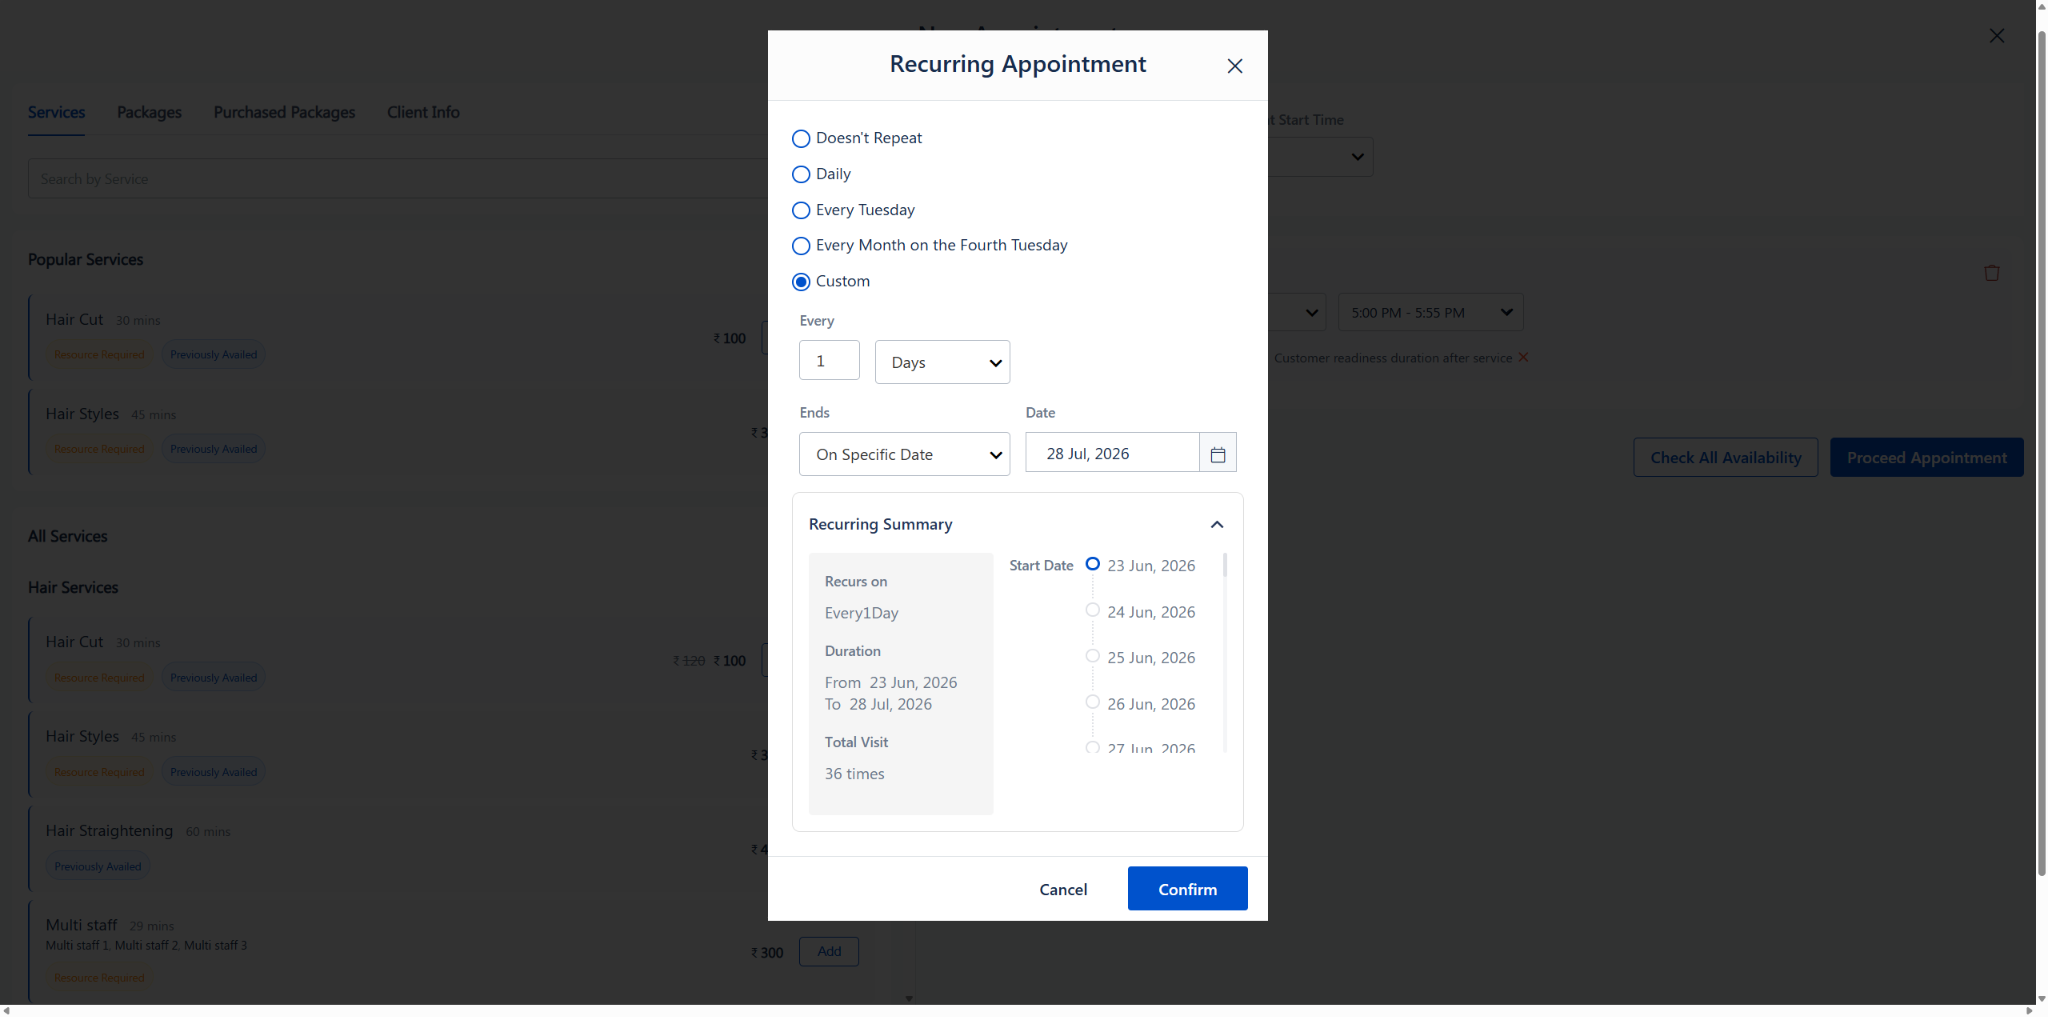
3. Pick the specific days the client wants to visit by clicking the day buttons (S, M, T, W, T, F, S). The selected days will turn blue to confirm your choice.
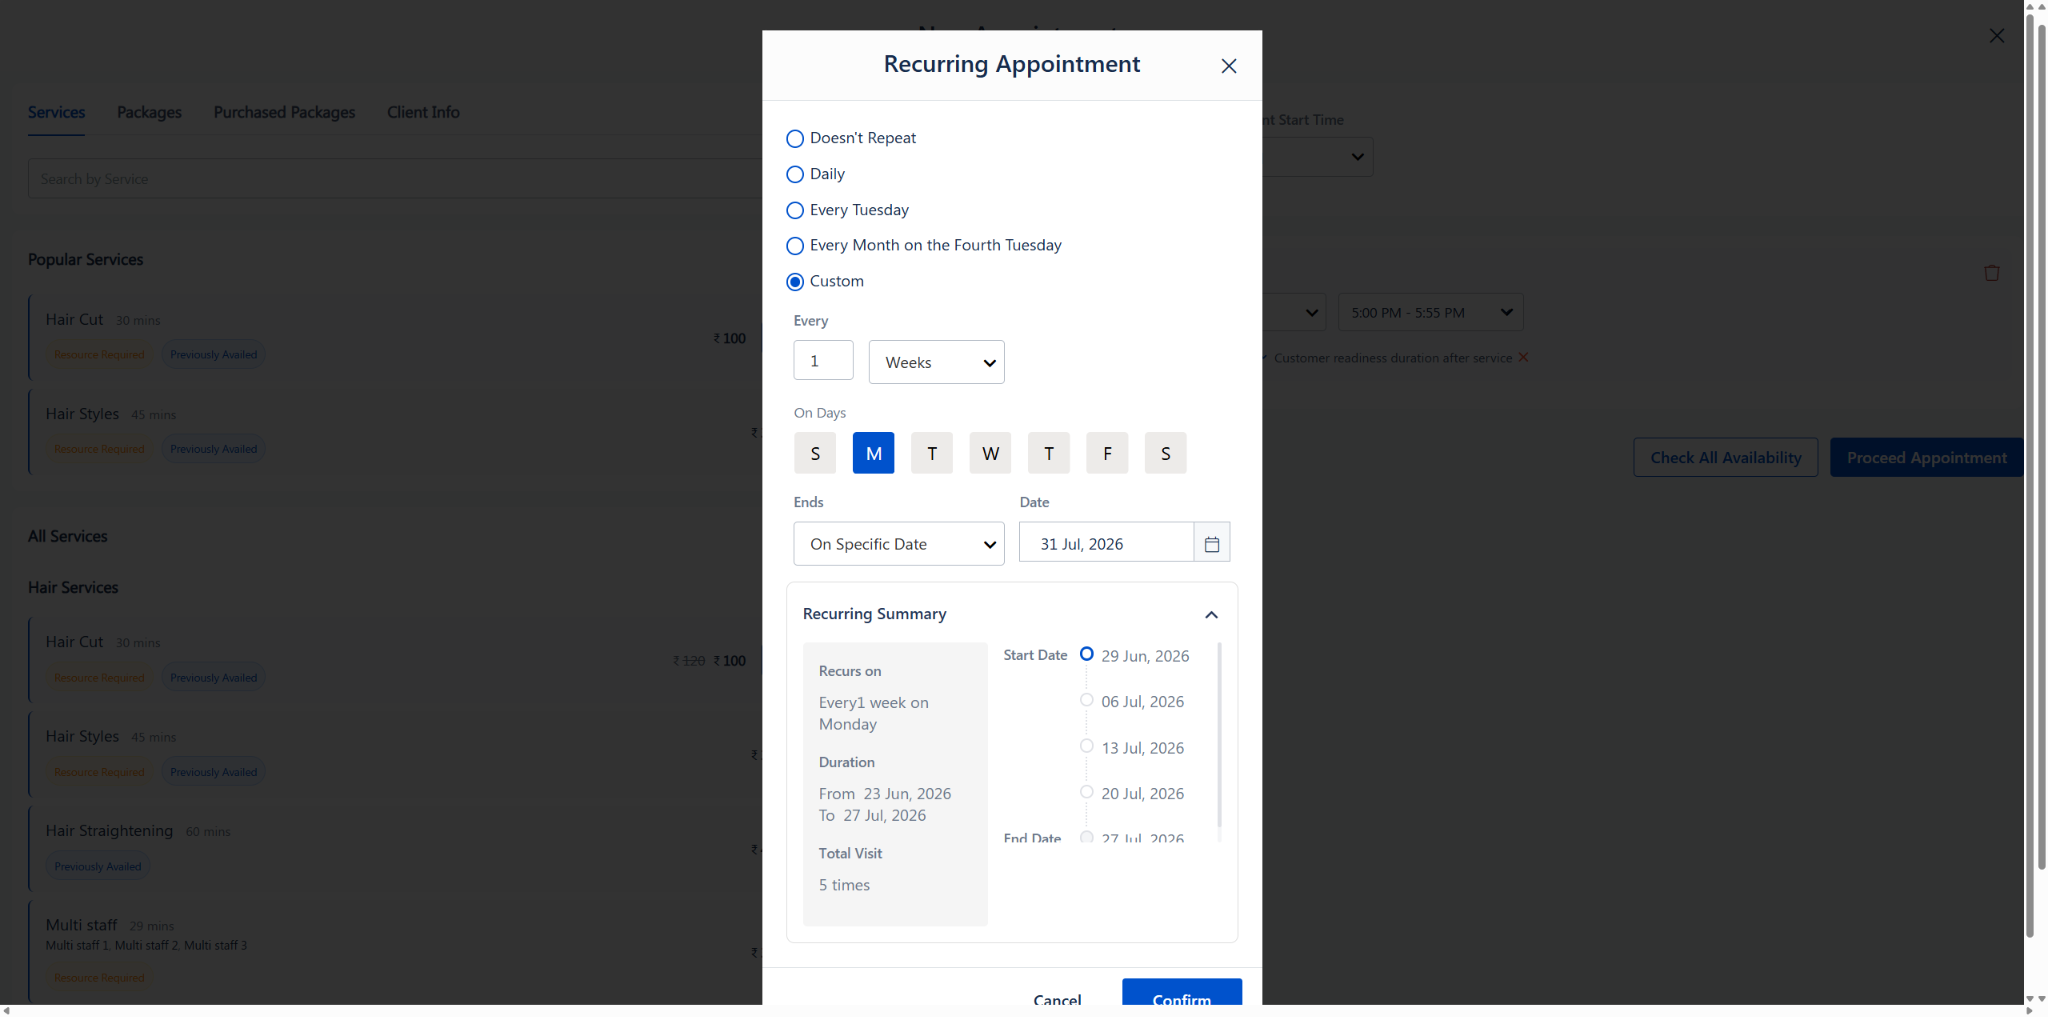
4. Under "Ends", decide when the recurring appointments should stop — either On a Specific Date or After a set number of visits.
5. Review the Recurring Summary box — it will show the exact schedule in plain language (e.g., Every 1 week on Monday, Thursday), so you can verify everything looks correct.
6. Click "Confirm" to apply the schedule.
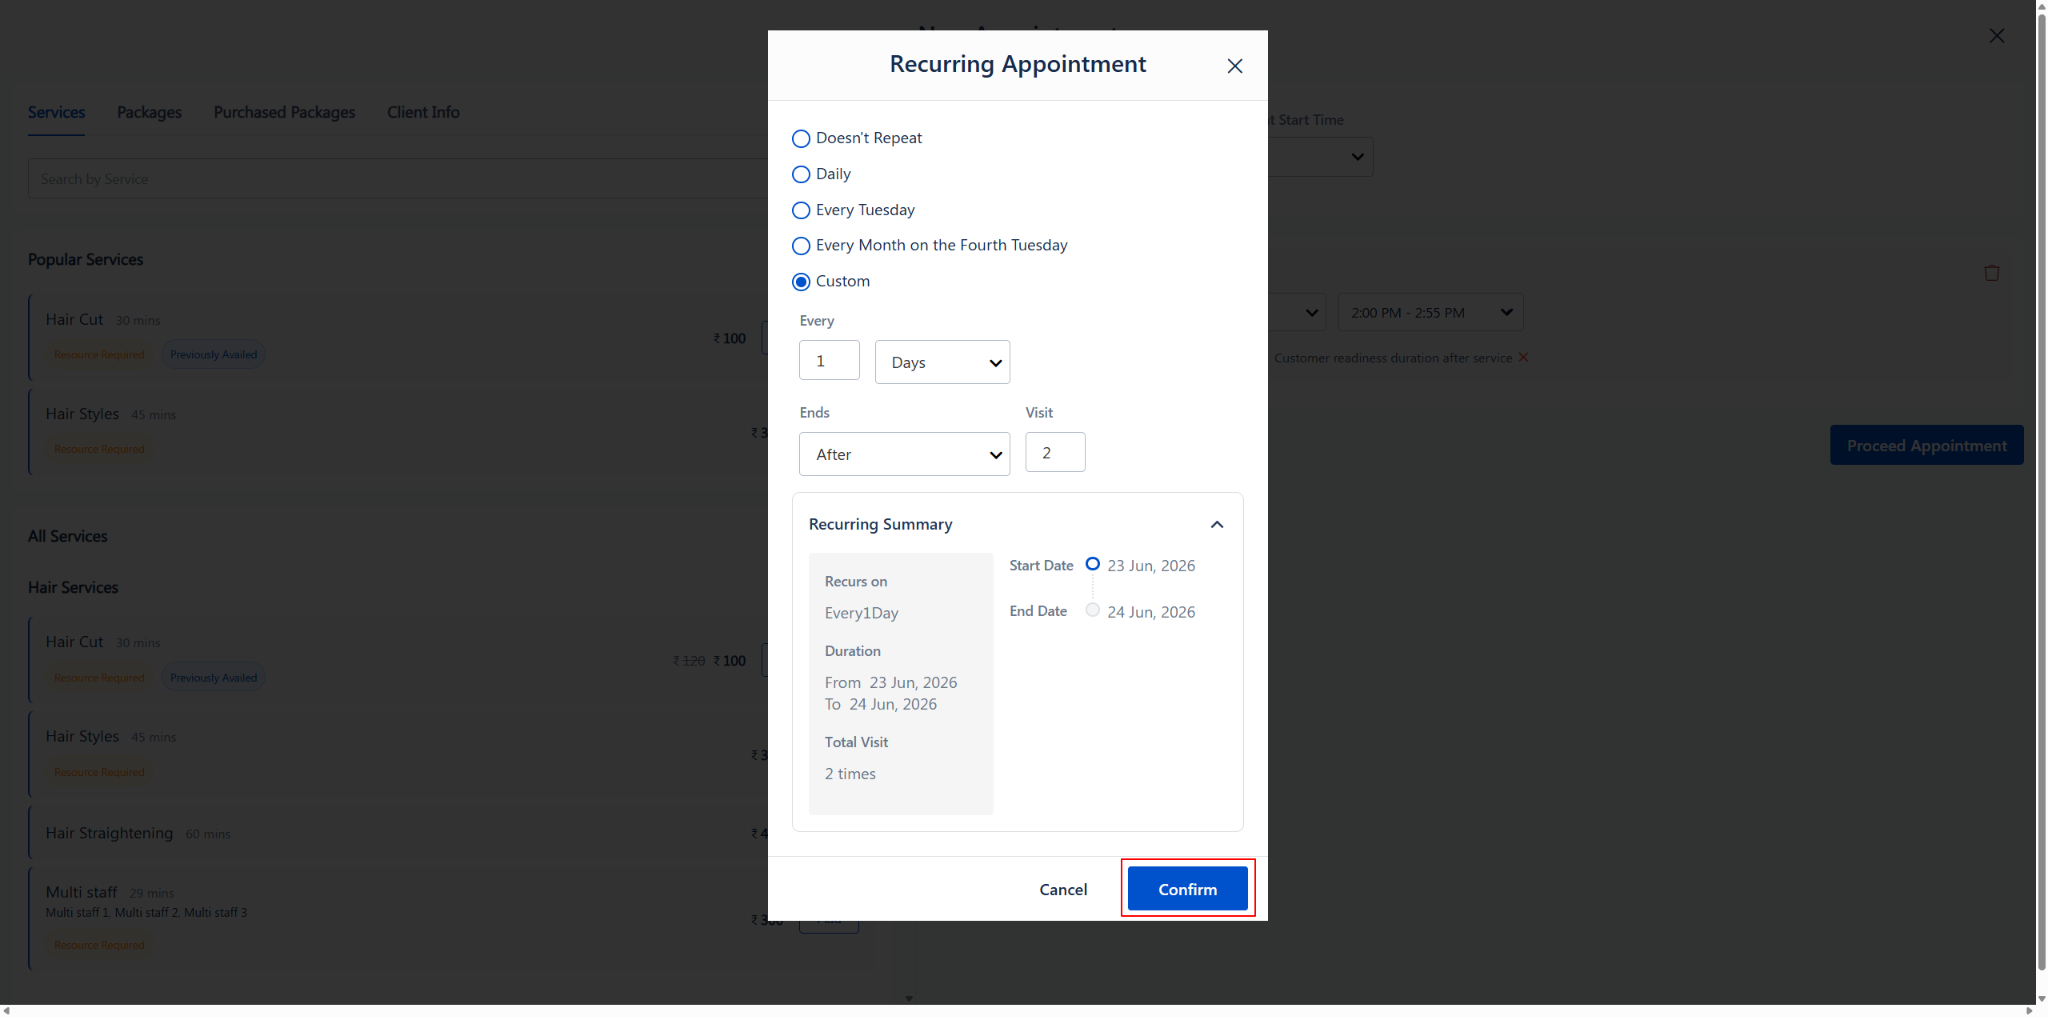
Custom recurring filter showing weekly frequency, multiple selected days, and summary
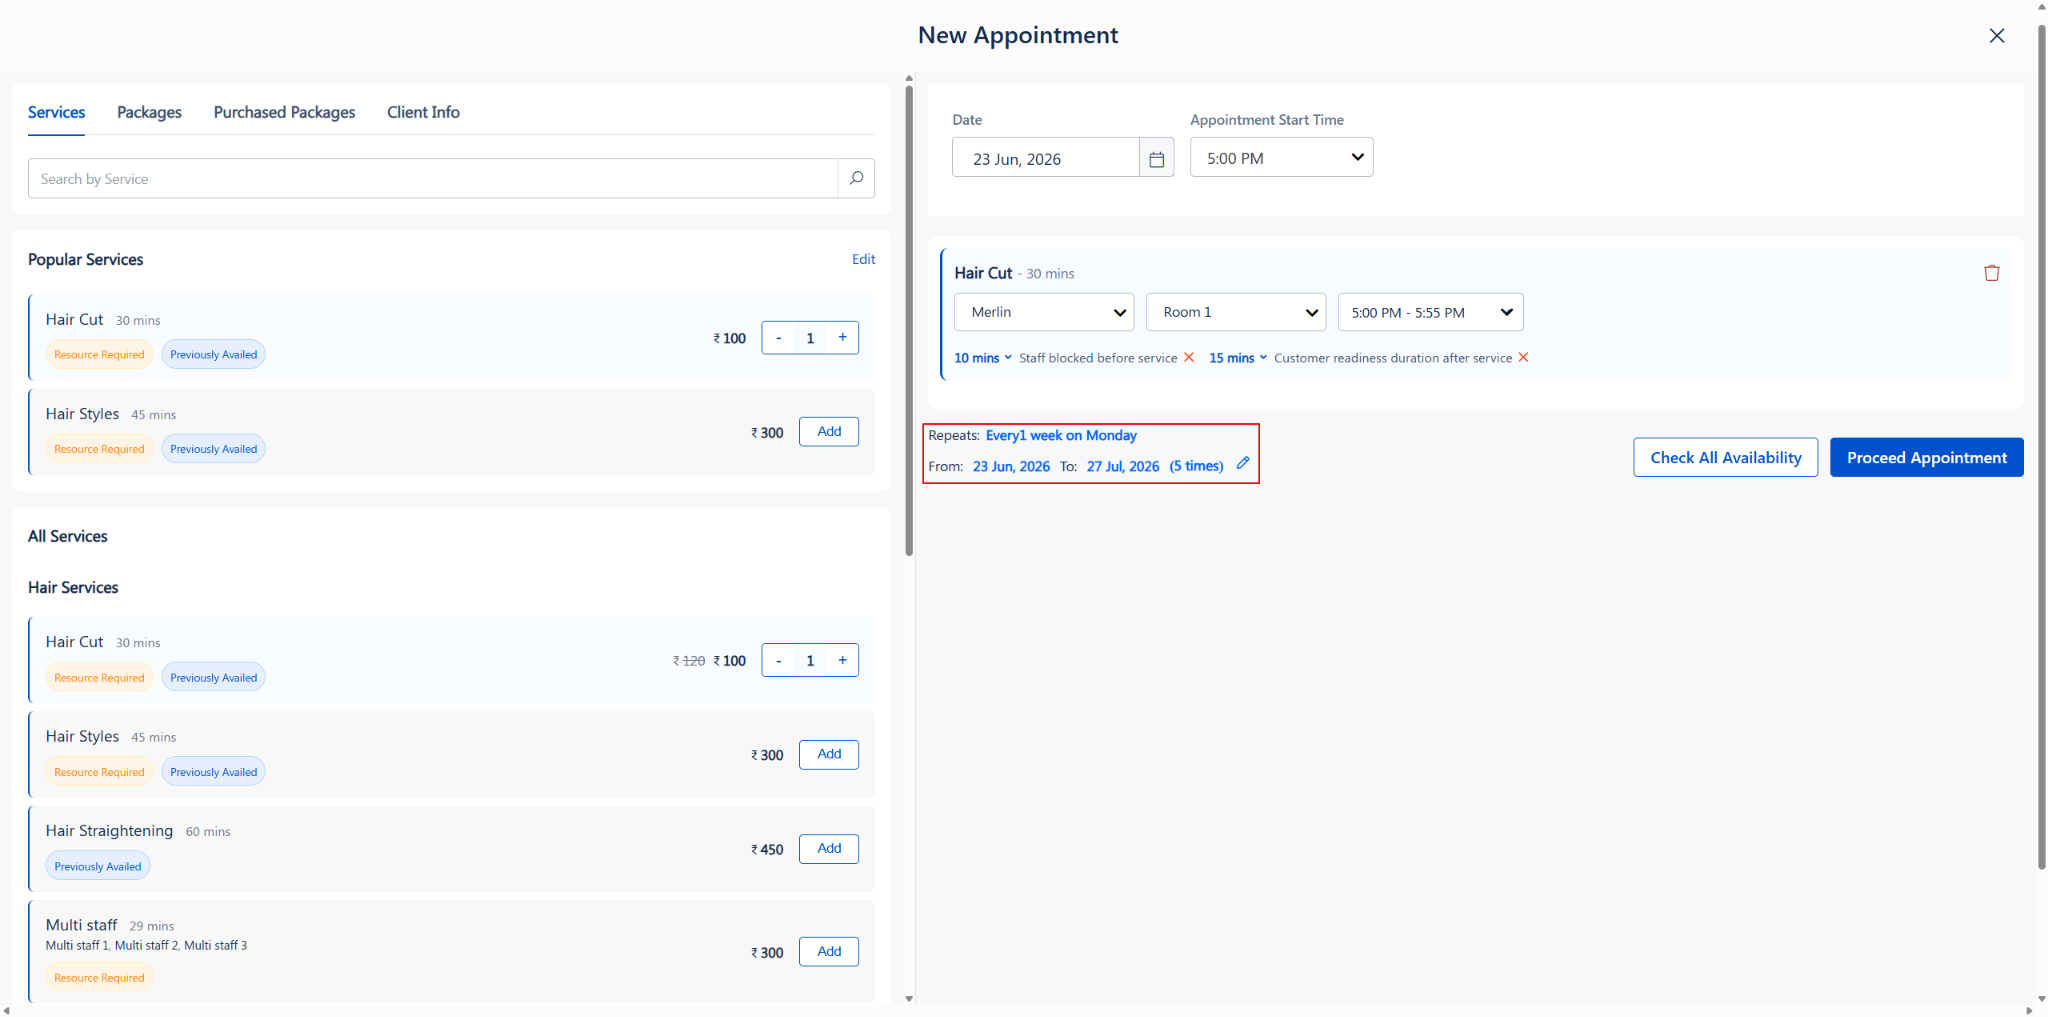
Step 4: Verify the Recurring Details
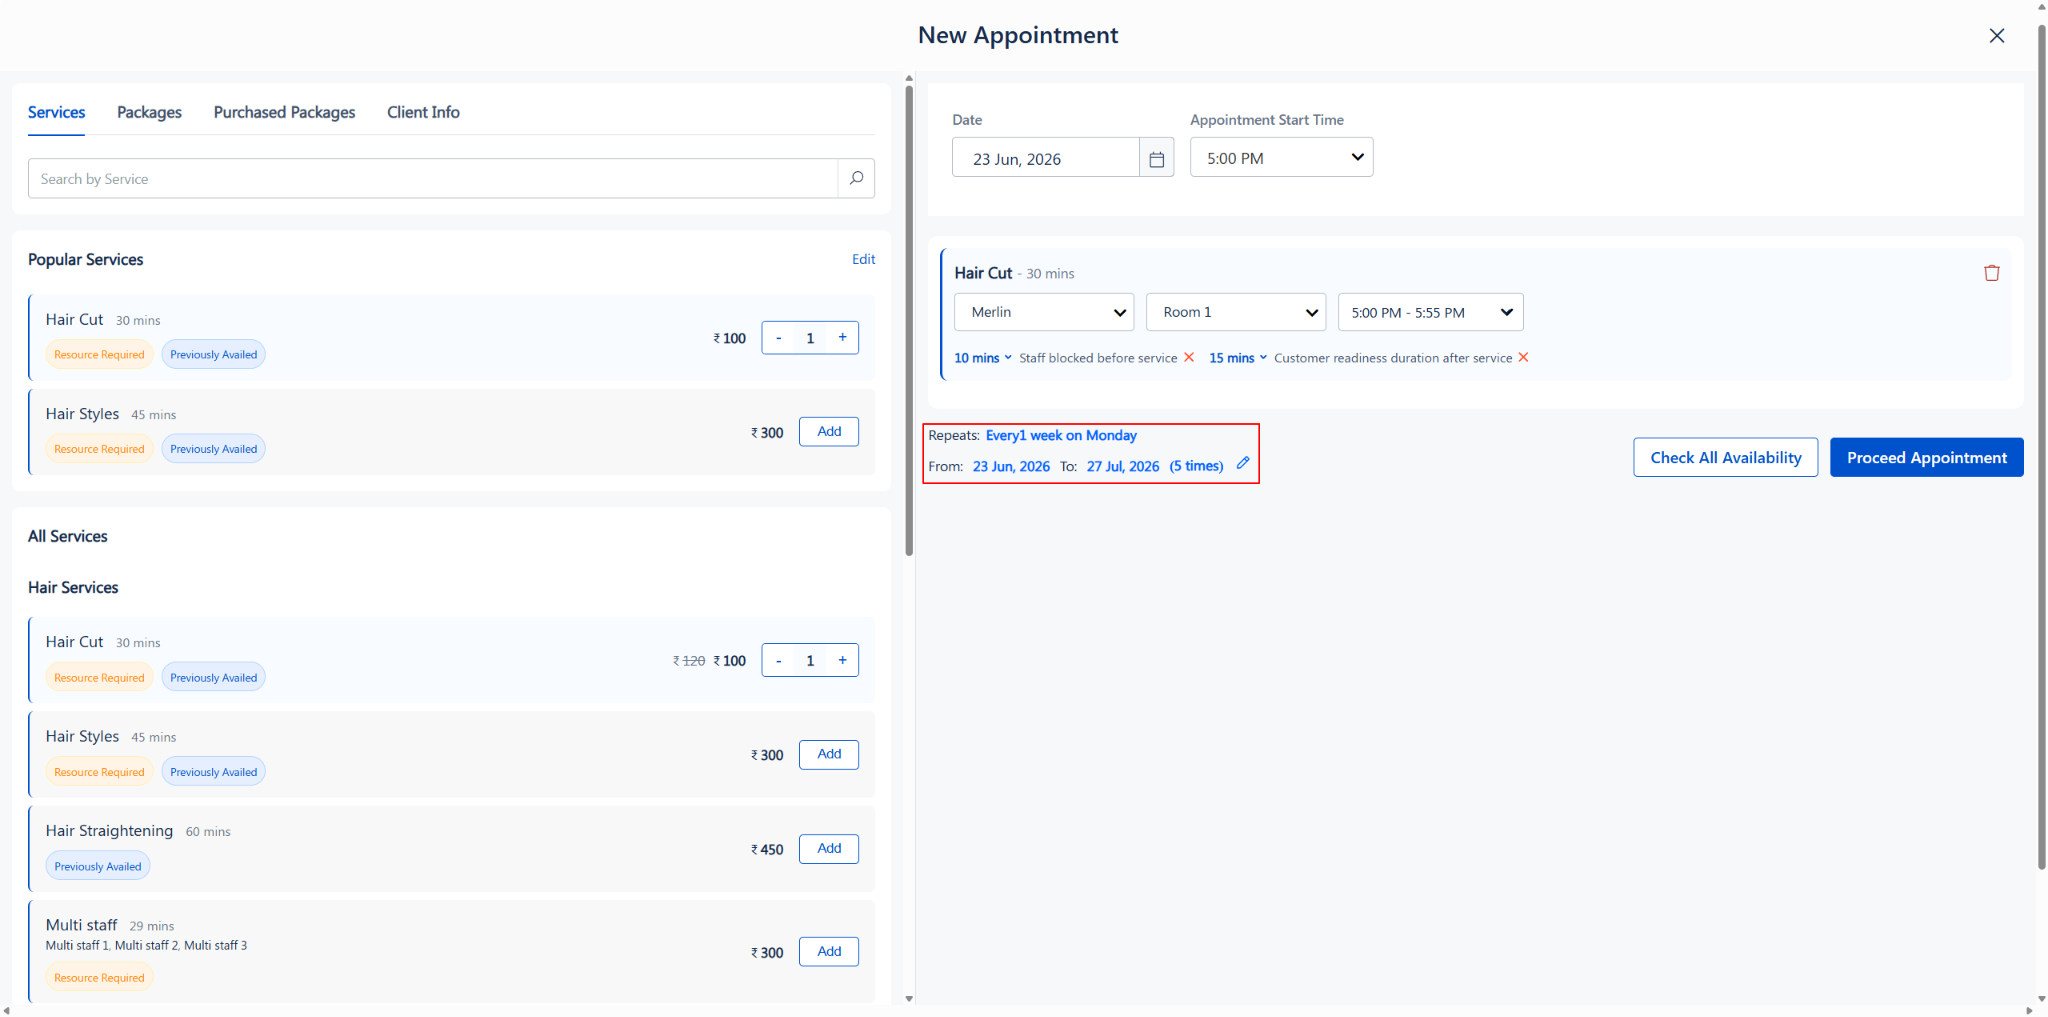
1. After confirming, the popup closes.
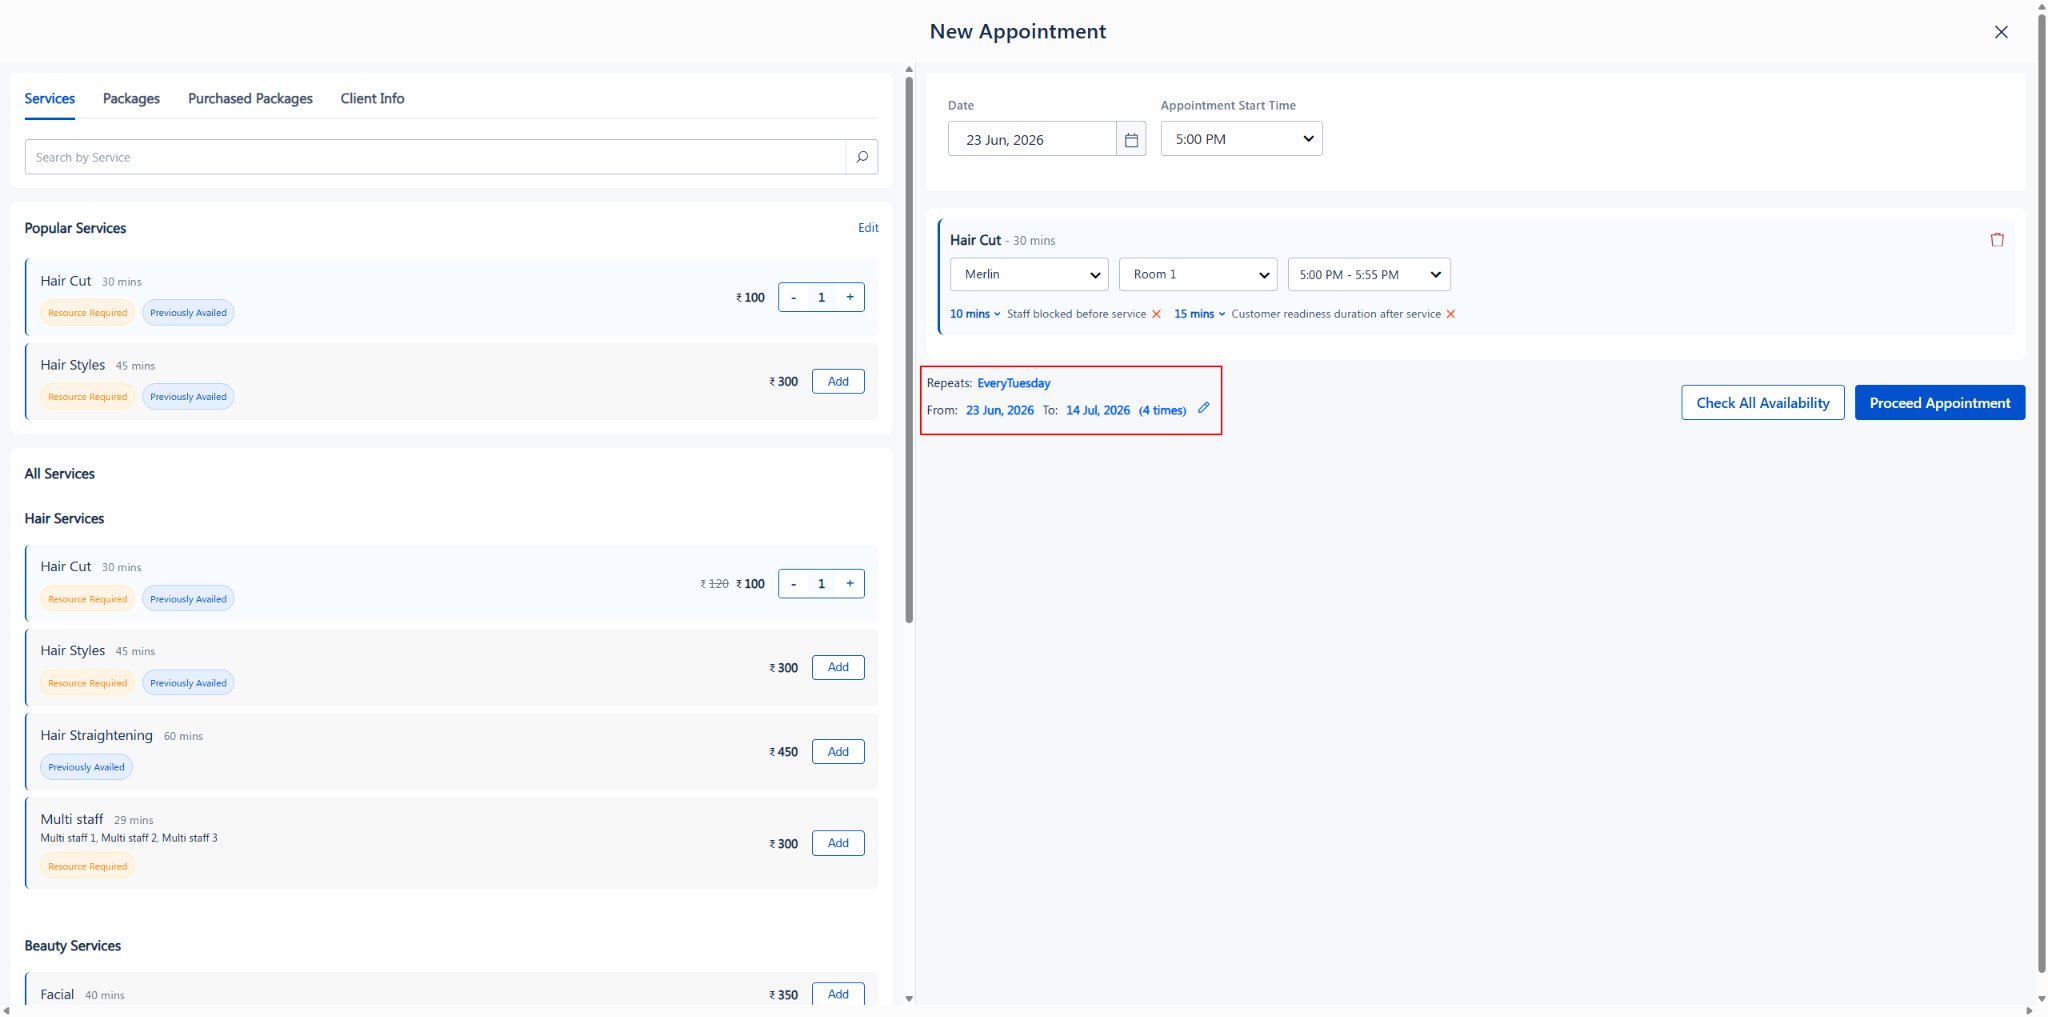
2. Below the service on the right panel, you will now see the confirmed recurring details text (e.g., Repeats: Daily. From: 19 Jun, 2026 To: 22 Jun, 2026 (4 times)).
3. If you need to modify the schedule, click the edit icon next to this text.
Step 5: Check Availability and Save
1. Click “Check All Availability” to open the availability grid. The system will verify that the staff and resource are available across all the recurring dates.
2. Click “Proceed Appointment” to review the Appointment Summary.
3. Click “Save” to finalize the recurring schedule.
Use Cases
· Therapy or Treatment Courses: Schedule a 6-week skin treatment plan where the client comes in every Tuesday.
· Regular Grooming: Set up a bi-weekly haircut appointment for a returning client using the Custom filter.
· Daily Sessions: Manage intensive daily spa or wellness sessions over a short period.
Benefits
· Time Savings: Schedule months of appointments in seconds without manually creating each one.
· Guaranteed Revenue: Securing future appointments in advance helps stabilize cash flow.
· Reduced No-Shows: Clients with an established, predictable schedule are more likely to commit to their appointments.
· Error Reduction: Automated recurring logic prevents manual data entry mistakes and schedule conflicts.
Was this article helpful?
That’s Great!
Thank you for your feedback
Sorry! We couldn't be helpful
Thank you for your feedback
Feedback sent
We appreciate your effort and will try to fix the article