How to Access Appointment Details to Delete the Service Appointment
Before you can Delete you need to open the appointment details. MioSalon gives you two ways to do this:
Option 1: Via Calendar View
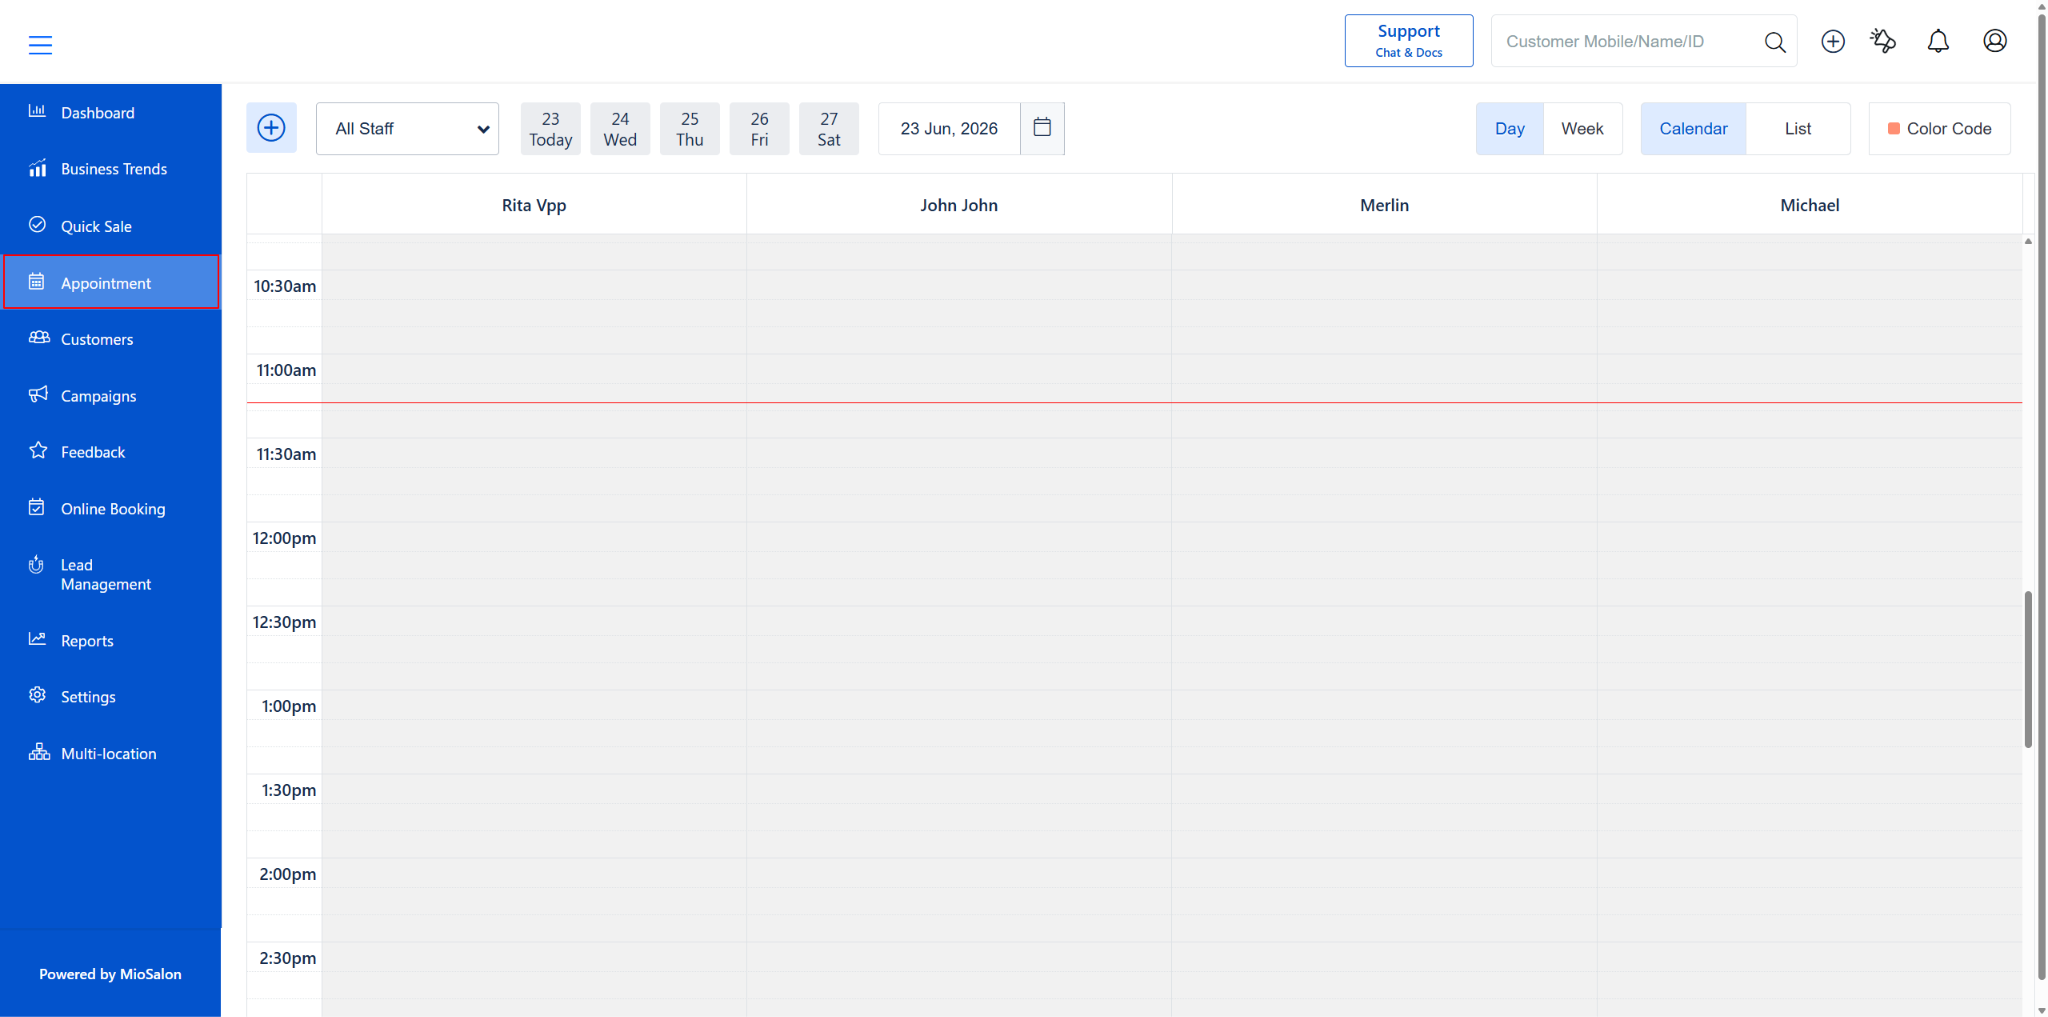
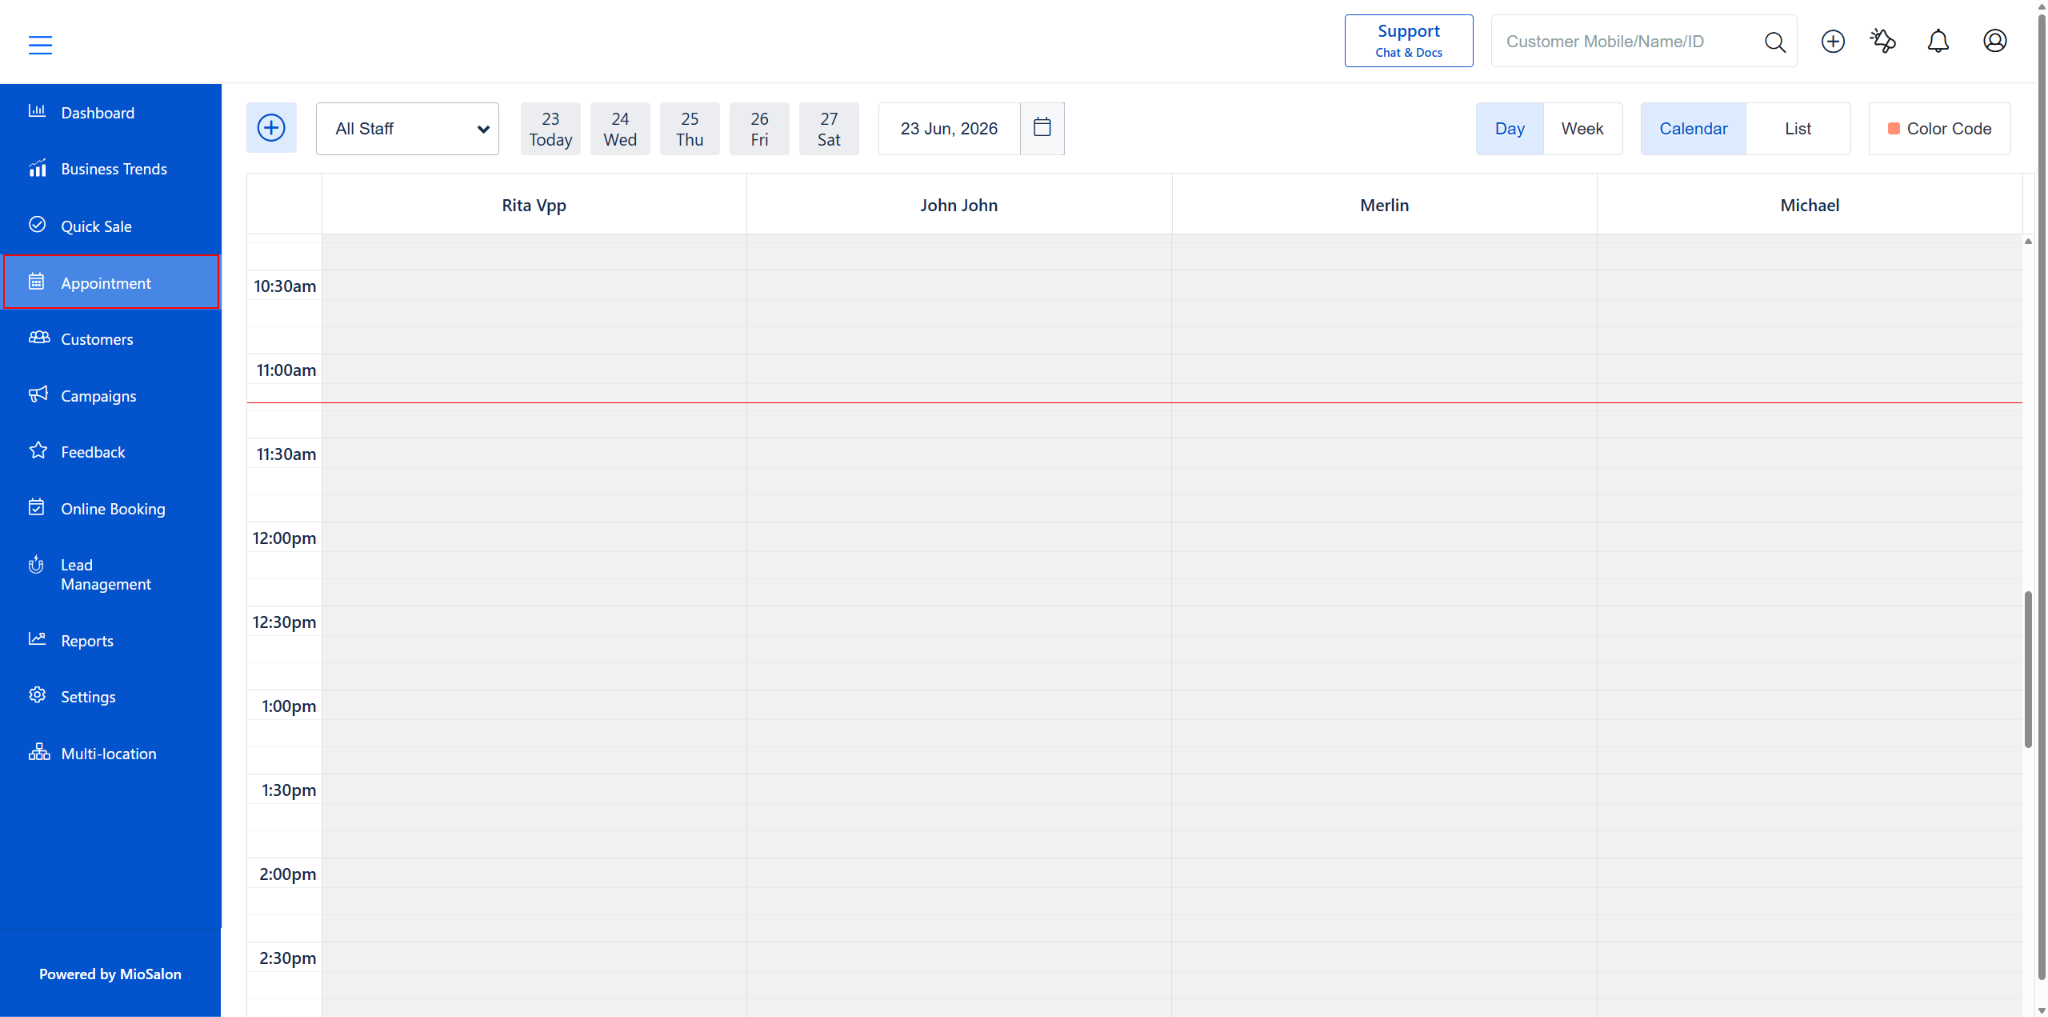
1. Go to Appointment from the left menu.
2. Make sure you’re on the Calendar view (top-right toggle).
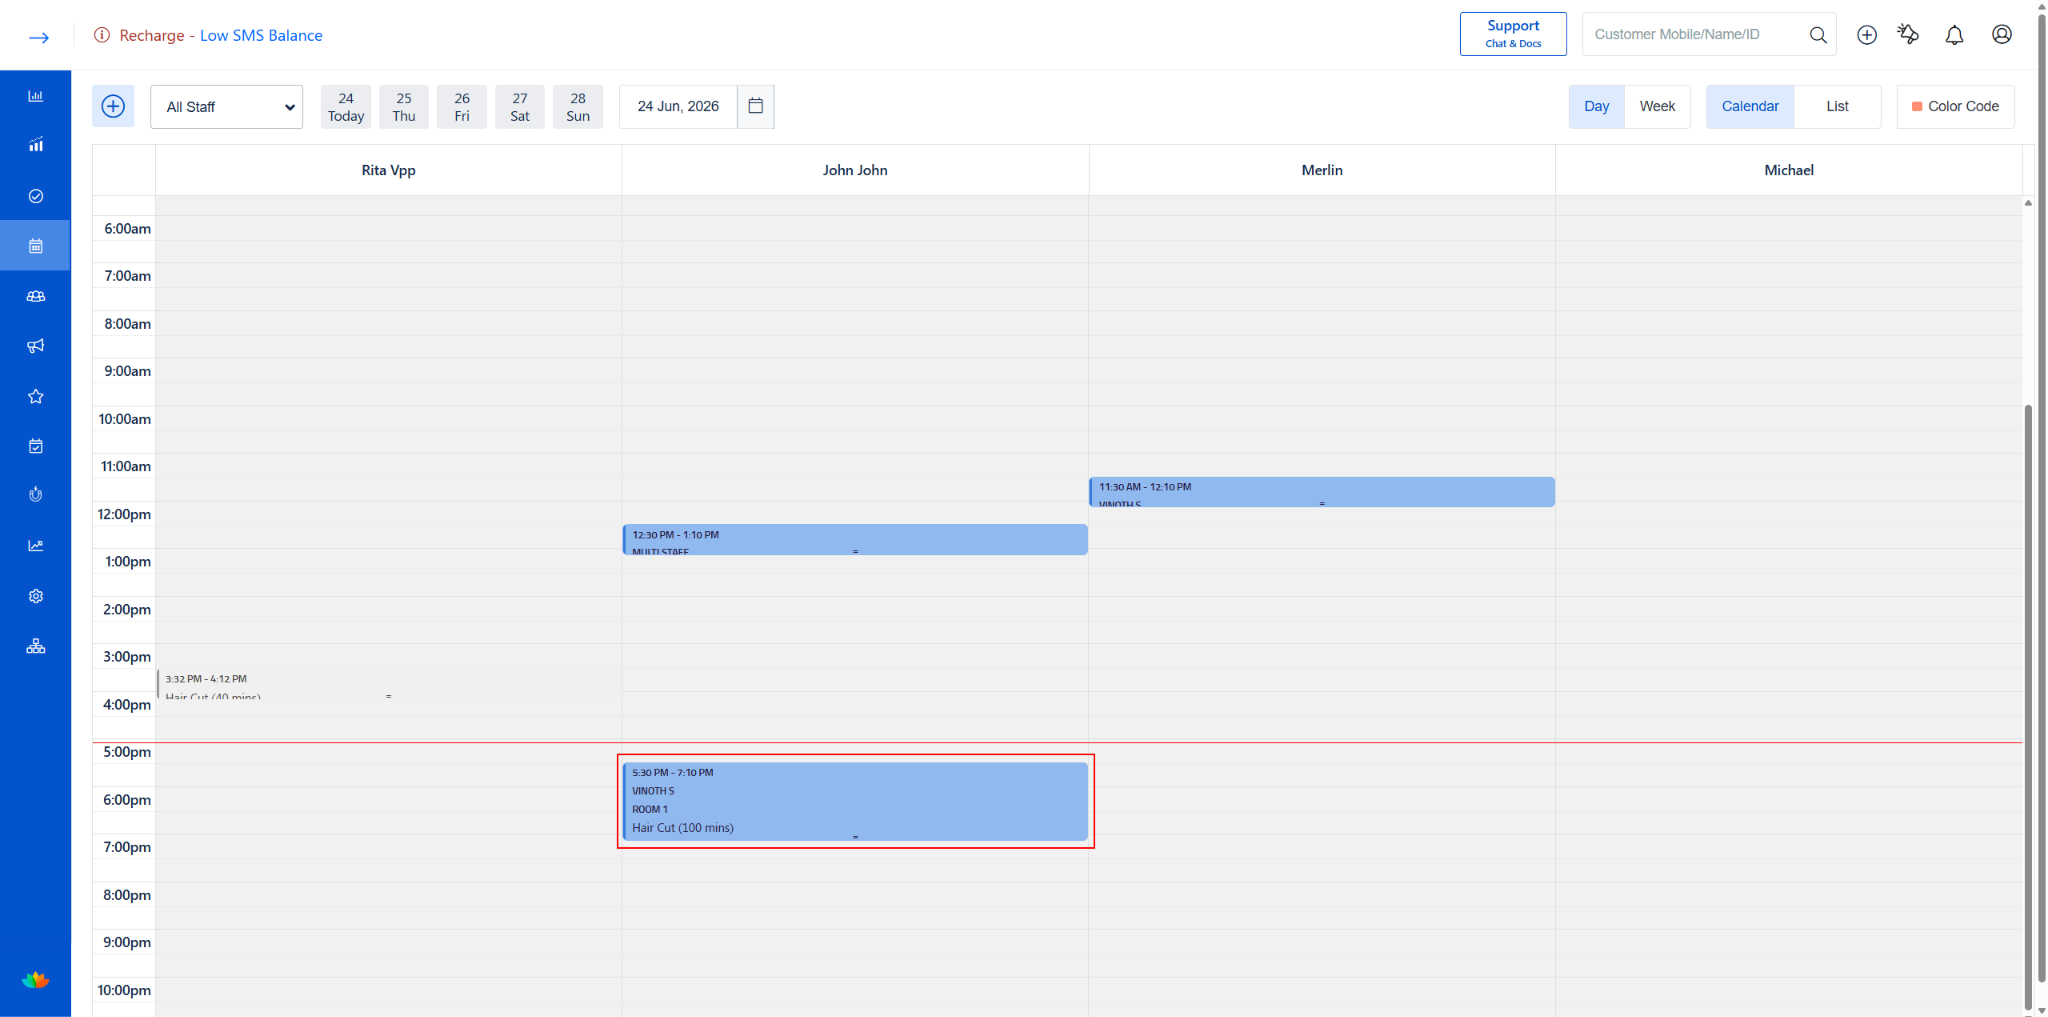
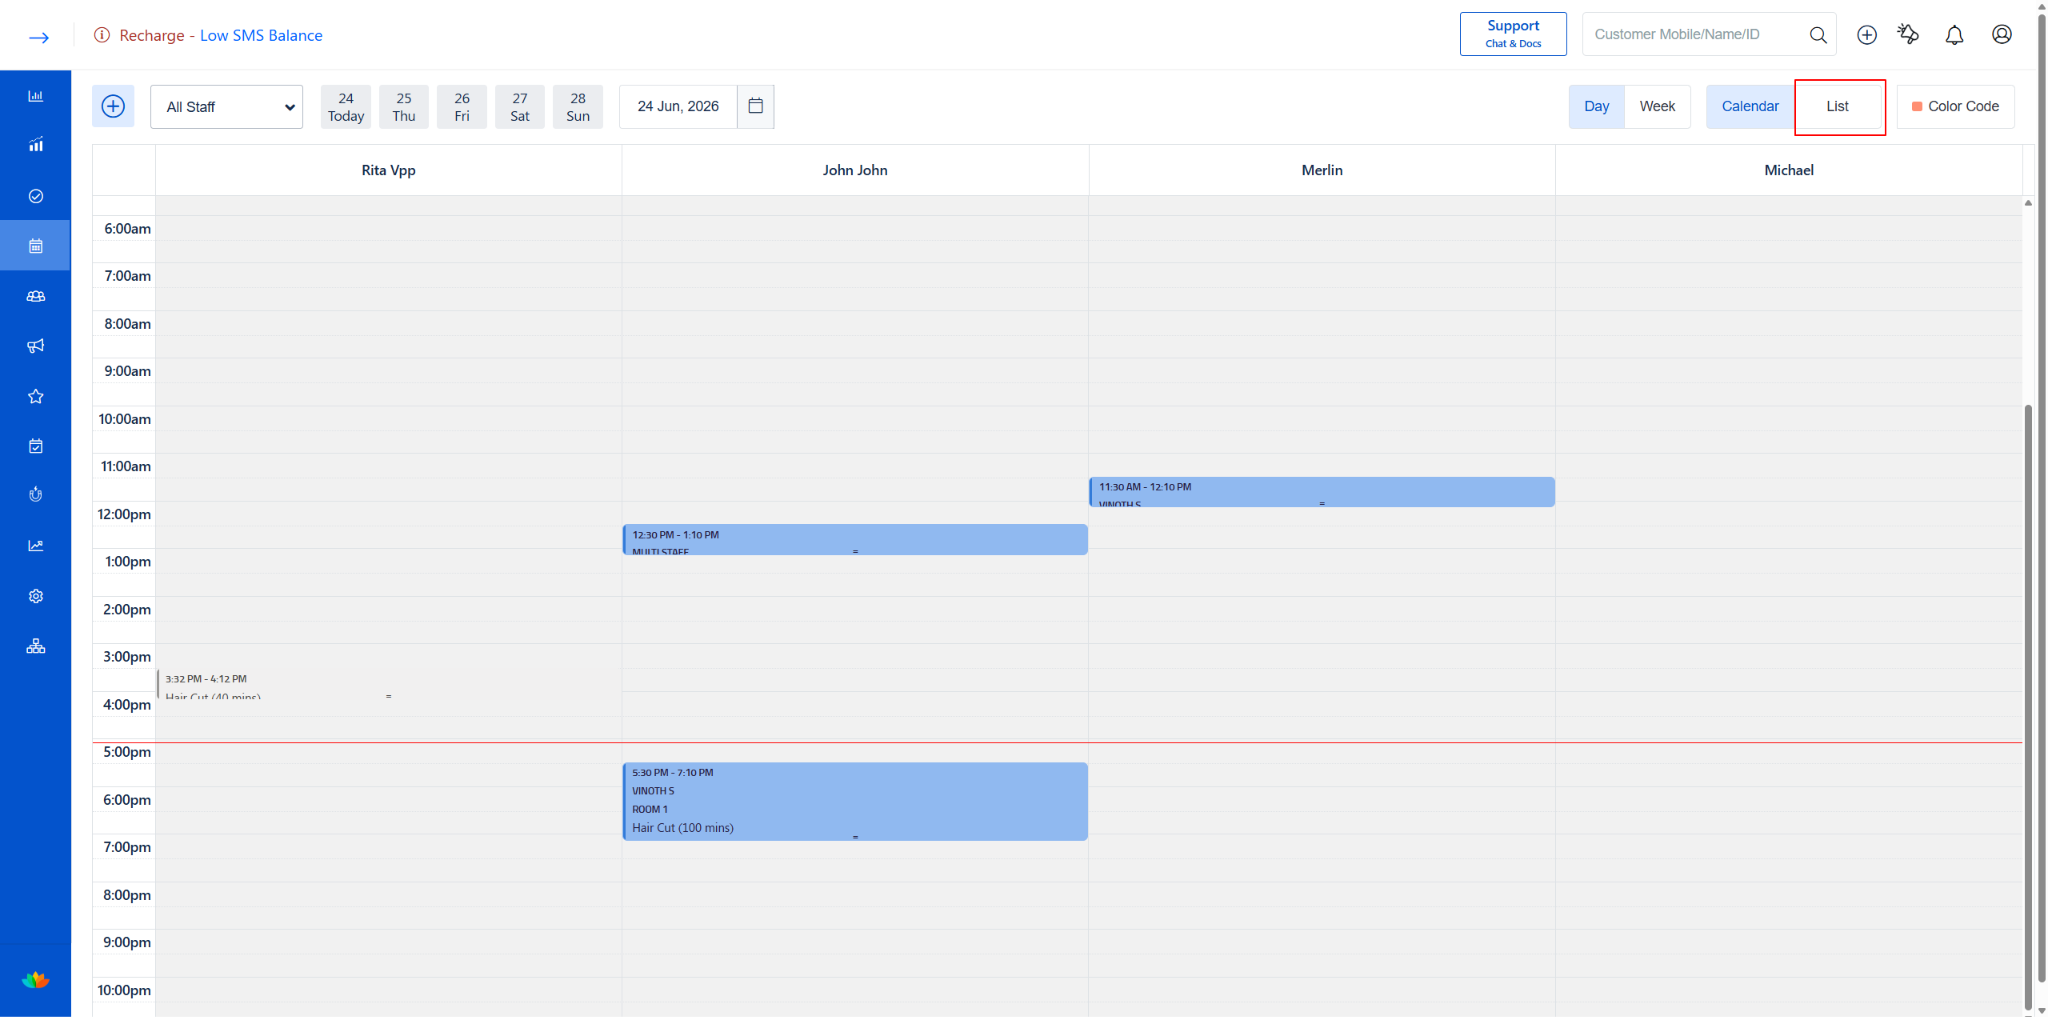
3. Each appointment appears as a coloured block under the assigned staff column.
4. The block shows the time range, client name, resource, and service name.
5. Click on the appointment block to open the Appointment Details popup.
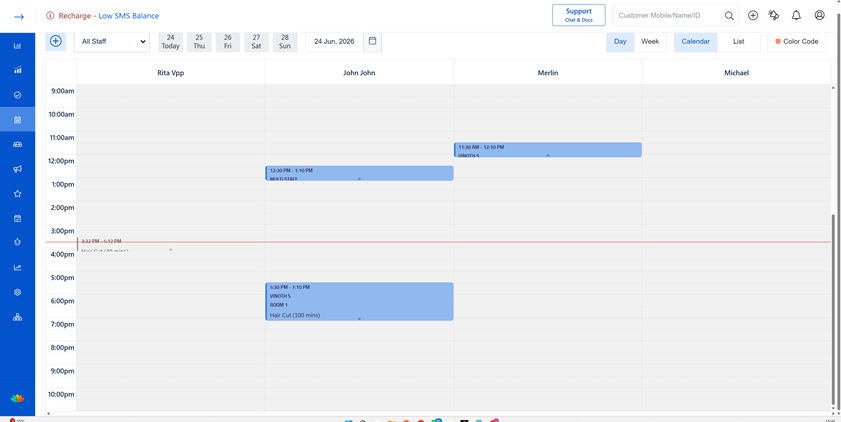
Calendar view showing appointment blocks under staff columns
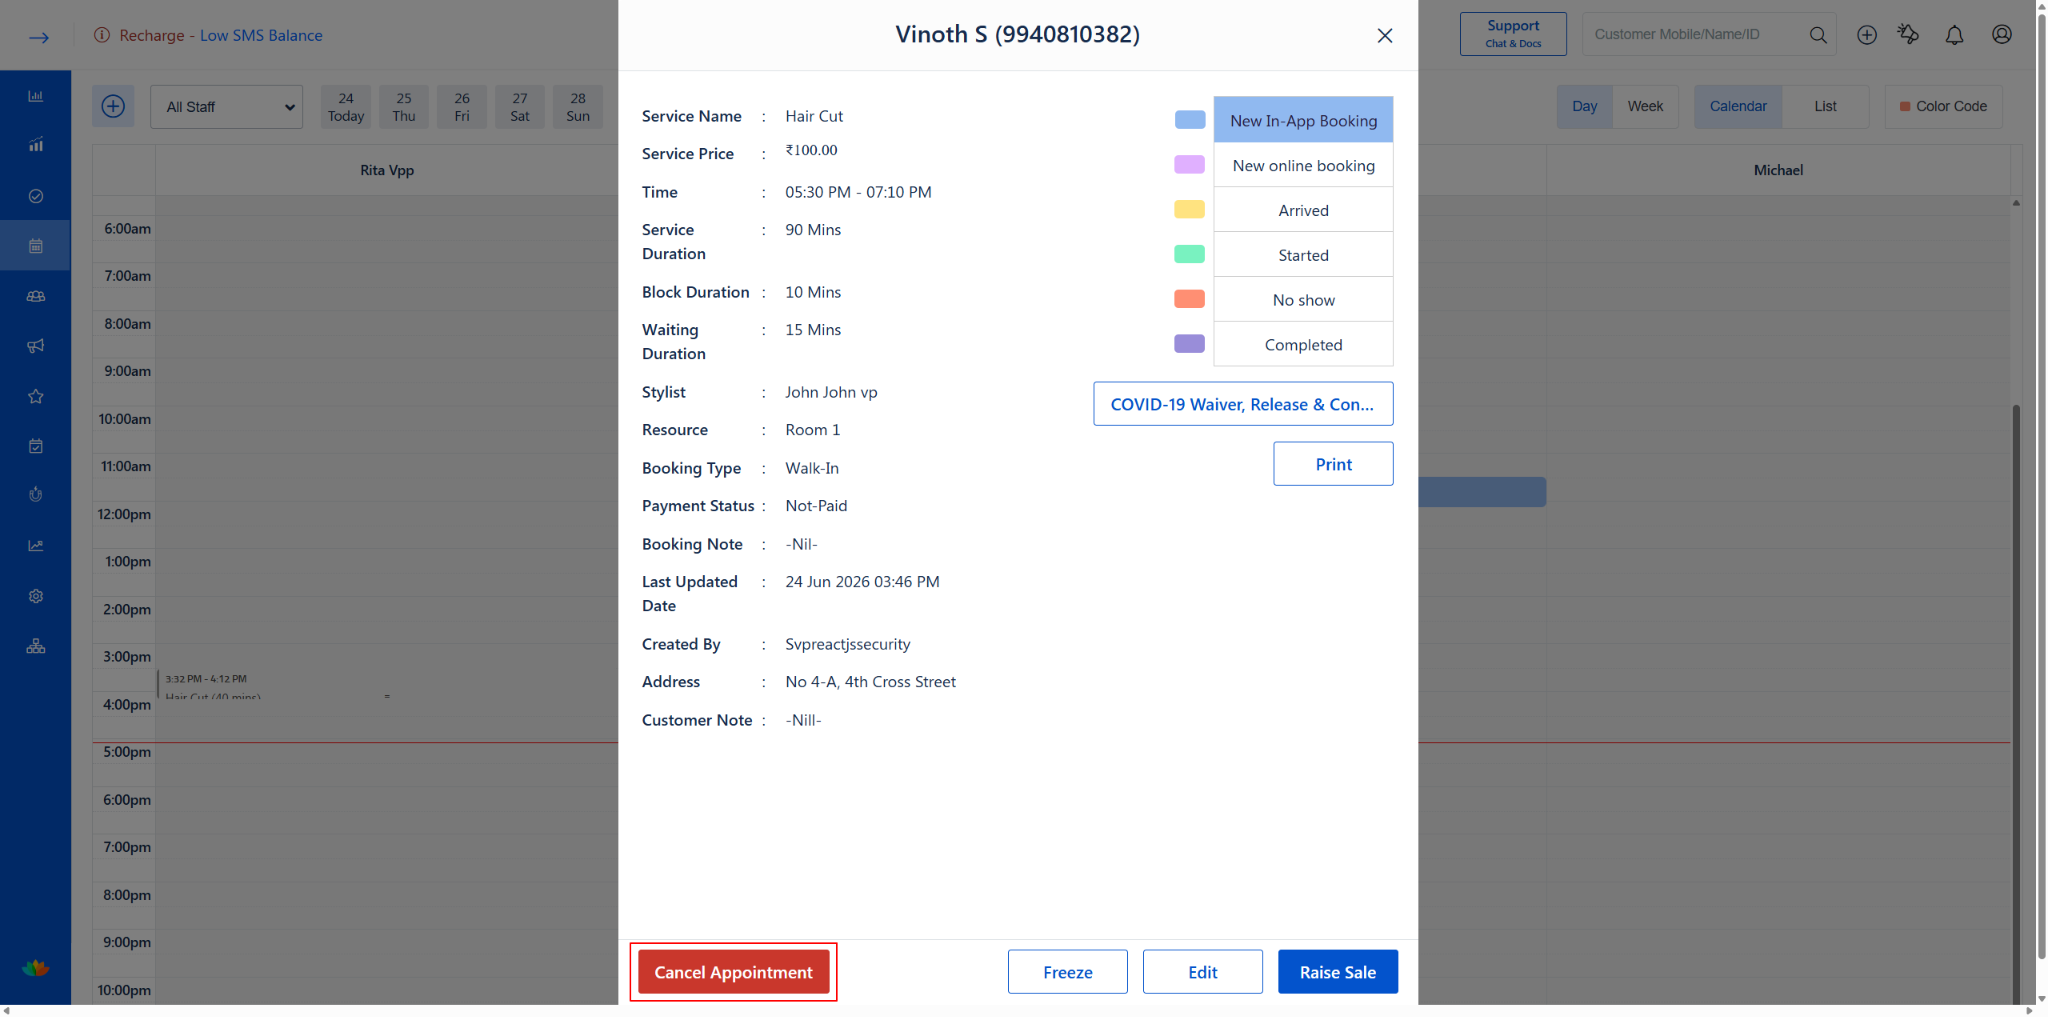
Appointment Details popup (Calendar view) displays:
· On the right side, you’ll see the Appointment Status with colour-coded options:
o New In-App Booking (blue)
o New Online Booking (pink)
o Arrived (yellow)
o Started (green)
o No Show (orange)
o Completed (purple)
· At the bottom, you have four action buttons:
o Cancel Appointment (red) — Cancel this appointment
o Freeze — Freeze the appointment
o Edit — Edit the appointment details
o Raise Sale — Raise a sale/bill for this appointment
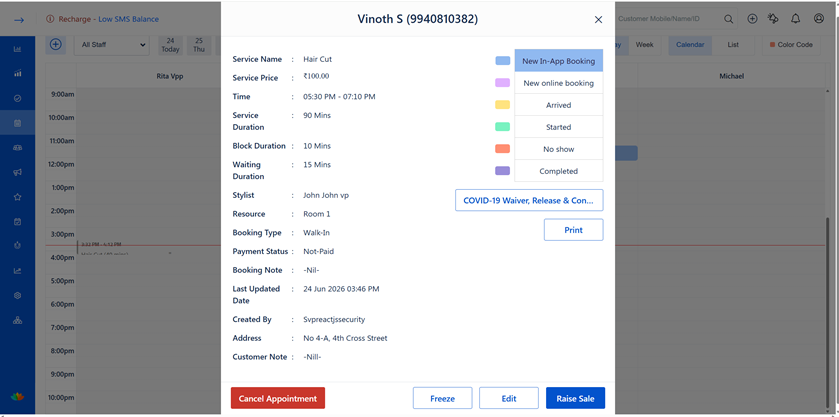
Appointment Details popup showing service info, status options, and action buttons
Option 2: Via List View
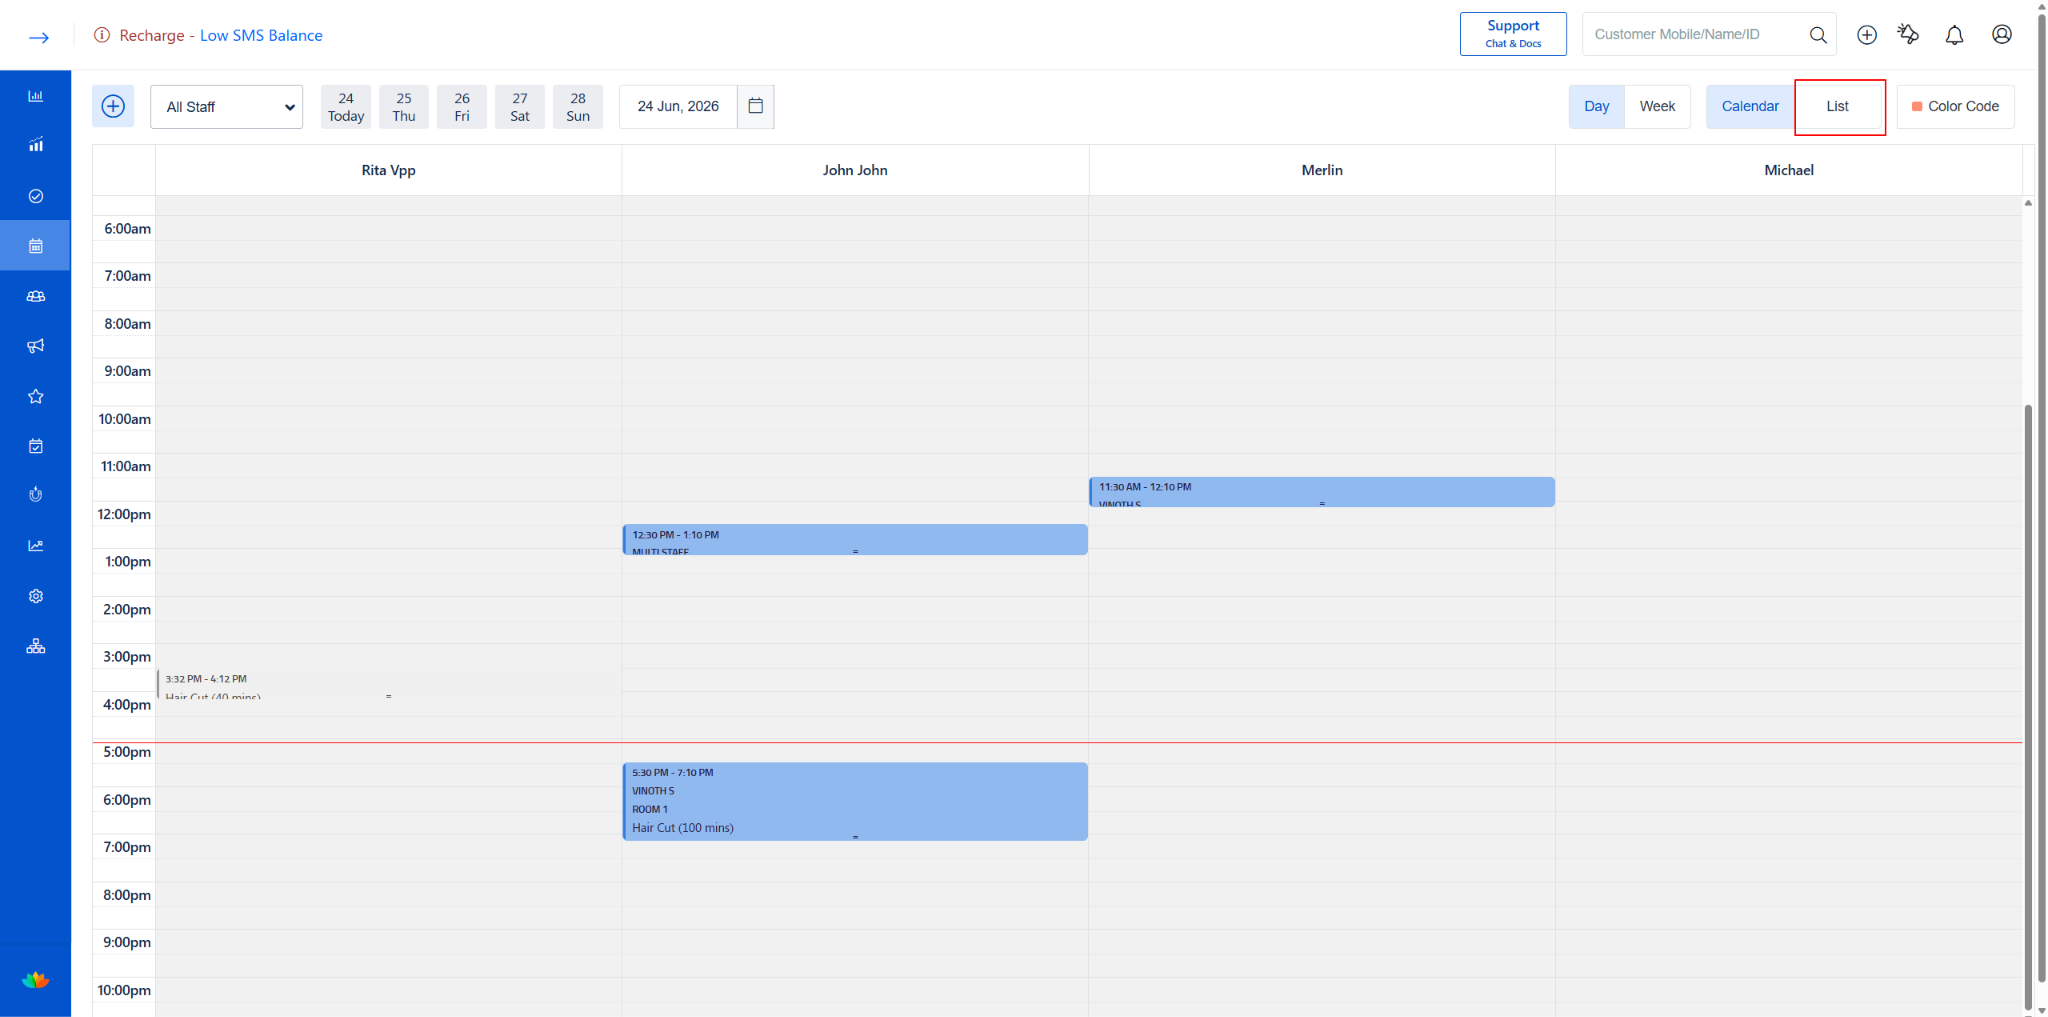
1. Go to Appointment from the left menu.
2. Click the “List” toggle in the top-right corner (next to Calendar).
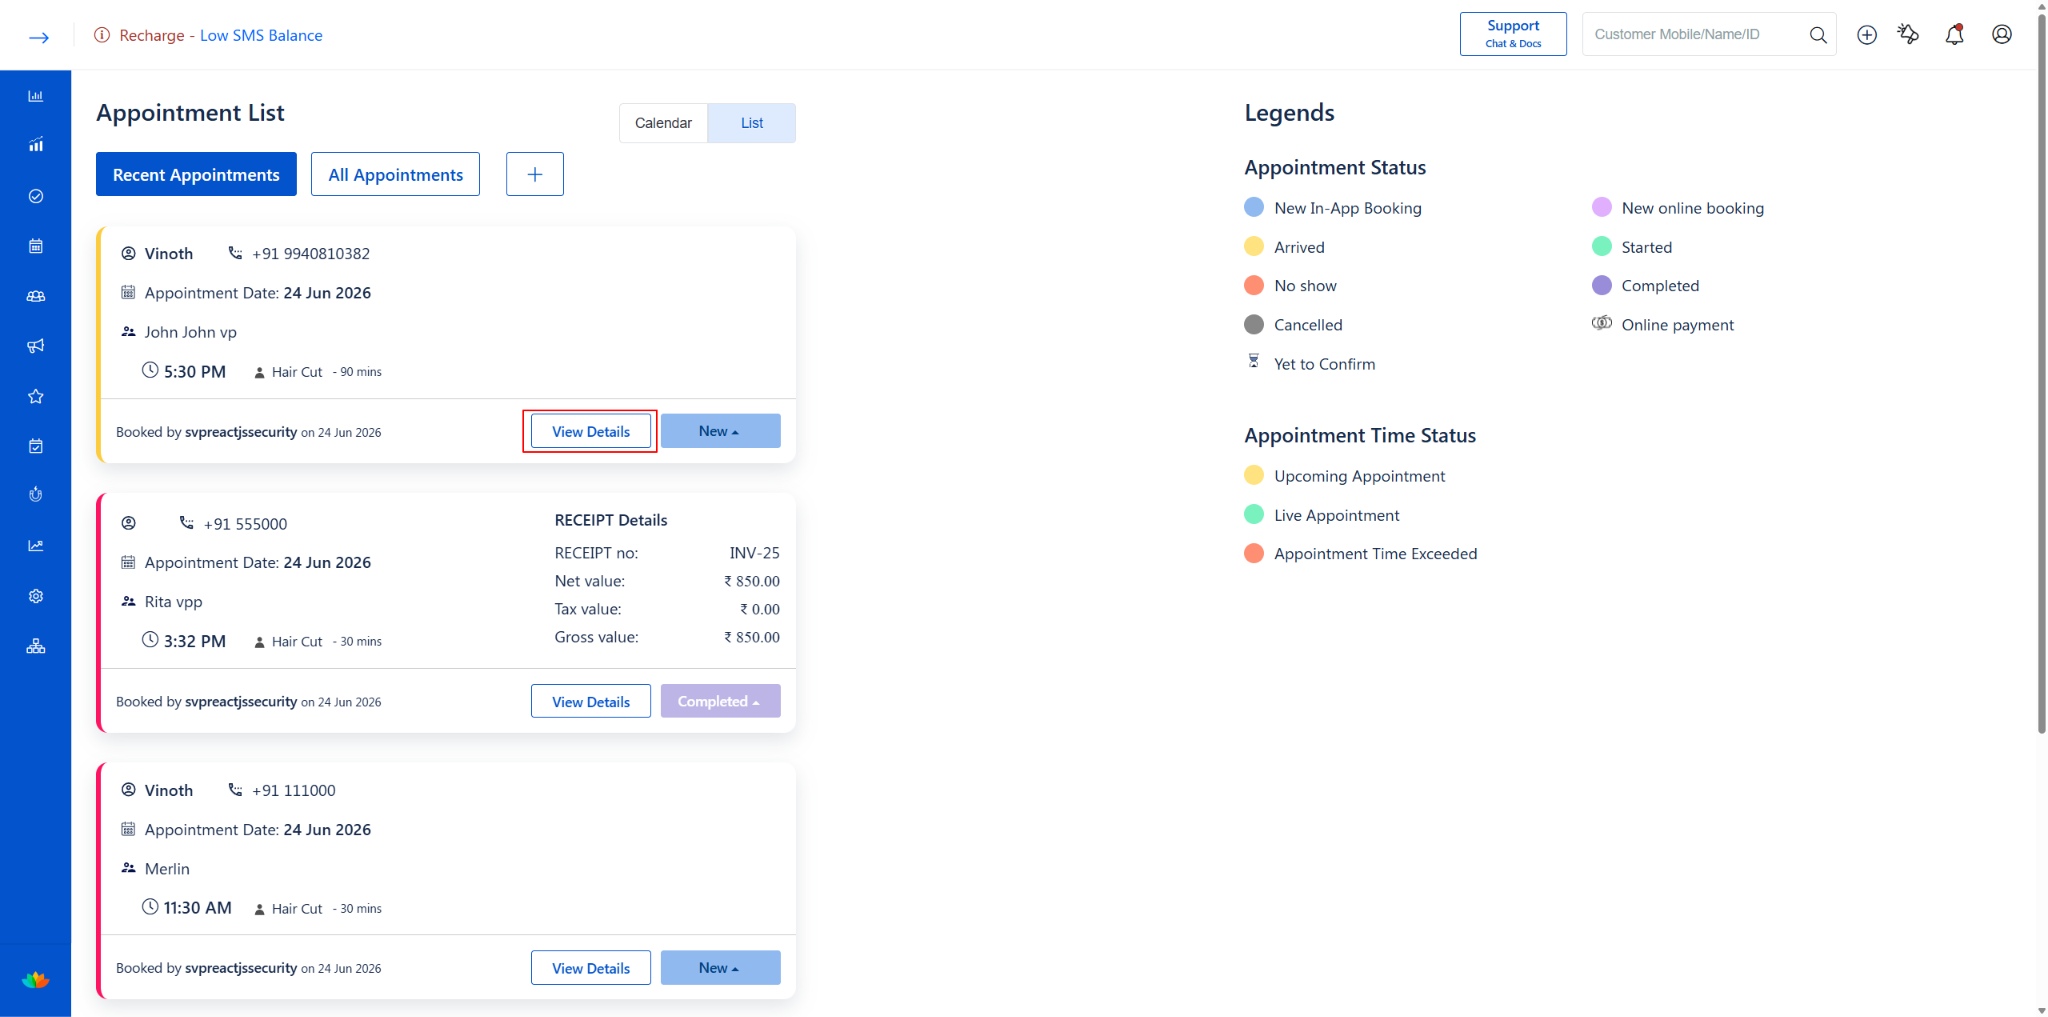
3. All appointments are displayed as individual cards.
Each appointment card shows: - Client Name and Mobile Number - Appointment Date - Staff Name assigned to the appointment - Time, Service Name, and Duration - Booked by — The user who created the booking and the date
At the bottom of each card, you’ll see two buttons: - “View Details” — Opens the appointment details popup - “New ▲” — Shows the current appointment status (with a dropdown to change it)
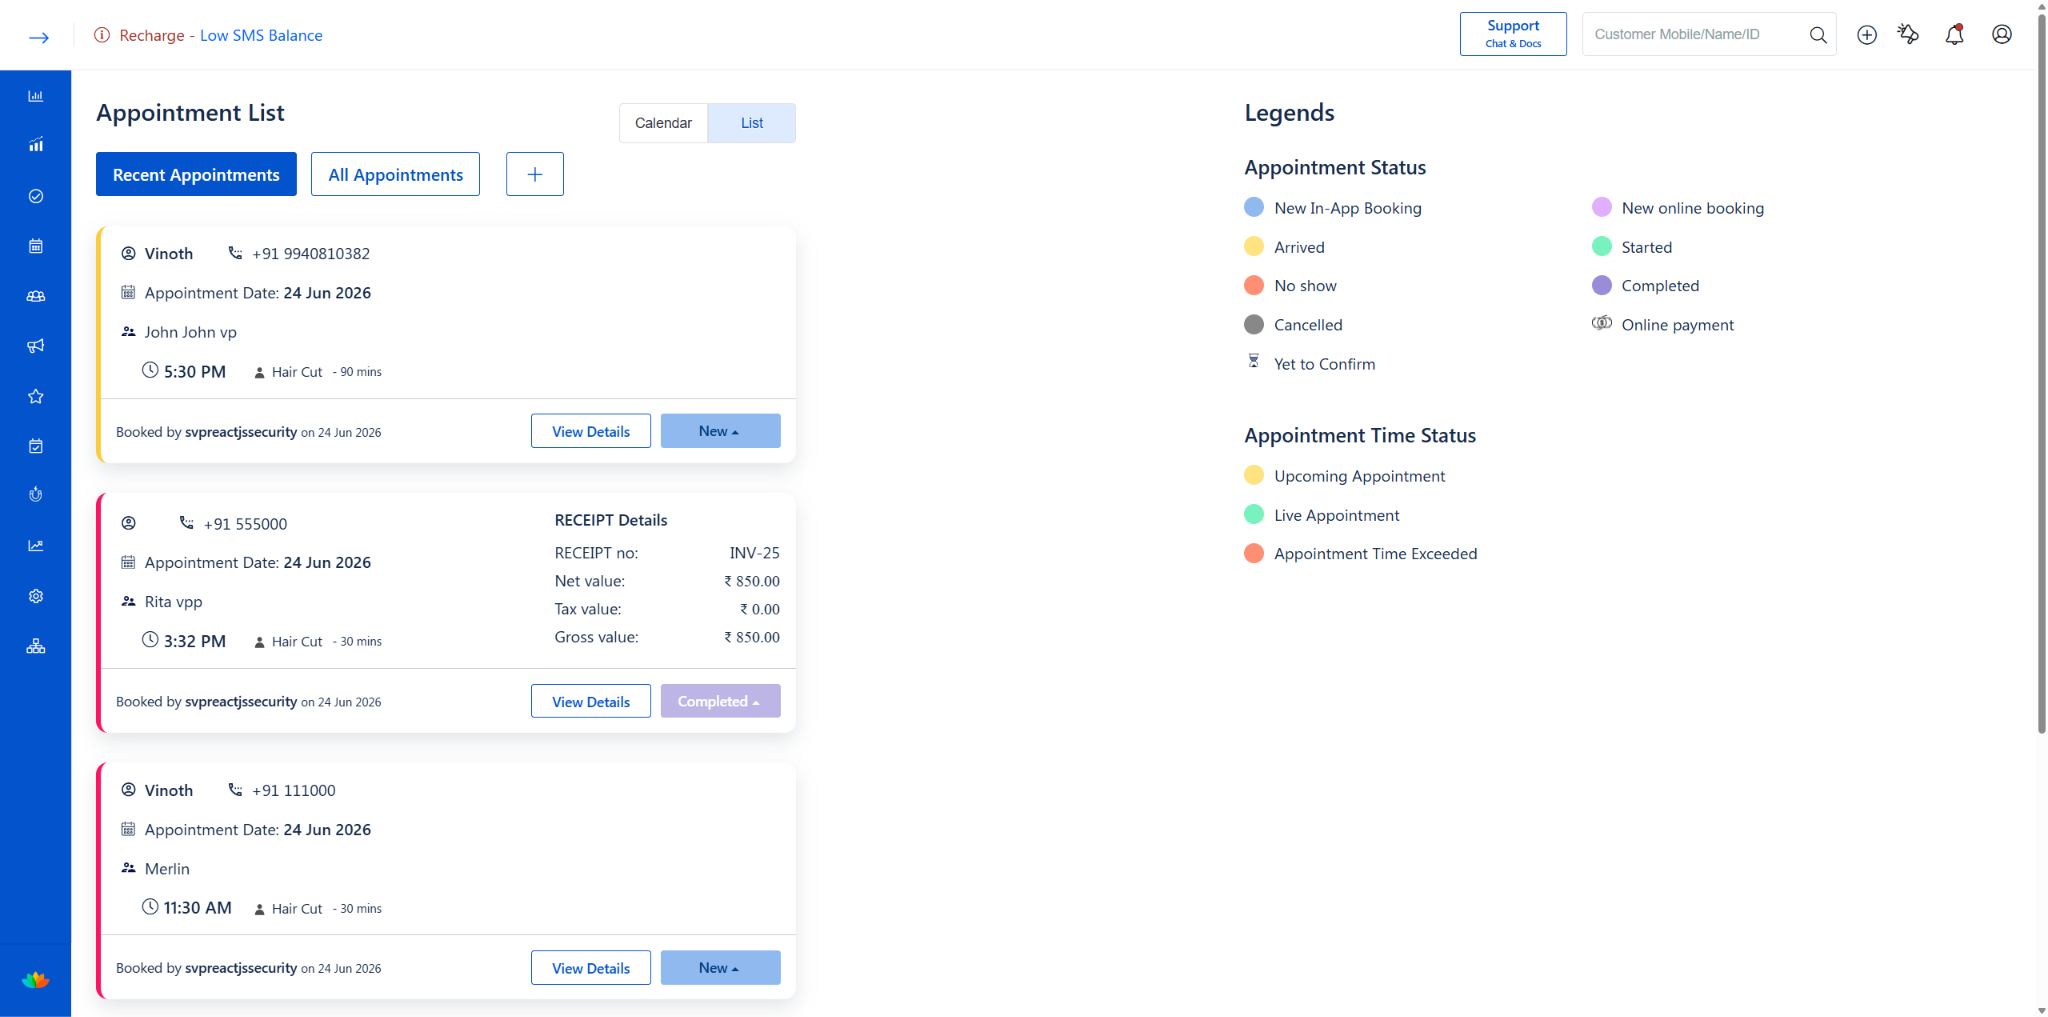
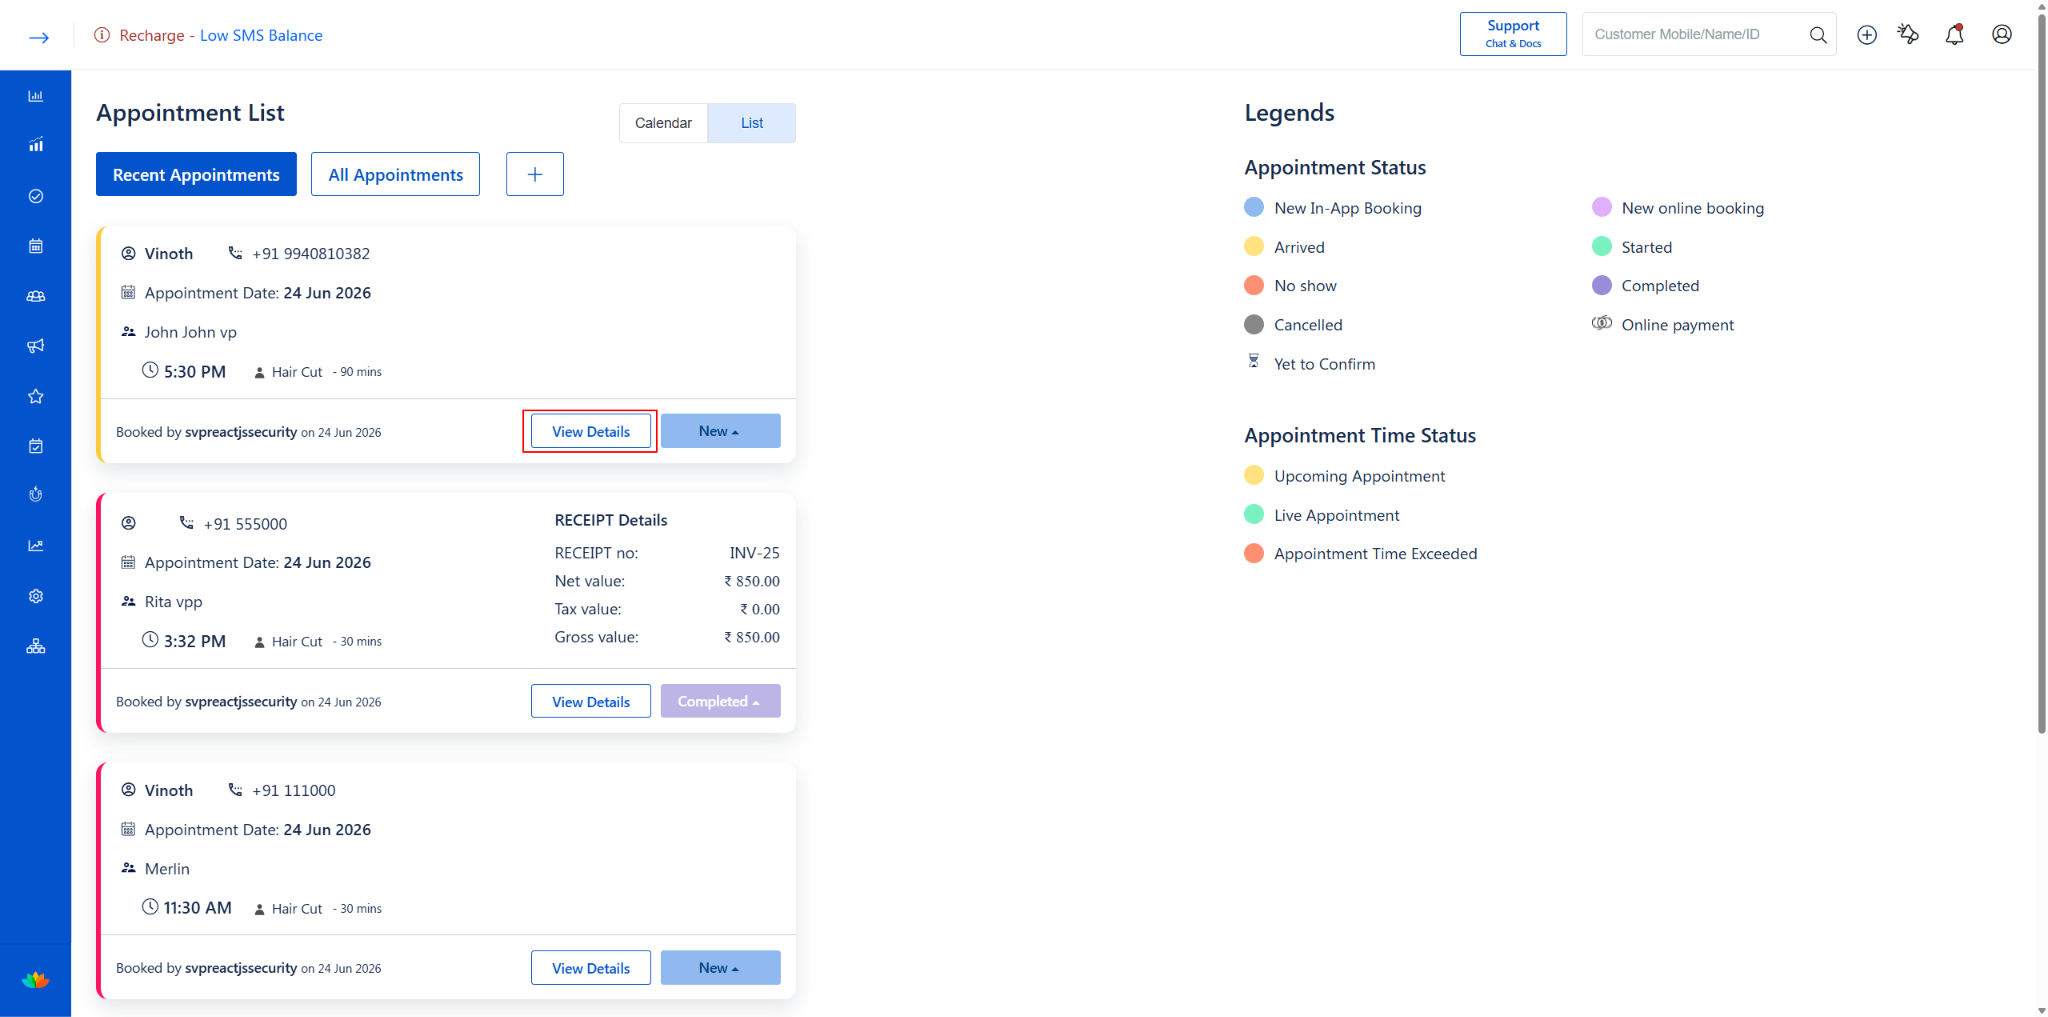
Appointment List card showing client details, service info, and View Details button
Click “View Details” to open the Appointment Details popup:
· At the bottom, you have three action buttons:
o Cancel Appointment (red) — Cancel this appointment
o Edit — Open the Edit Appointment screen
o Raise Sale — Raise a sale/bill for this appointment
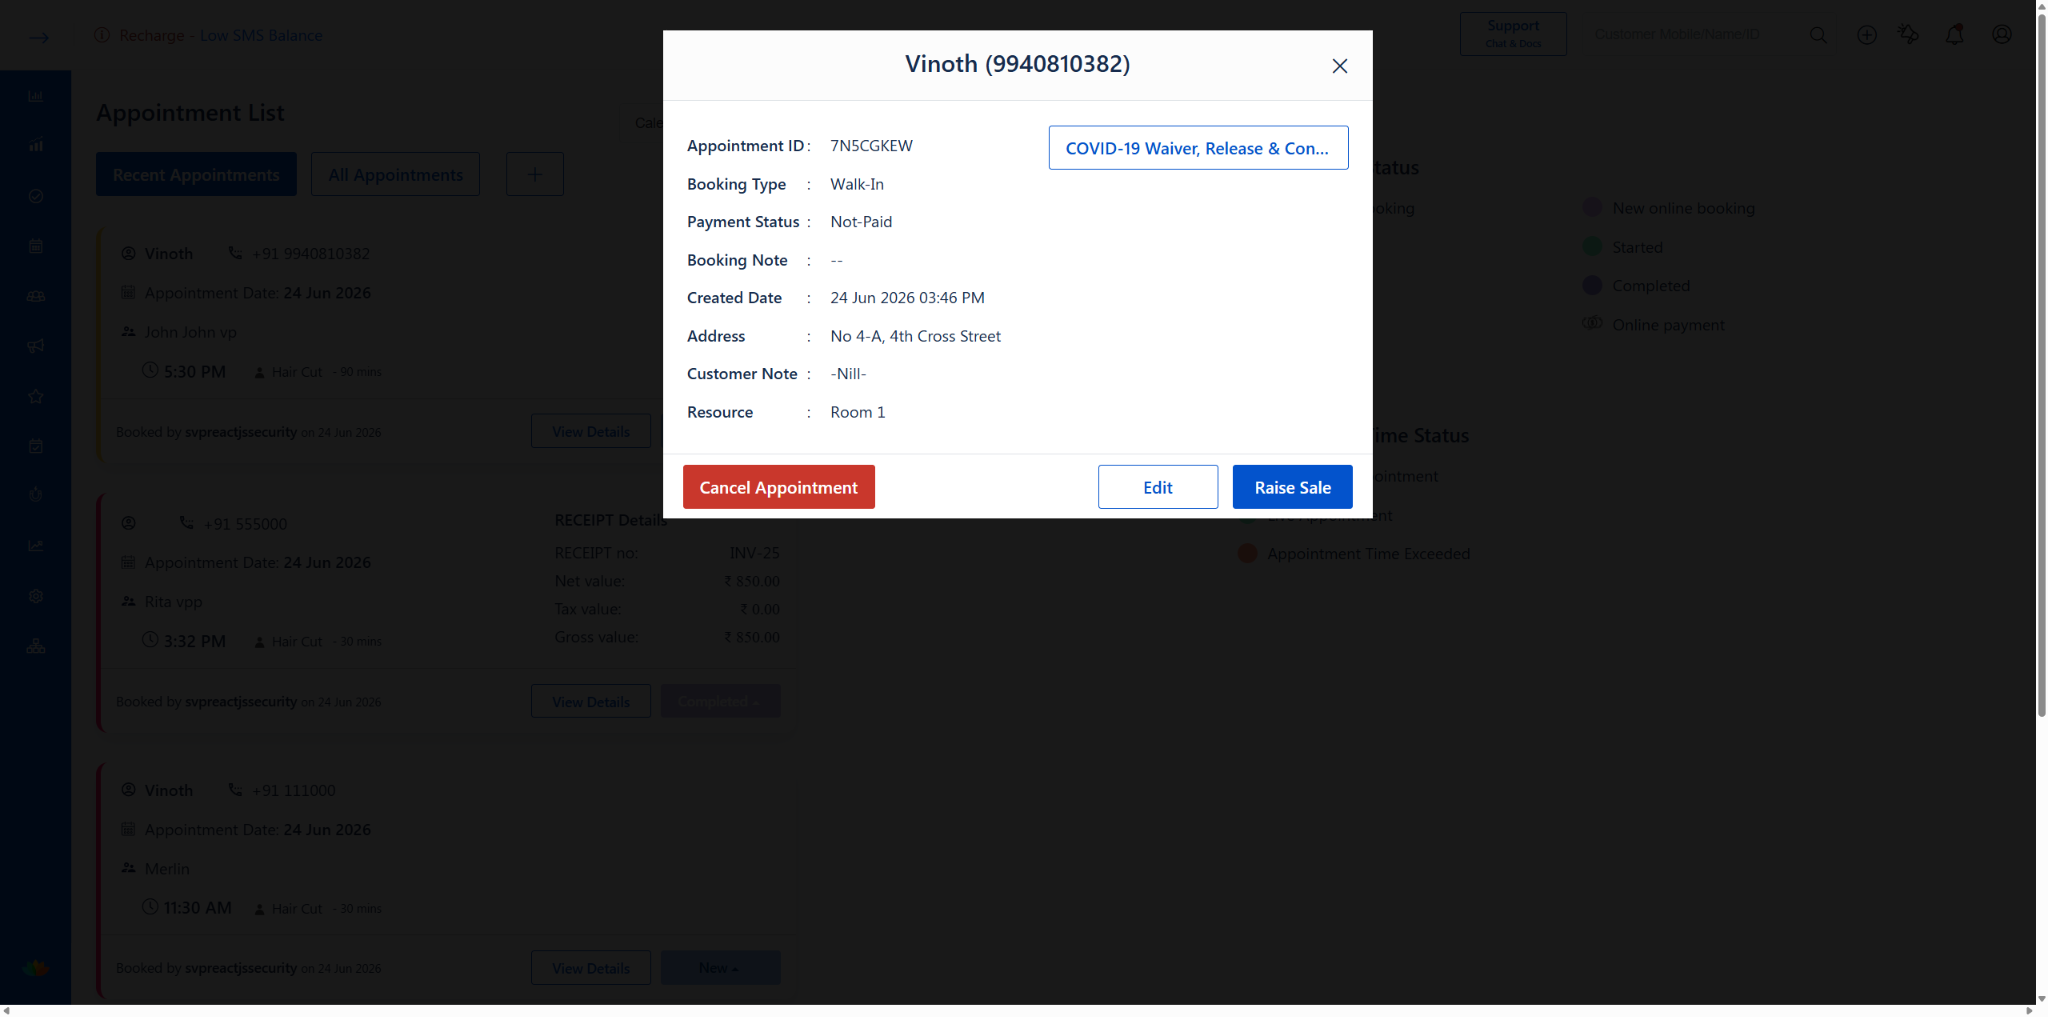
Appointment Details popup from List view with Cancel, Edit, and Raise Sale buttons
1. Cancel an Appointment
Overview
When a client cancels their visit — whether it’s due to a schedule conflict, personal emergency, or any other reason — you can cancel the appointment directly from MioSalon.
The system requires a reason for cancellation, which helps you identify patterns over time (e.g., frequent cancellations from specific clients or on certain days).
Tracking these reasons helps salon owners take steps to reduce no-shows and improve booking reliability.
Navigation Path
· Via Calendar: Appointment → Calendar → Click appointment block → Cancel Appointment
· Via List: Appointment → List → View Details → Cancel Appointment\
Step-by-Step Instructions
Step 1: Click “Cancel Appointment”
· On the Appointment Details popup, click the red “Cancel Appointment” button at the bottom-left.
· A Cancel Appointment popup will appear.
Step 2: Enter Cancellation Reason and Confirm
· The popup displays the appointment details: service name, client name, date, and time.
· Enter the Reason for Cancellation in the text box (e.g., “Personal Emergency”).
o The reason field has a character limit (max 82 characters).
· Click the red “Cancel Appointment” button to confirm the cancellation.
· Click ✕ (close icon) to go back without cancelling.
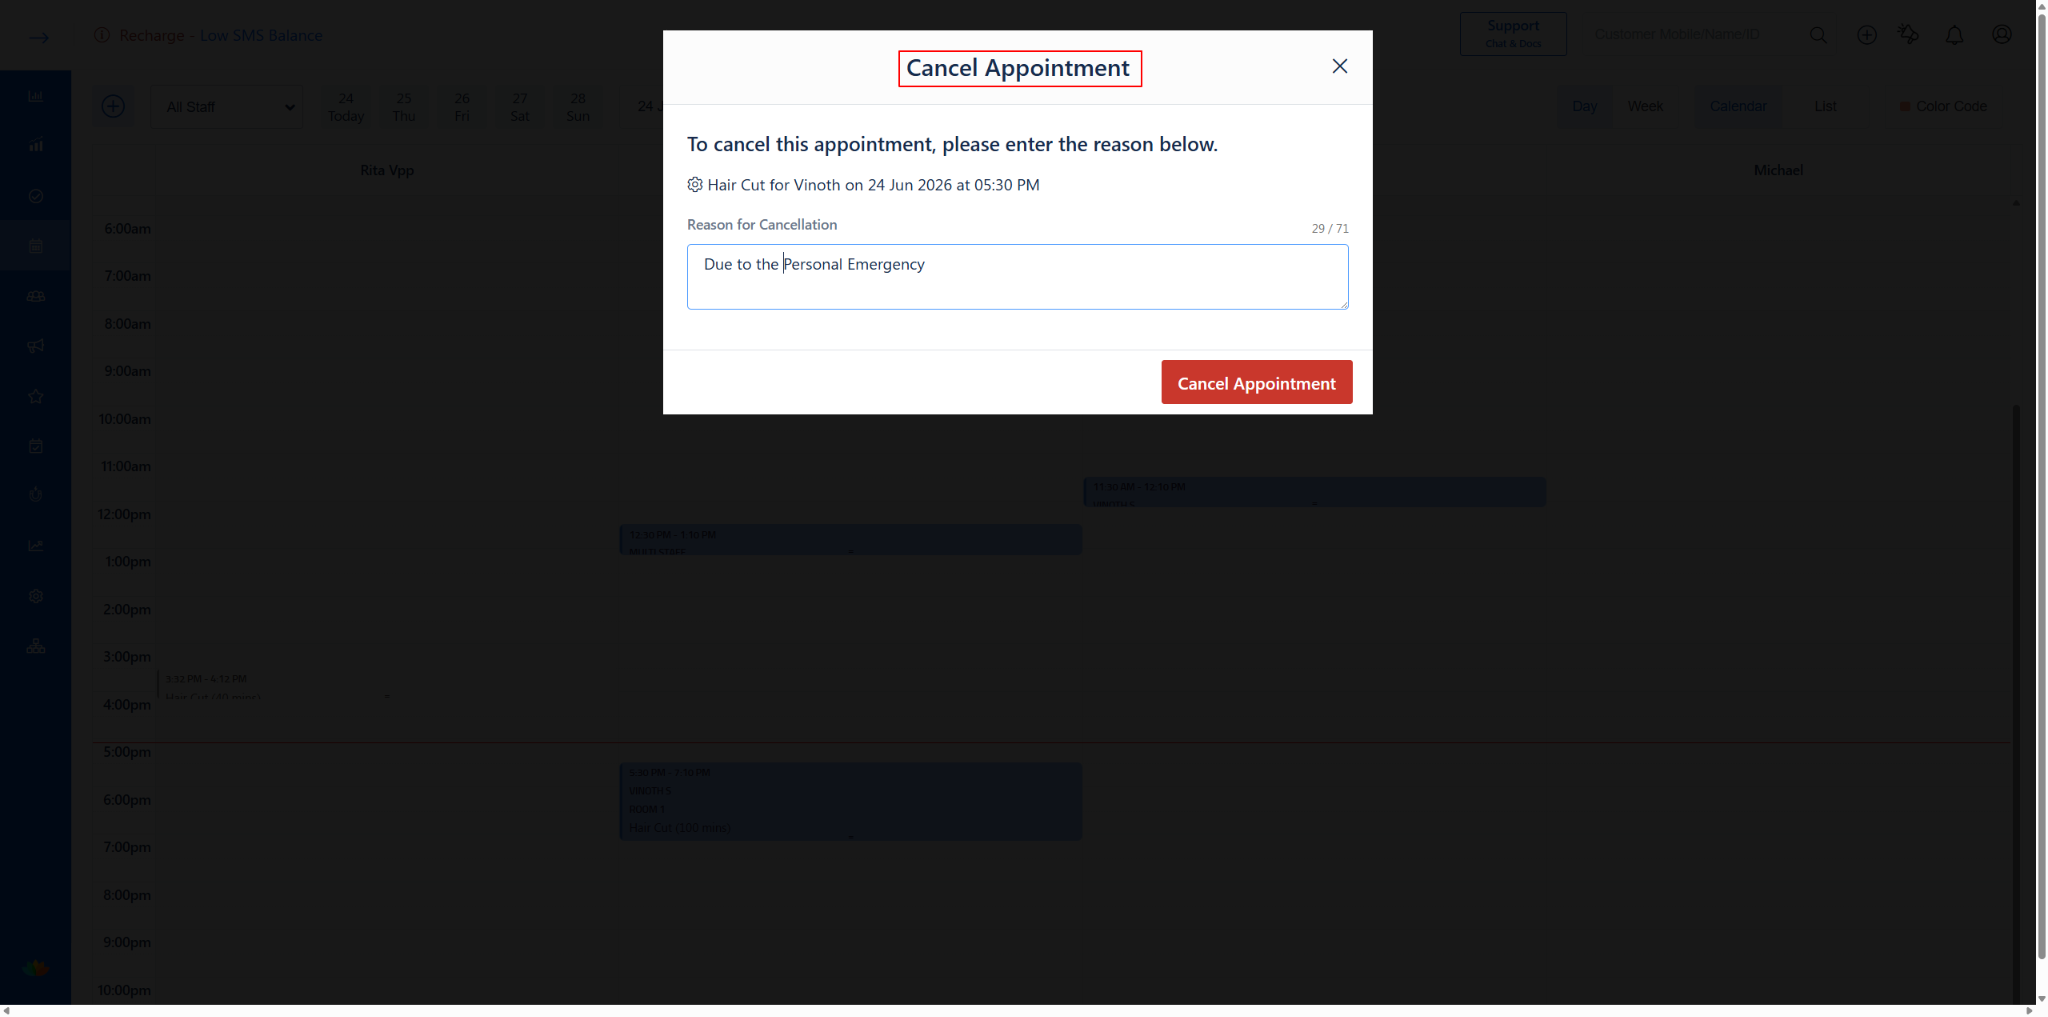
Cancel Appointment popup with reason field and Cancel Appointment button
Was this article helpful?
That’s Great!
Thank you for your feedback
Sorry! We couldn't be helpful
Thank you for your feedback
Feedback sent
We appreciate your effort and will try to fix the article